Create service-level objectives
- Latest Dynatrace
- How-to guide
- 4-min read
- Published Nov 05, 2024
With  Service-Level Objectives, you can configure new service-level objectives (SLO)s from templates provided by Dynatrace.
You can also define your SLOs based on a custom DQL query.
Steps
Create an SLO from template
To create a new SLO with a predefined template
-
In Dynatrace, search for
 Service-Level Objectives and open it.
 -
Select Service-level objective.
-
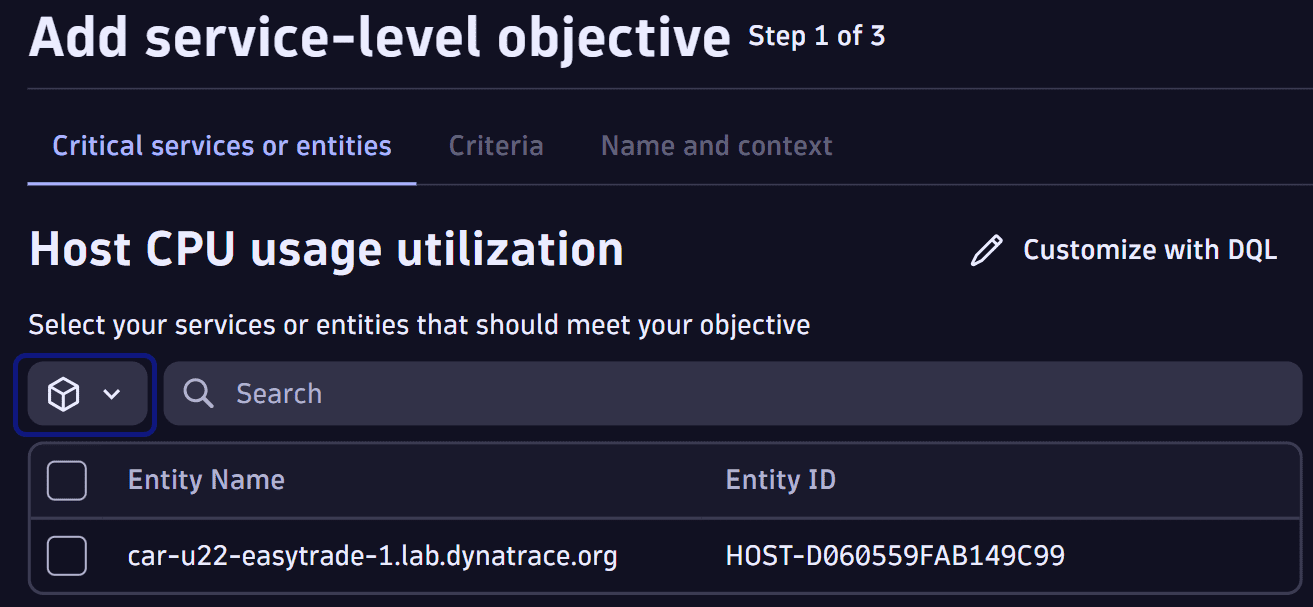
In the SLO wizard, choose one of the following:
- Host CPU usage utilization
- Service availability
- Service performance
- Kubernetes cluster CPU usage efficiency
- Kubernetes cluster memory usage efficiency
- Kubernetes namespace CPU usage efficiency
- Kubernetes namespace memory usage efficiency
-
Select Create for one of the above options.
-
Choose the entities that should meet your objective. If you're using the Service performance template, enter a value in milliseconds in Requests should be faster than.
-
Optional Select segments , choose the required segment(s), and select Apply. This reduces the number of filter results.

This is only an additional filter for the required entities. It does not apply to the SLO evaluation. To add the segment filter to the SLO evaluation, use step 5 in the Create a custom SLO section.
-
Select Next.
-
Define the criteria of your SLO. Fill in the Target field and select the timeframe for the evaluation period by using the dropdown in the Over the evaluation period field.
-
Optional Turn on Show warning and enter the numeric percent in Show warning at field.
-
Select Next.
-
Enter a name for your SLO in SLO Name.
-
Optional Provide a meaningful description of what your SLO is about in SLO description.
-
Optional Provide tags for your SLO in the Tags section by filling in the Key and Value fields. Select Add to save the tags. Tags can be used to provide additional metadata for your SLOs, such as a responsible ownership team or additional information about the underlying entities or criticality of your SLO.
-
Select Save.
Create a custom SLO
- In Dynatrace, search for
 Service-Level Objectives.
 - In the overview of Service-Level Objectives, select Service-level objective.
- Select Custom SLO.
- Provide your DQL query. Your query has to include an "sli" field like in the following example, to ensure consistent visualization, transformation, and aggregation across your SLOs. The "sli" field needs to return an array of
doubletype. The DQL query can be based on any data type in Grail, such as events or logs. Using the makeTimeseries provides the possibility to create an sli time series that can be used for calculating the SLO status.
timeseries { total=sum(dt.service.request.count) ,failures=sum(dt.service.request.failure_count) }, by: { dt.entity.service }, filter: { in (dt.entity.service, { services }) }| fieldsAdd sli=(((total[]-failures[])/total[])*(100))
-
Optional Select segments , choose the required segment(s), and select Apply. This is an additional filter to the query.
The selected segments are stored with the SLO definition. Those filters are effective with future segment modifications and new entity creations with the same DQL query.
-
Select Next.
-
Define the criteria of your SLO. Fill in the Target field and select the timeframe for the evaluation period by using the dropdown in the over the evaluation period field.
-
Optional Turn on Show warning and enter the percentage in Show warning at.
-
Select Next.
-
Provide the name for your SLO in the SLO Name field.
-
Optional Provide a meaningful description of what your SLO is about in the SLO description field.
-
Optional Provide tags for your SLO in the Tags section by filling in the Key and Value fields. Select the Add button to save the tags. Tags can be used to provide additional metadata to your SLOs, such as a responsible ownership team or additional information about the underlaying entities or criticality of your SLO.
-
Select the Save button to create your SLO.
Create and manage SLOs via API
You can create, edit, list, delete, and evaluate your SLOs via API.
- Go to Dynatrace.
- In the platform search, type
API. In the search results, see Support resources section and Dynatrace API below it. - Select Dynatrace API to access the Dynatrace API documentation. A new page opens with the Dynatrace API definitions.
- In the upper right corner, go to Select a definition.
- From the drop-down list, choose the endpoint.
- Authenticate with your API token. For more details, see Authentication.
 Service-Level Objectives