Sensitive Data Center
- Latest Dynatrace
- App
- 9-min read
Prerequisites
Permissions
The following table describes the required permissions.
Before you begin
Some one-time setup is necessary before using  Sensitive Data Center.
Create service user
 Sensitive Data Center uses a service user to continue processing scans and requests while you aren't using the app. See Create service users to learn how to create the service user. Follow the following instructions to set up the service user:
- Name the service user
sensitive-data-center. The name must match exactly. - Create a policy with the policy statement below, to grant the service user the required permissions.
- Create a group to assign the policy to (for example,
sensitive-data-center-service-users) and assign the service user to this group. For more details, see Create policies based on a service user. - This user must also be assigned to the
sensitive-data-center-usersgroup defined in the next section.
ALLOW app-engine:apps:run WHERE shared:app-id = 'dynatrace.sensitive.data.center';ALLOW state:app-states:read, state:app-states:write, state:app-states:delete WHERE shared:app-id = 'dynatrace.sensitive.data.center';ALLOW iam:users:read, iam:groups:read;ALLOW storage:records:delete, storage:logs:write, storage:events:write;ALLOW storage:fieldsets:read, storage:system:read, storage:logs:read, storage:events:read, storage:bizevents:read, storage:metrics:read, storage:spans:read, storage:buckets:read;ALLOW email:emails:send;ALLOW document:documents:read, document:documents:write, document:direct-shares:write, document:documents:delete, document:trash.documents:delete;ALLOW automation:workflows:read, automation:workflows:write;
If you previously used Privacy Rights, rename your privacy-rights service user to sensitive-data-center rather than creating a new service user. Note that the required permissions have changed and you must also update them. Renaming your service user allows  Sensitive Data Center to automatically clean up the workflow used by Privacy Rights. Alternatively, a Workflows administrator can delete it manually.
sensitive-data-center-users group
Assign users to this group when you want them to be able to create requests and scans. To view all matching data for requests and scans, these users need unrestricted access to data in Grail. For  Sensitive Data Center to function correctly, the group name must match exactly and a policy with the following permissions must be assigned to the group:
ALLOW app-engine:apps:run WHERE shared:app-id = 'dynatrace.sensitive.data.center';ALLOW app-engine:functions:run;ALLOW state:app-states:read, state:app-states:write, state:app-states:delete WHERE shared:app-id = 'dynatrace.sensitive.data.center';ALLOW state:user-app-states:read, state:user-app-states:write, state:user-app-states:delete WHERE shared:app-id = 'dynatrace.sensitive.data.center';ALLOW iam:service-users:use WHERE iam:service-user-email = "YOUR-SERVICE-USER-EMAIL-HERE";ALLOW iam:users:read, iam:groups:read;ALLOW storage:logs:write, storage:events:write;ALLOW storage:fieldsets:read, storage:logs:read, storage:bizevents:read, storage:buckets:read;ALLOW email:emails:send;ALLOW document:documents:read;ALLOW automation:workflows:read, automation:workflows:write;
Replace the placeholder value for iam:service-user-email with the email of your sensitive-data-center service user. To find the email of your service user:
- In Dynatrace, go to Account Management.
- Select Identity & access management > Service users. You will see an overview table with all of your service users.
- In the Actions column, select > Edit.
- The service user's email is displayed at the top.
If you previously used Privacy Rights, this group is equivalent to the Privacy Rights request assignees group. You can edit the group name and reuse the same group, but note that you need to add additional permissions to the policy. These permissions support the Sensitive Data Scanner functionality, which is currently available as a preview program in  Sensitive Data Center.
sensitive-data-center-admins group
Assign users to this group when you want them to be able to approve requests and delete data from Grail. All users assigned to this group must also be assigned to the sensitive-data-center-users group. For  Sensitive Data Center to function correctly, the group name must match exactly and a policy with this permission must be assigned to the group:
ALLOW storage:records:delete;
If you previously used Privacy Rights, this group is equivalent to the Privacy Rights request reviewers group. You can edit the group name and reuse the same group, but note that the policy has changed.
Configure audit logging
By default, audit logs go to the default_logs bucket. To change this, you can create a privacy_audit bucket to assign audit logs to. The name must match exactly. You can customize the retention period to suit your needs and restrict access to the bucket using IAM policies. You also need to configure bucket assignment so that logs matching log.source == "Sensitive Data Center" are assigned to the privacy_audit bucket.
Restrict access
As sensitive data is visible in  Sensitive Data Center, we recommend you restrict access for users who don't need to create or review requests and scans. To prevent users from accessing
  Sensitive Data Center, you can assign them to a group with the following policy:
DENY app-engine:apps:run WHERE shared:app-id = 'dynatrace.sensitive.data.center';DENY state:app-states:read, state:app-states:write, state:app-states:delete WHERE shared:app-id = 'dynatrace.sensitive.data.center';DENY state-management:app-states:delete WHERE shared:app-id = 'dynatrace.sensitive.data.center';DENY iam:service-users:use WHERE iam:service-user-email = "YOUR-SERVICE-USER-EMAIL-HERE";
They should also be denied read access to audit logs in the default_logs or privacy_audit buckets (depending on your chosen audit logging configuration).
Get started
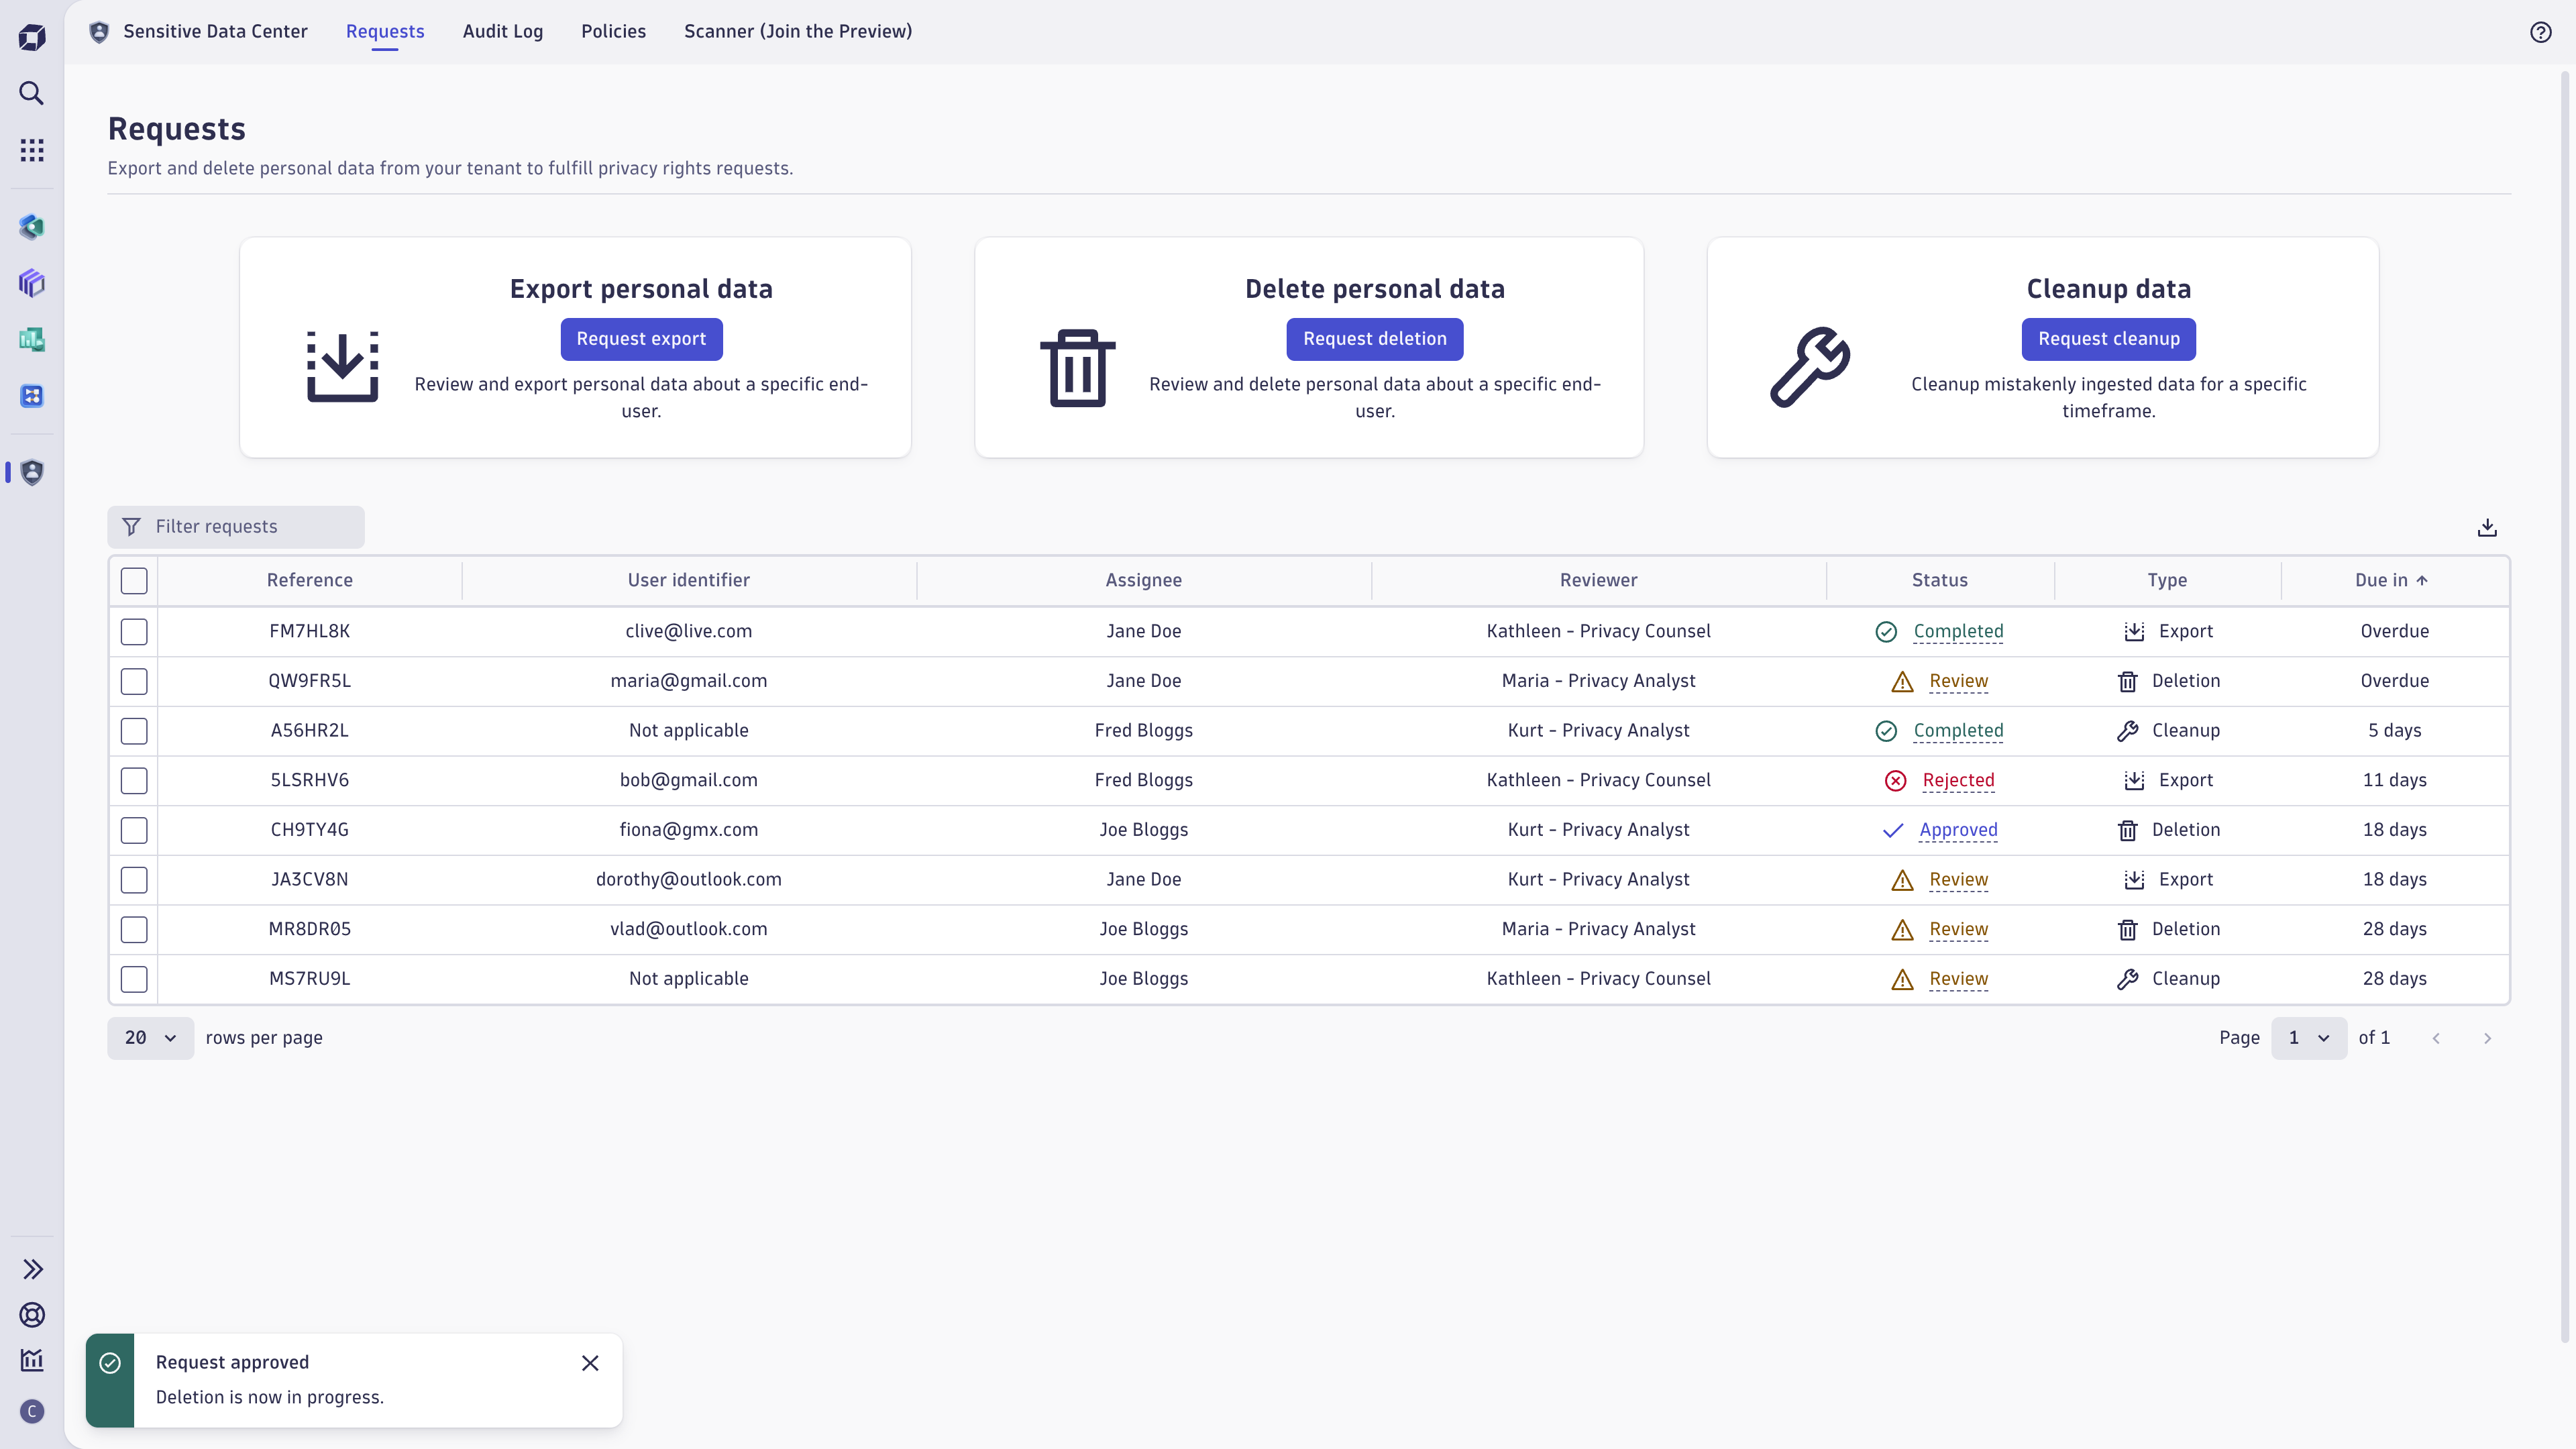
 Sensitive Data Center empowers you to address and manage customer requests related to data subject rights under applicable data protection laws (for example, GDPR and CCPA/CPRA).
 Sensitive Data Center helps you to:
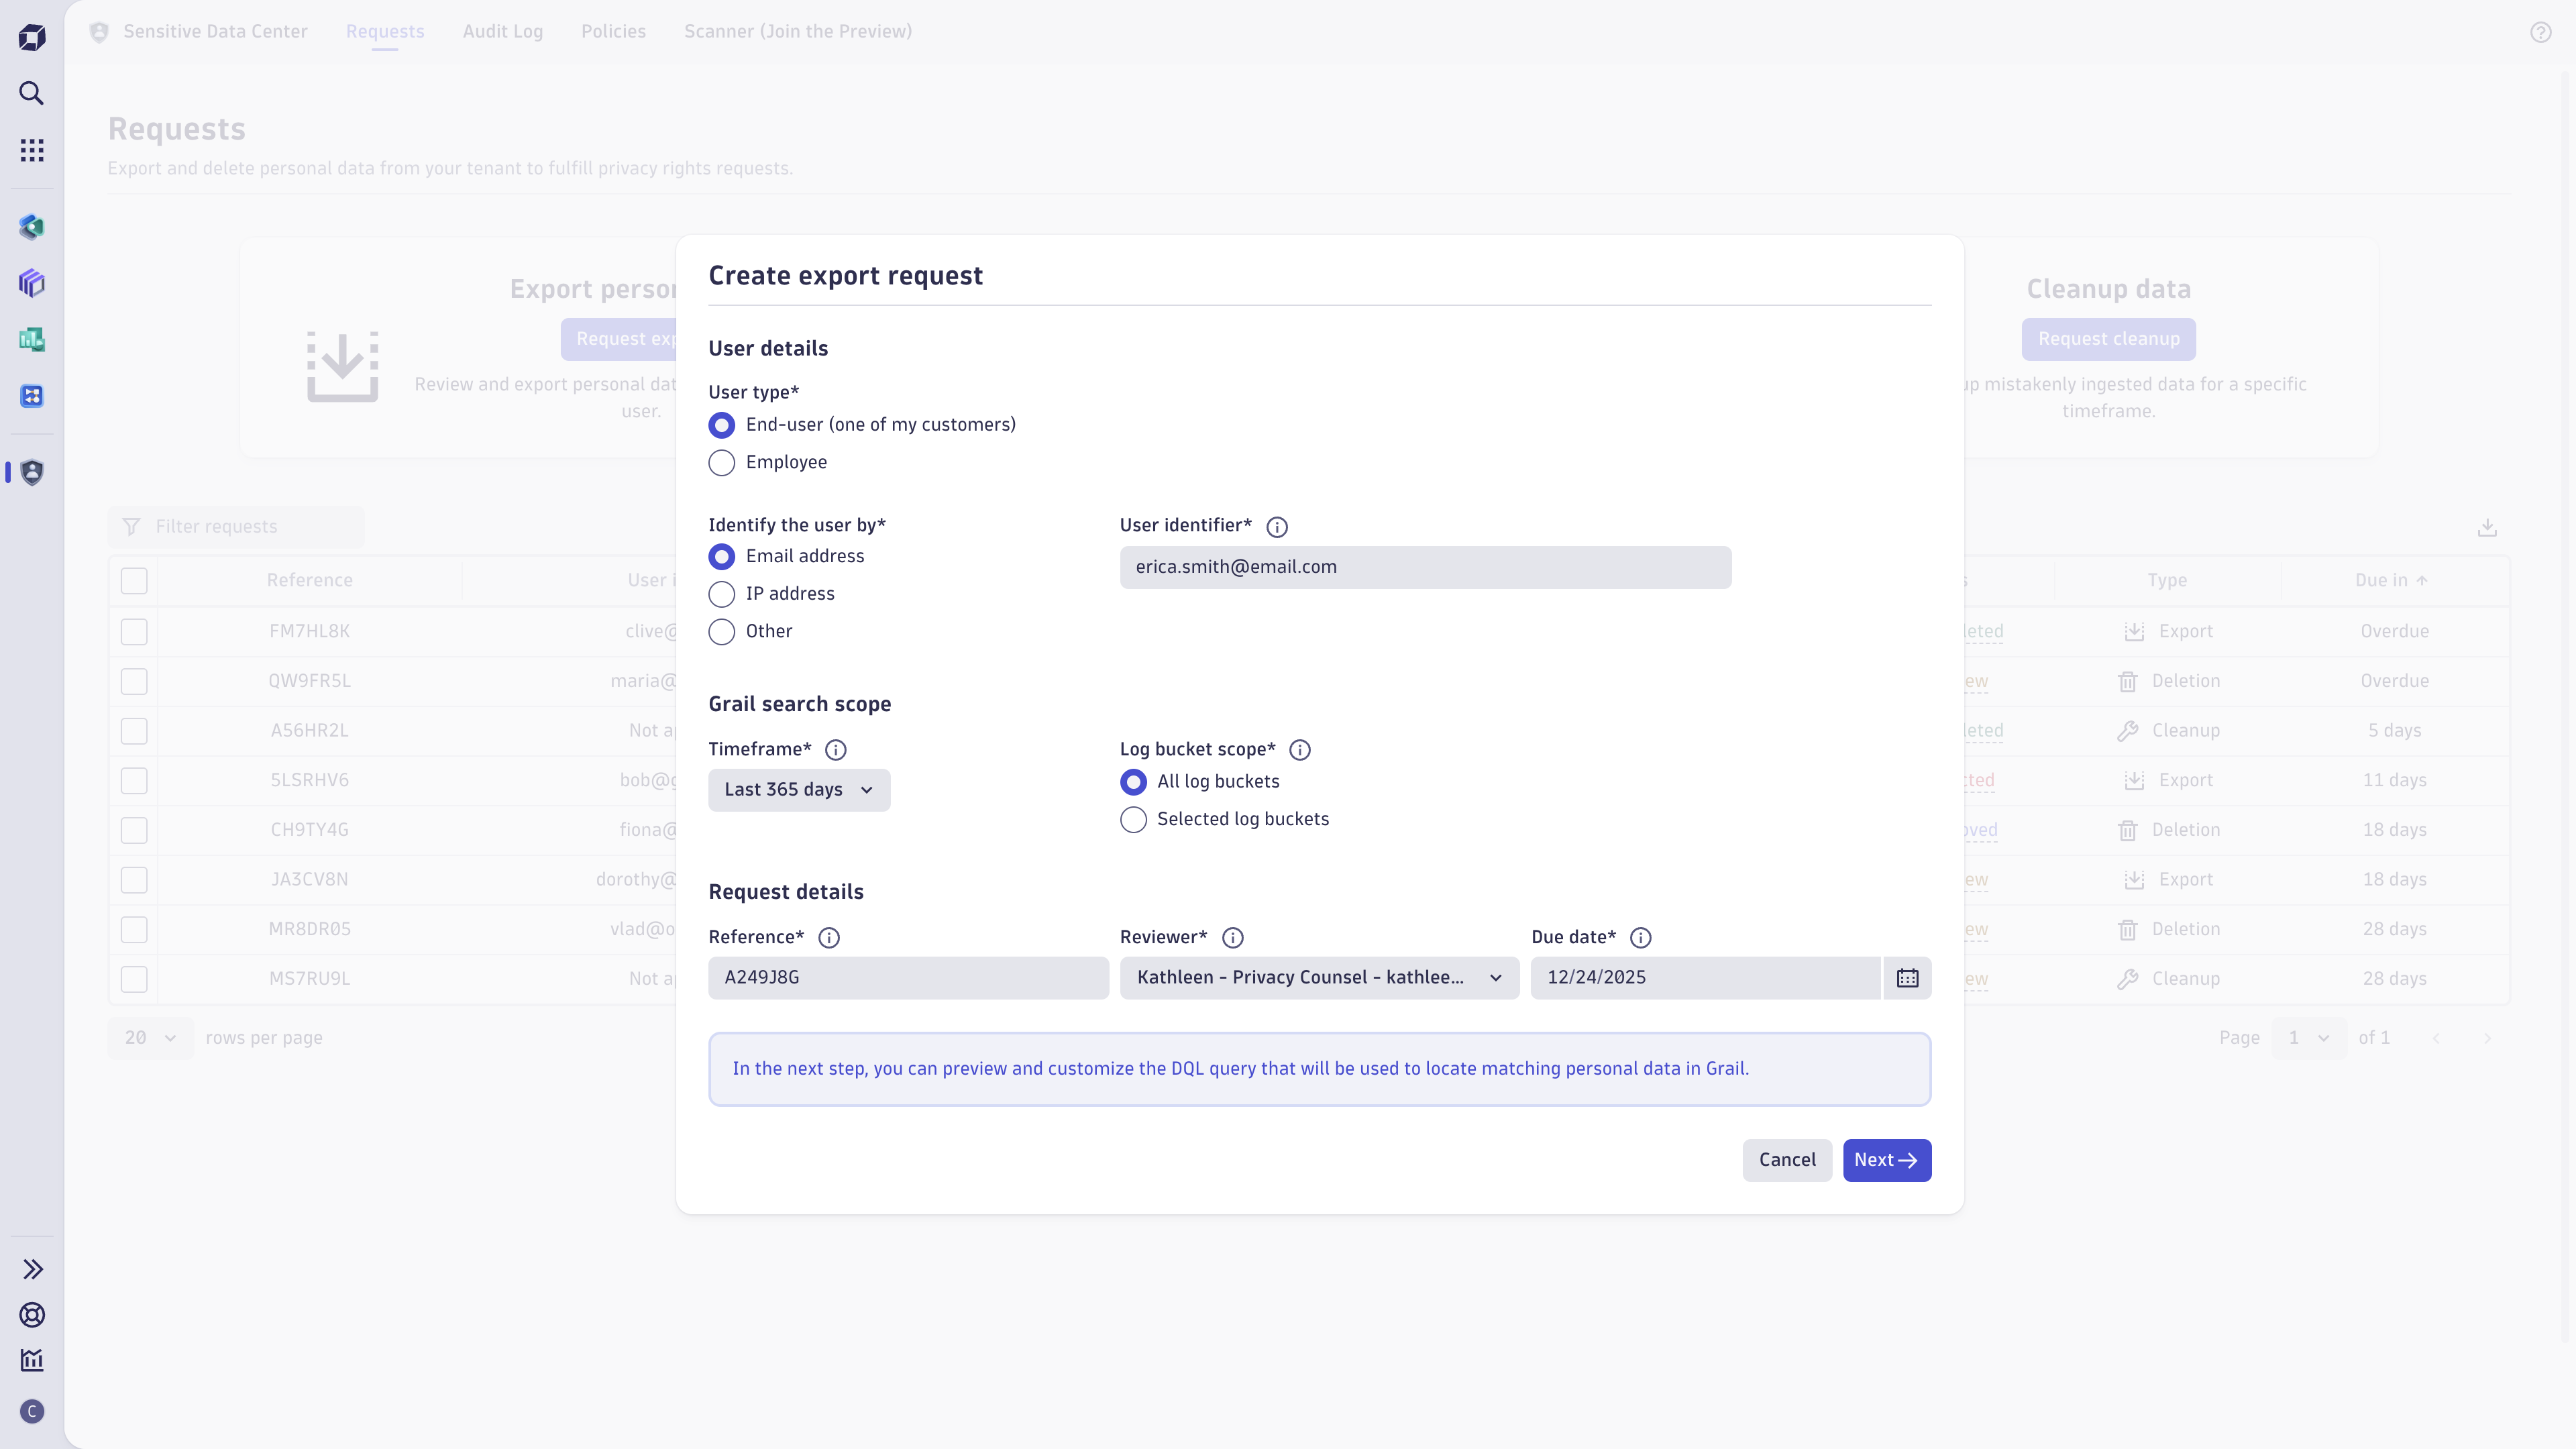
- Export personal data: Review and export personal data that relates to a specific end user.
- Delete personal data: Review and delete personal data that relates to a specific end user.
- Clean up data: Delete mistakenly ingested data for a specific timeframe.
- Schedule scans: Create scans for mistakenly ingested sensitive data, such as credit card numbers and IBANs, using the Sensitive Data Scanner. This functionality is only available as a preview.
 Sensitive Data Center currently supports export, deletion, and cleanup of Grail logs. Other data types are not supported.
 Sensitive Data Center uses a multi-party access control model to protect your data. This requires setup of policies, groups, and a service user before first use of the app. See Prerequisites to learn more.
We recommend that you restrict access to the app, app state, service user, and audit logs to a small group of trusted users. The service user has extensive permissions and could be mistakenly or deliberately abused, for example, to delete a large volume of data. Users with access to the app state may be able to modify requests even if they don't have access to the app UI. To learn how to restrict access, see Prerequisites.


Use cases
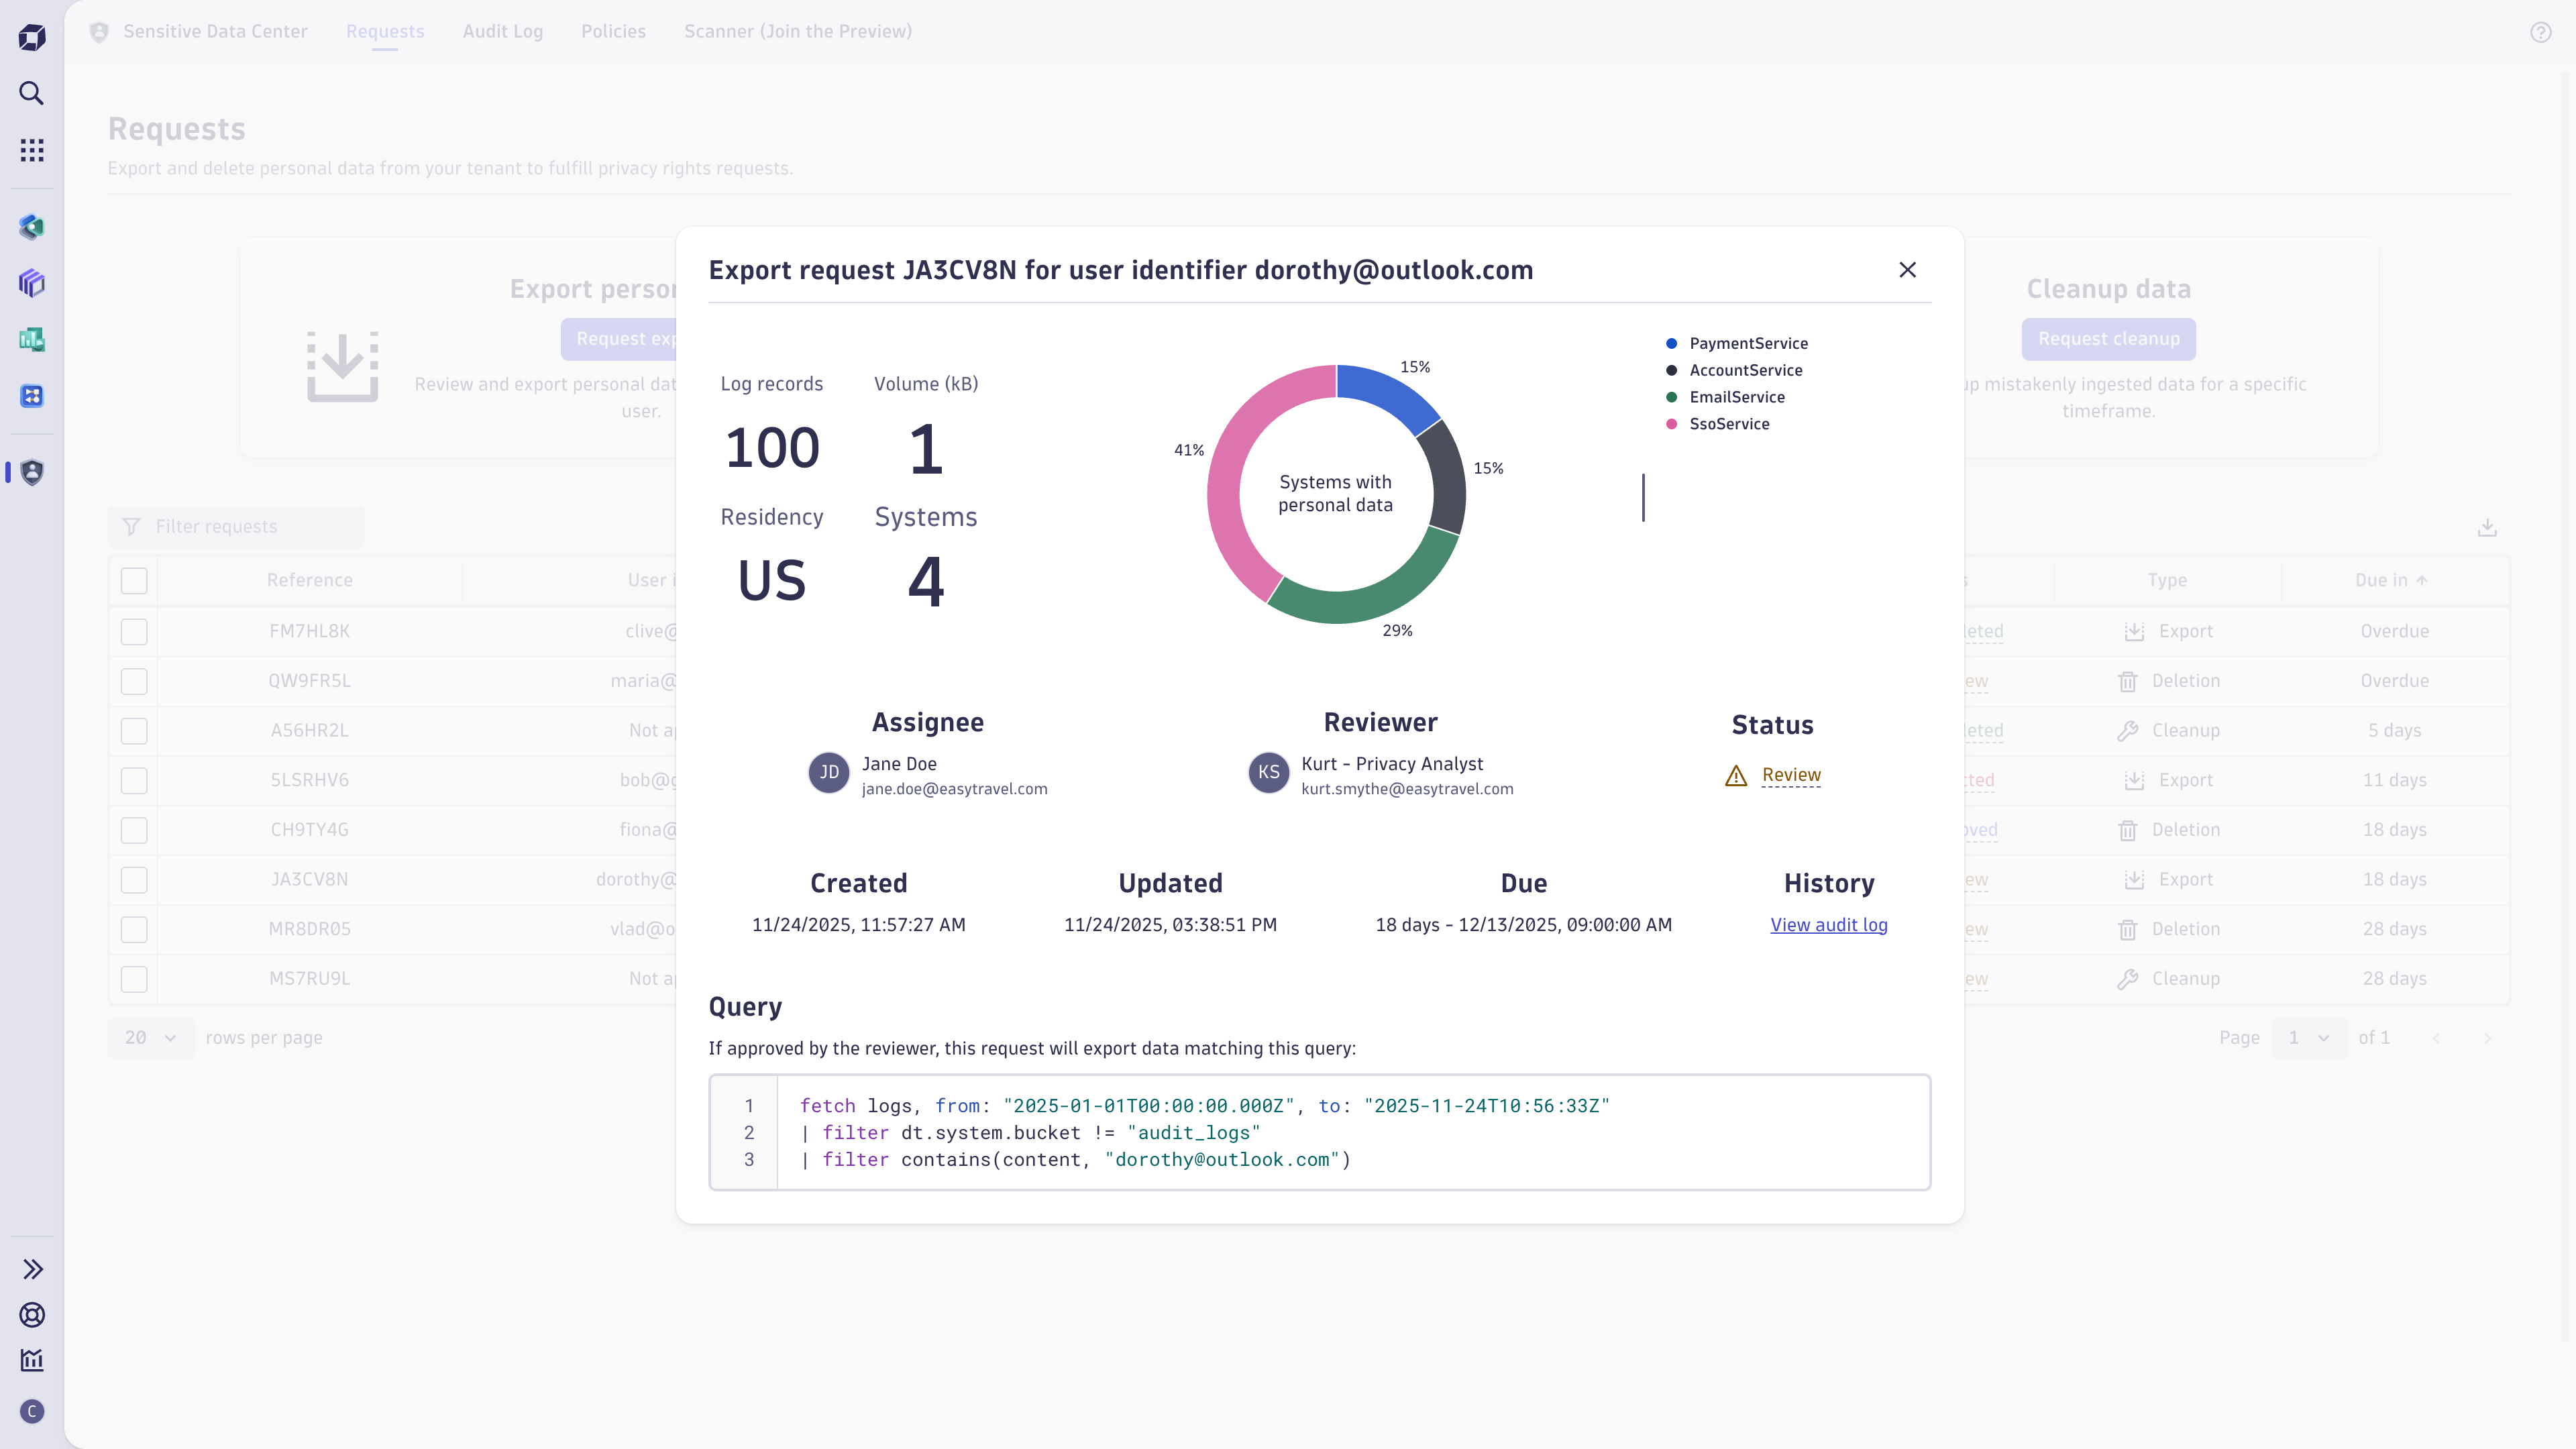
- Easily filter, query, and review data processed about a specific end-user in Grail.
- Export personal data relating to a specific end-user to respond to an access request (for example, right of access in the GDPR).
- Delete personal data relating to a specific end-user to comply with a deletion request (for example, right of erasure in the GDPR).
- Cleanup any mistakenly ingested data for a specific timeframe.
Best practices
To limit the scope of requests:
-
Use the shortest possible timeframe and select relevant buckets only.
-
Make sure you aren't exporting personal data of other individuals or confidential data.
-
Use policies to help ensure that your organization’s policies regarding sensitive data are followed.
-
Minimize the number of logs you export/delete so it is easier to review the data.
FAQ
If you see a banner informing you that permissions are misconfigured, confirm that:
- Permissions are configured correctly for the service user, to learn more see Prerequisites.
- The simple workflow used by the app has not been mistakenly deleted or switched off. Users with the
automation:workflows:adminpermission can view and edit the workflow in Workflows after enabling admin mode. The workflow should be enabled on a schedule and include the app’s Process deletion requests workflow action.
I noticed that deletion and cleanup requests in the "Approved" state don't transition into the "Processing" state, what should I do?
If you notice that deletion and cleanup requests in the Approved state don't transition into the Processing state, confirm that:
- Permissions are configured correctly for the service user, to learn more see Prerequisites.
- The simple workflow used by the app has not been mistakenly deleted or switched off. Users with the
automation:workflows:adminpermission can view and edit the workflow in Workflows after enabling admin mode. The workflow should be enabled on a schedule and include the app’s Process deletion requests workflow action.
My request is in "Failed" state, what should I do?
If any deletion error occurs, then your request transitions into the Failed state. In the request details, further information will be provided for each failed task. Deletion and cleanup requests are processed in one or more tasks that cover specific timeframes. You can assume that deletion has succeeded for any timeframe not listed in the failed tasks. There are four reasons why a deletion task may fail:
-
Invalid request: the request was not accepted because either it uses DQL that is unsupported for deletion or it matches too many records. No data has been deleted. You can resolve this by creating a new request with a modified query and attempting deletion again for the failed timeframe(s).
-
Trigger timeout: due to a temporary outage, it was not possible to start deletion and the task timed out. No data has been deleted. We recommend you wait 12 hours or longer, then create a new request for the failed timeframe(s) to attempt deletion again.
-
Processing timeout: due to a temporary outage during deletion, the task has timed out. Data may have been partially deleted. We recommend you wait 12 hours or longer, then create a new request for the failed timeframe(s) to attempt deletion again.
-
Internal error: an internal error occurred during deletion. In this unlikely case, data may have been partially deleted for the timeframe. Please contact Support so we can assist you in resolving the issue.
Why do I get an error when I approve a request?
If you see an error, either you are missing permissions or the app is not yet fully set up. To approve a request, you must be a member of the sensitive-data-center-admins group. Confirm that you are in this group, the sensitive-data-center service user exists, and both the group and service user are configured as described in Prerequisites. The names must match exactly.
Why can't I see my audit logs in the Audit Log tab?
If no audit logs are visible in  Sensitive Data Center, check if bucket assignment is misconfigured.
If the privacy_audit bucket exists, bucket assignment must be configured to route  Sensitive Data Center audit logs to it, as
  Sensitive Data Center only queries this bucket.
If the privacy_audit bucket does not exist, check if any other assignment rules are mistakenly assigning  Sensitive Data Center audit logs to a different bucket than
 default_logs. If this is not the case, then your volume of log ingest is too high to use default_logs and you must configure the privacy_audit custom bucket (see Prerequisites).
I previously used Privacy Rights. What happened to it?
Privacy Rights has been replaced by  Sensitive Data Center, which offers the same privacy rights request functionality combined with additional features for sensitive data management. To support these features, new IAM groups and policies are required, so additional one-time setup is necessary. For customers who previously used Privacy Rights, request data is retained in Privacy Rights, but requests and policies can no longer be created.
Why do I see failed scans?
The most likely cause of failed scans is misconfigured permissions for the service user. Check that the service user's name, two assigned groups, and the policies assigned to those groups exactly match the description in Prerequisites.
Learning modules
- How-to guide
- Create a policy to enrich or filter request results with Sensitive Data Center.
- How-to guide
- Export personal data with Sensitive Data Center export requests.
- How-to guide
- Review Sensitive Data Center audit logs.
- How-to guide
- Delete personal data with Sensitive Data Center deletion requests.
- How-to guide
- Clean up data with Sensitive Data Center cleanup requests.
- How-to guide
- Create a scheduled scan to maintain personal data with Sensitive Data Center.
 Sensitive Data Center