Dynatrace Hub
- Latest Dynatrace
- App
- 7-min read
Unlock the full potential of Dynatrace by finding, activating, and running apps and extensions that address your specific observability needs.
Dynatrace Hub  is the central place to explore and activate all capabilities of Dynatrace. You can find solutions to monitor your environment, analyze your observability data to get insights and automate problem resolution based on your insights. You stay up to date with recent additions to the Dynatrace Platform. You can easily install applications and extensions with one click via Dynatrace Hub and benefit from continuous updates. You can manage your apps to stay in control.
- Browse all the capabilities of the Dynatrace Platform
- Keep up to date with the recent additions to the Dynatrace Platform
- Find the solution to your monitoring problem
- Easy one-click installation of apps and extensions
- Get continuous updates to receive the latest features
- Manage your apps
Where to find Dynatrace Hub
You can access Dynatrace Hub via search in the Launcher.
Search for “Hub” and open Dynatrace Hub.
Alternatively, you can select Dynatrace Hub in the Manage section on the Launcher.
What's listed in Dynatrace Hub
Generally, Dynatrace Hub lists any technology that Dynatrace officially supports, such as:
- OneAgent out-of-the-box supported technologies.
- Supported Open Observability Frameworks.
- Dynatrace built extensions.
- Dynatrace built apps based on the AppEngine.
Apps vs. Extensions
Apps
Compared to other Dynatrace platform functionality, Dynatrace Apps are smaller, self-contained, and focused on specific use cases. But a Dynatrace App is not an isolated application: the Dynatrace platform implements an intent concept that allows interoperability between Dynatrace Apps.
For more information, see AppEngine.
Extensions
With Extensions 2.0 you can declaratively bring metrics into Dynatrace that feed platform analytics and monitoring capabilities. Dynatrace links your data in a meaningful way so you can explore it, build instrumentation, and set up alerting.
You can manage your extensions with the Extensions app.
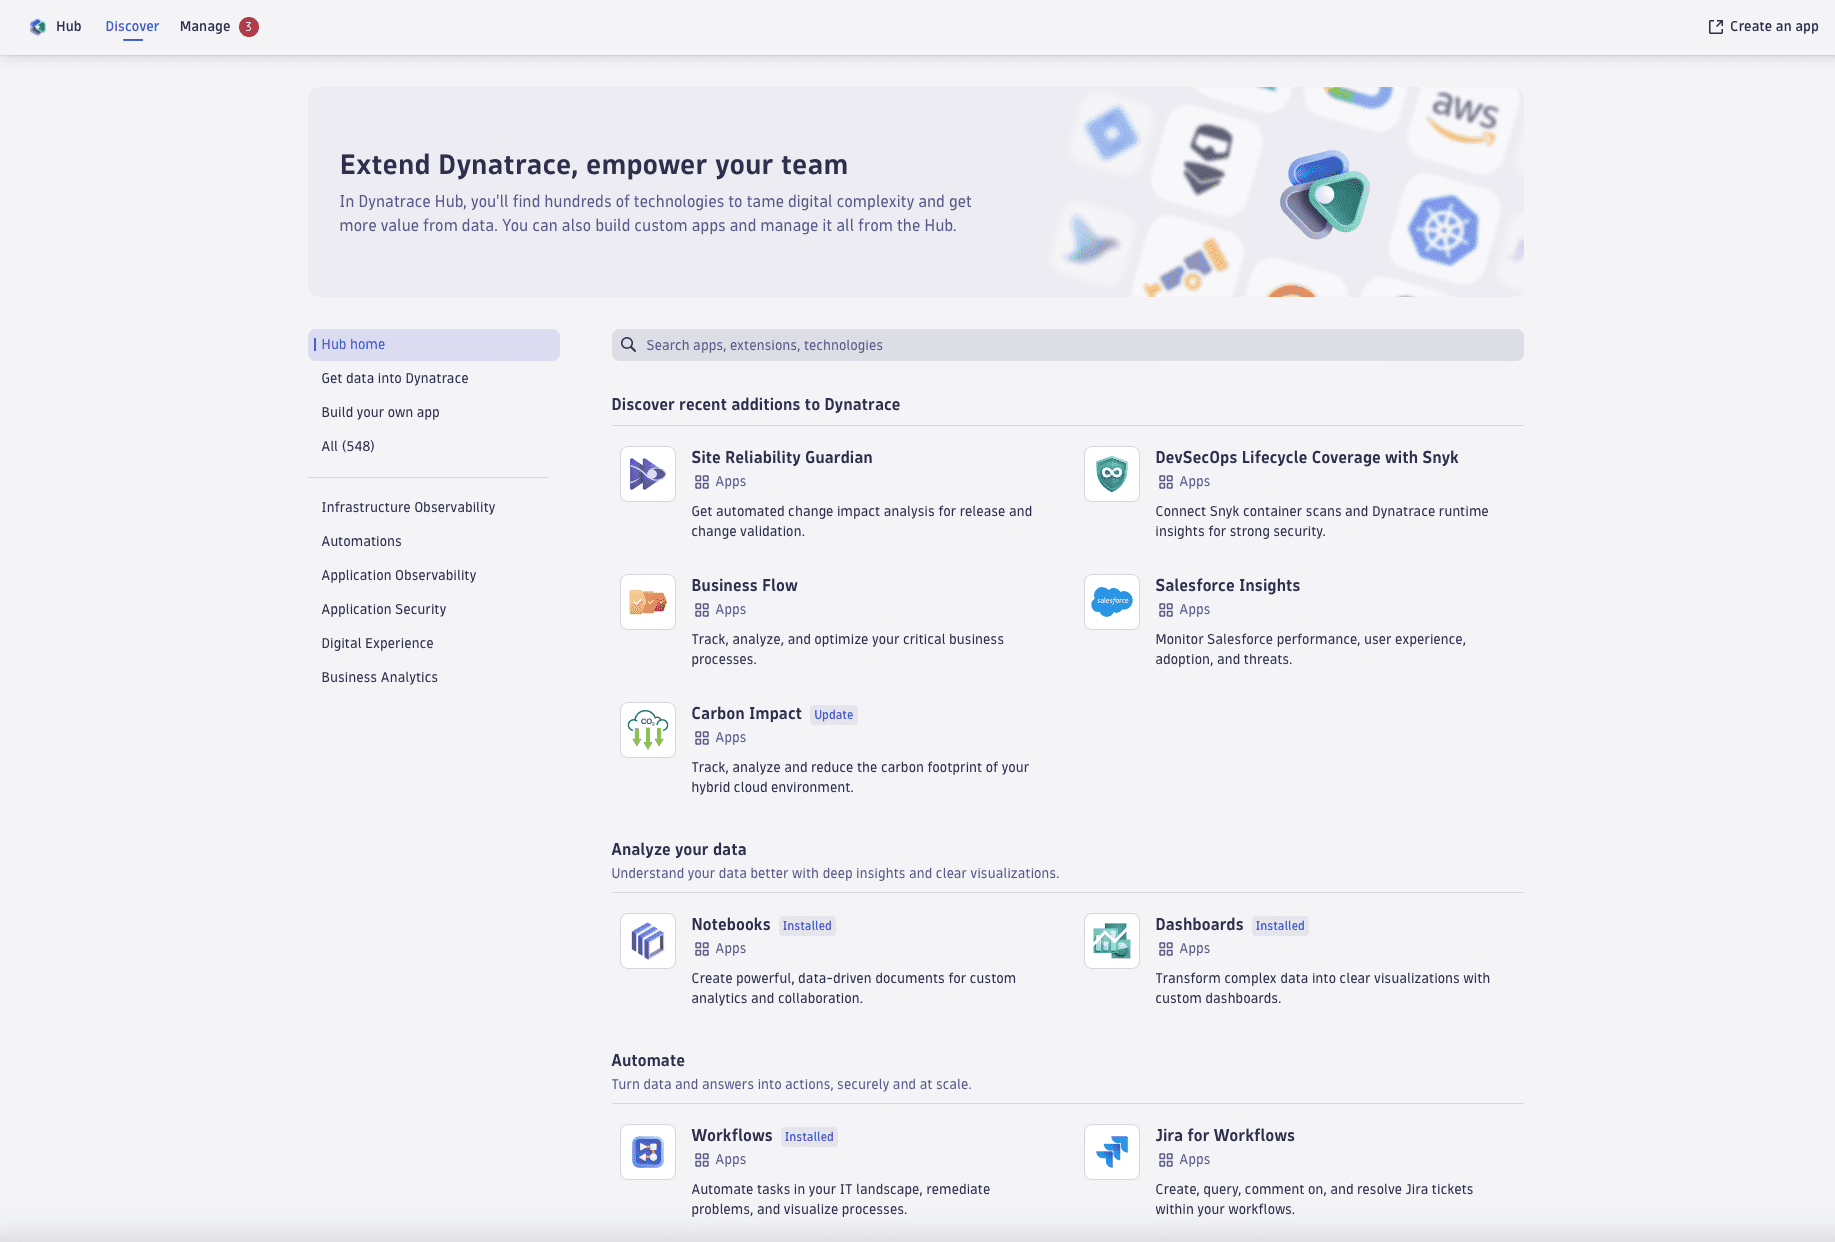
Discover
You can browse through all the Hub listings using the provided categories.

If you have a specific problem in mind, you can search the Hub listings and filter your results.
Get information
Once you find an interesting listing, select the app icon to open the app overview page with the following information:
- Product information:
App overview, getting started, use cases, and links to related resources. - Technical information:
All that you need to get your users started with the app, including required permissions and supported intents. - Contents:
All ready-made dashboards, notebooks, and workflow actions that are included with this app. You can start using them as soon as the app is installed. - Release notes
Manage
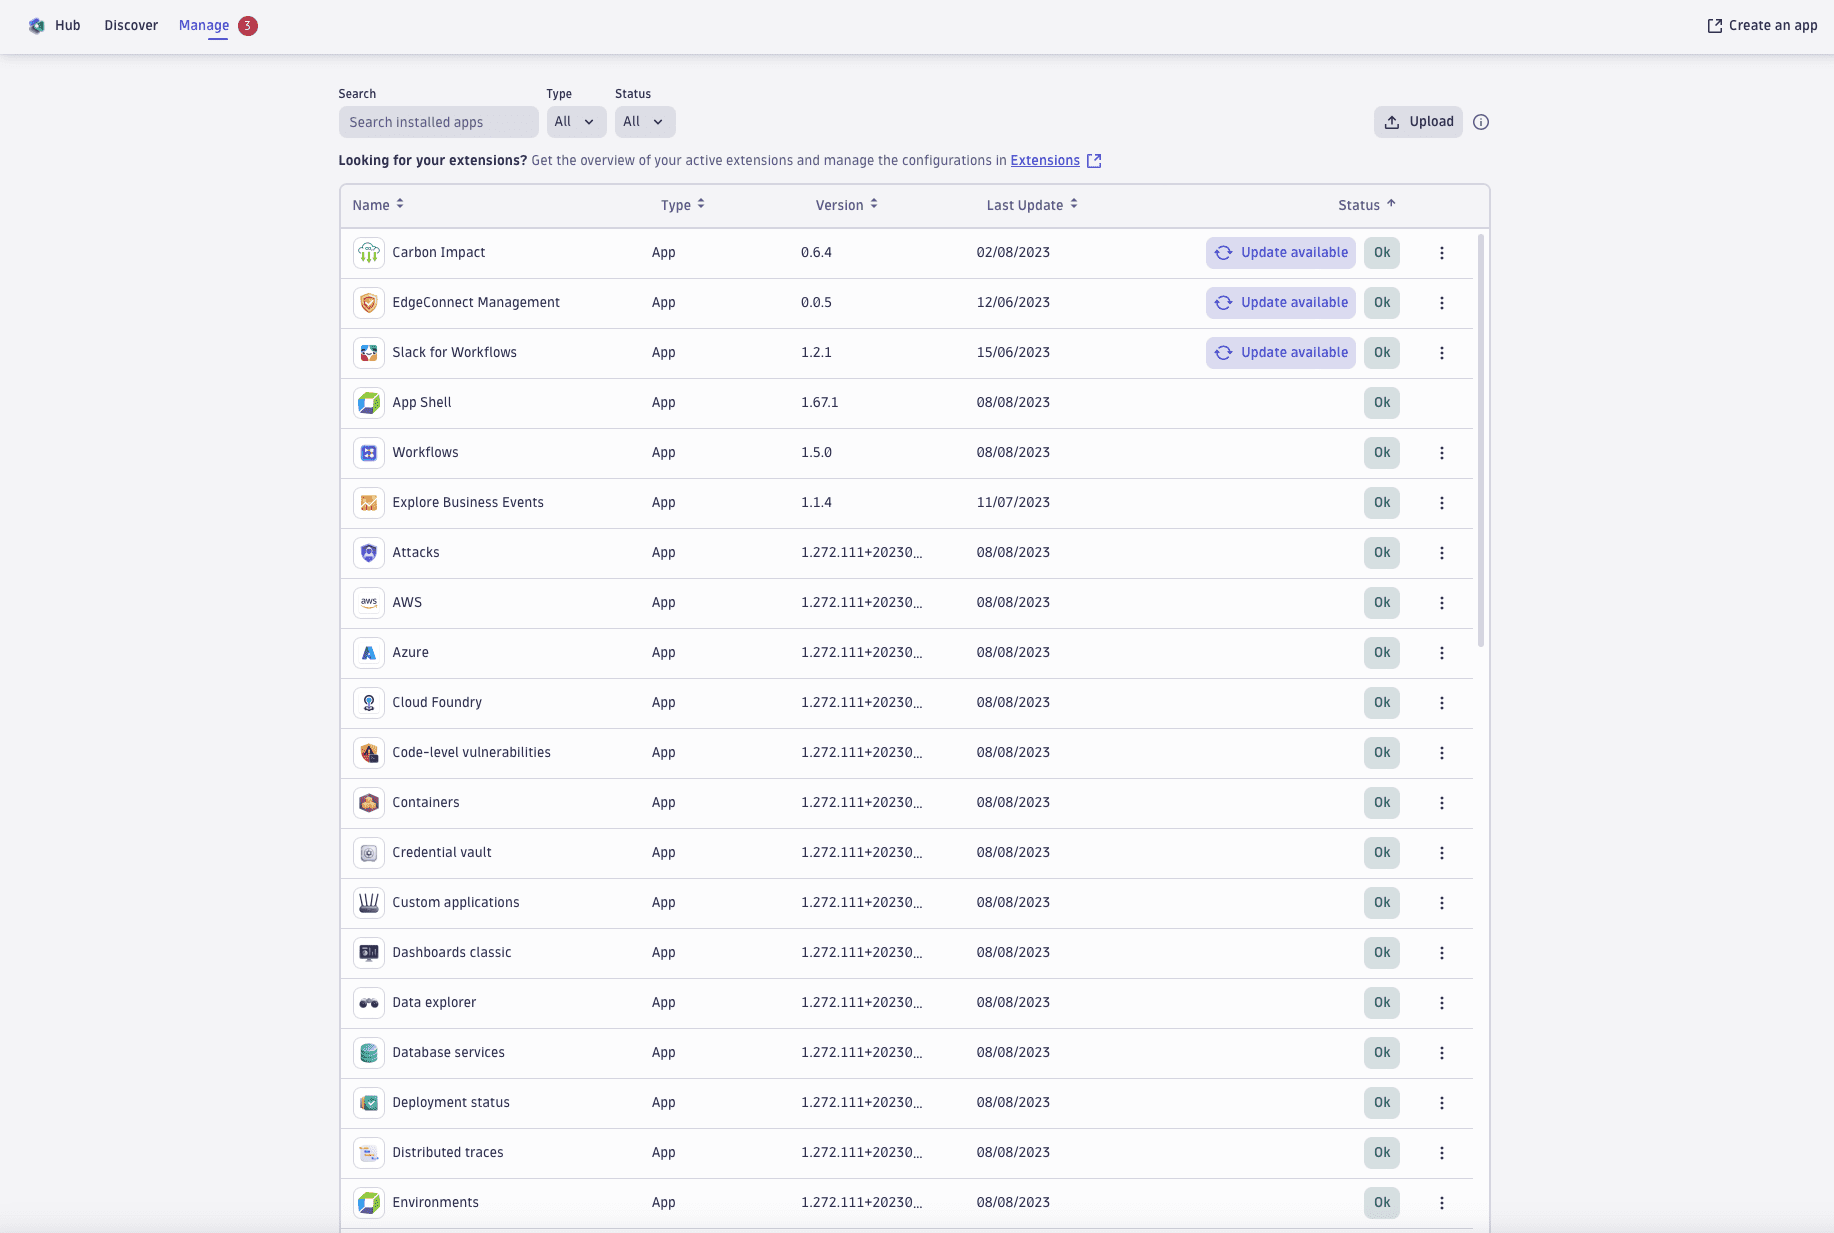
Dynatrace Hub gives you full control over apps available in your environment.

Filter
You can filter the list for custom apps (provided by you) and Dynatrace Apps (provided by Dynatrace).
To manage your installed apps, you can use filters to sort them by their status. For example, you can see which apps have updates available or which apps have issues that need to be fixed.
Install
You need app-engine:apps:install permissions to install apps and make them available to your environment users.
To install an app, open the app overview and select Install.
The installation is automatic and takes a few seconds.
After the installation, the app is available to all the users of your environment. Make sure you assign your potential app users to groups with the permissions listed in the Technical information tab of the app overview. For more information, see Manage IAM policies.
If you don't have permission to install the app
-
Send a request by opening the app overview and selecting Request install.
-
Choose one of the options:
- Automatic installation request—Under Send a request, view the responsible person who will receive your request, provide a comment in the field, and select Send Request. Note that for automatic installation requests to work, an admin has to set up the contact details first.
- Manual installation request—Select Request manually, copy the provided information, and pass it on to your admin to help you install the app.
Enable automatic installation requests
Sending an automatic request is available only when an admin has set up the contacts for automatic installation requests. Use one of the options below to set up the contacts.
-
In Dynatrace Hub:
- Select
icon.
- Select Add admin to add the admin details. More than one contact can be added if needed.
- Select Save.
- Select
-
In Settings:
- Go to General > Hub Requests.
- Select Add admin and add the admin details.
- Select Save.
Automatic installation requests require at least one admin contact.
Automatic updates
All apps that were installed via Dynatrace Hub are automatically kept up-to-date.
App update notifications
Dynatrace Hub can send you an email notification when there's an update available for an app.
To receive update notifications, users need at least the following permissions.
| Permission | Grants access to |
|---|---|
Required storage:system:read | View app update events. |
optional storage:event.provider = "APP_REGISTRY" | Restrict event access to app-related events only. |
To manage your email notifications about app updates
-
In Dynatrace, go to Hub and switch to the Manage tab.
-
Select Notify on app updates.
If you have already enabled notifications, the button is now Update notifications enabled. -
Open the list and make your selections. There's a search box to make things easier.
- To receive email notifications when certain apps are updated, select their checkboxes.
- To stop receiving notifications about certain apps, clear their checkboxes.
-
To save your changes, close the list and select Apply.
You will start receiving email about updates to the selected apps.
Uninstall
You need app-engine:apps:delete permissions to uninstall an app.
To uninstall an app:
- Open an app overview.
- Select > Uninstall.
Add Hub subscriptions
Dynatrace can provide you with apps or releases specifically created and distributed to your environment.
In such cases, a Dynatrace representative will reach out to you and provide you with a channel ID that you need to add to your environment to enable a subscription to a specific app or release.
After you enable the subscription, your environment-specific app will be available to you in Dynatrace Hub, and you can manage it like any other app. You can set up multiple subscriptions, each for a different app/release, in this manner.
Because of caching, the subscription might take up to 30 minutes to become active.
You need read-and-write access to settings to enable subscriptions.
Example policy
ALLOW settings:objects:read, settings:objects:write, settings:schemas:readWHERE settings:schemaId = "builtin:hub-channel.subscriptions";
To enroll a subscription in your environment
- Open
 Settings app and go to General > Hub subscriptions.
 - Select Add subscription.
- In Name of subscription, add a meaningful name so that your team knows what it's for.
- In Channel ID, paste the provided channel identifier. The channel ID looks like this:
c576b6da-af39-41cd-af90-f179e5c67b6e. - Optional In Description, describe the subscription's purpose or include additional comments.
- Select Save changes.
After you added a subscription, you can enable or disable it using a toggle in the Status column.
Dynatrace App verification process
The Dynatrace Hub app distribution process is designed to ensure that apps available in your environment are secure and trusted.
To ensure their authenticity and integrity, Dynatrace verifies all Dynatrace Apps before they are listed:
Dynatrace App authenticity
As a Dynatrace user or admin, you can be sure who developed the app and how it reached your environment.
- The Hub listing for an app gives you the information on the app provider.
- The Hub Manage tab highlights apps that haven't gone through the Dynatrace standard verification process as "Custom apps".
Dynatrace App integrity
App integrity ensures that the app has not been modified between its release and the time it is listed on the Dynatrace Hub.
Dynatrace App code signing
To meet the authenticity and integrity goals, Dynatrace apps require a valid certificate. This certificate, in addition to other security-related automated checks, is verified before listing the app.
 Hub
Hub