Filter logs
- Latest Dynatrace
- How-to guide
You can search in logs for the relevant information while building queries with the Filter command. Filtering allows you to reduce the number of records in a list by keeping only the records that match the specified condition.
See below for filtering options.
Filter by fields or sequences
You can filter by the partial or full value of a field, or by a sequence of fields.
-
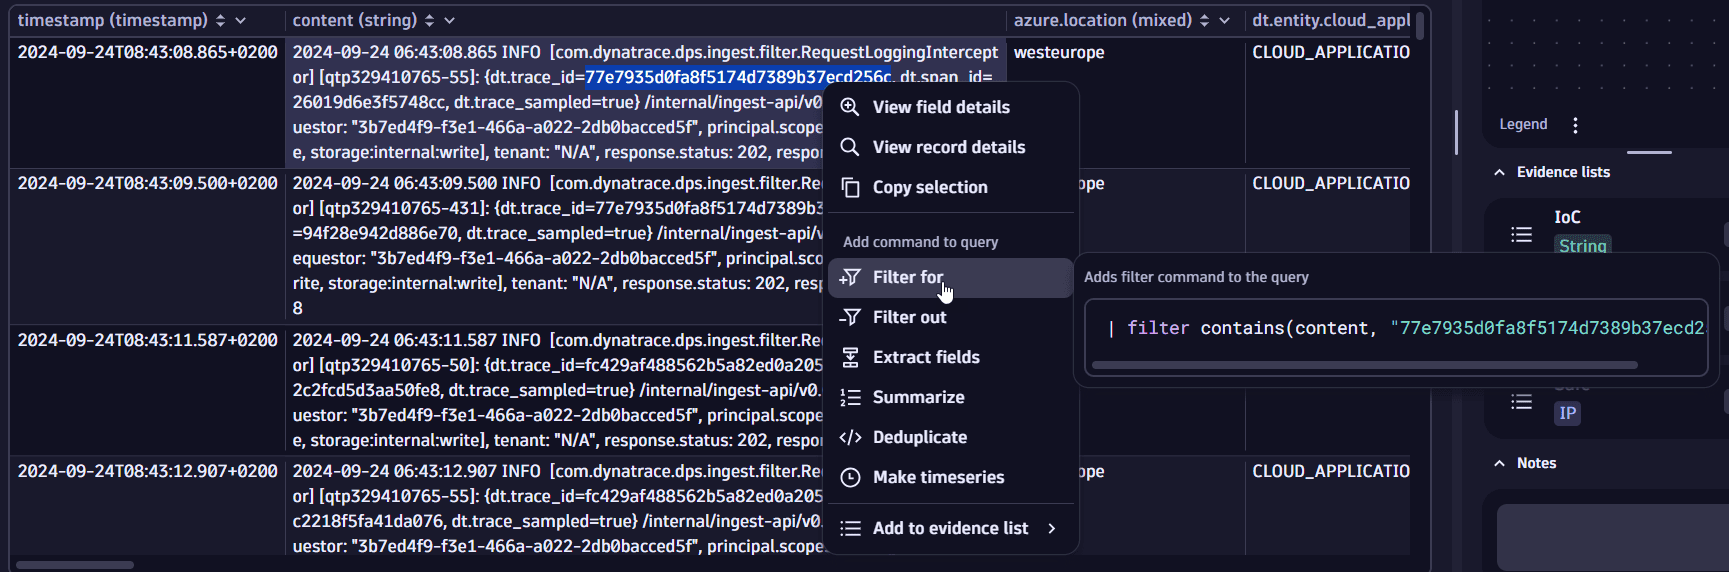
In the query results table, select a partial or full value of a field, or a sequence of fields.
-
Right-click and select
 Filter for or
  Filter out.
If you select a sequence, only the distinct values will be filtered for or filtered out.
To select a sequence of fields, press shift while selecting the fields.
Example: Filter by trace ID value
You can filter by the trace ID value in the content field of the query results.
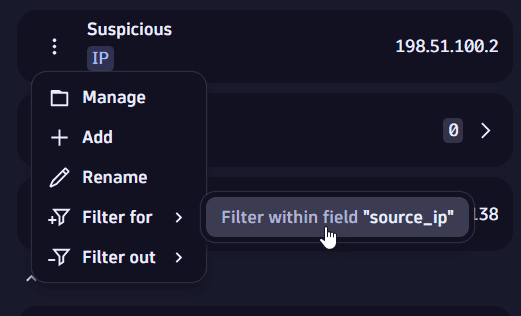
Filter by evidence
You can use stored evidence to search for particular elements in the logs and for later reporting, to have an overview of the evidence found.
There are two ways, from the Evidence collection section or from the query results header menu.
In the evidence collection
In the Evidence collection section, select Filter for or Filter out to filter the query by one or multiple strings or IPs in your evidence list. This adds the filter or filter out command to the query input.
Only fields that correspond to the data type are displayed. For example, for IP address evidence lists, only fields with the IPADDR data type are displayed.
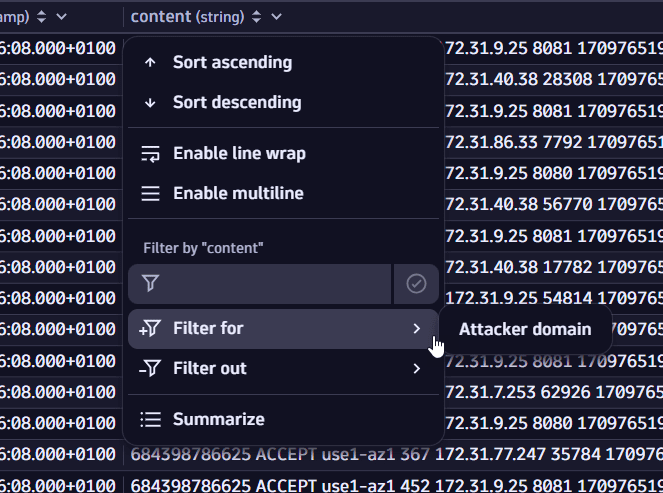
In the query results
In the query results header menu, select a header (for example, content), then select Filter for or Filter out to filter the query by preset or custom evidence lists. This adds the filter or filter out command to the query input.
Only evidence lists that correspond to the fields data type are displayed. For example, when you want to filter a column with an IPADDR data type, only the IP address evidence lists are displayed.
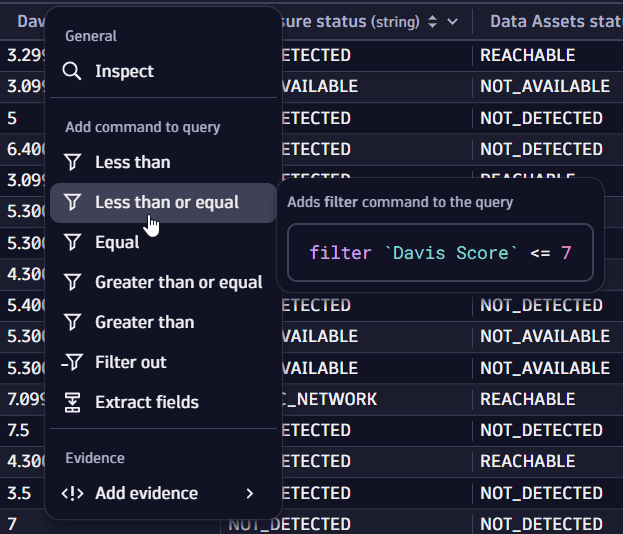
Filter by numerical operators
You can filter by numerical operators such as Less than, Less than or equal, Equal, Greater than or equal, Greater than.
- In the query results table, select a field.
- Right-click and select one of the operators.
Free-form filter
You can manually define the filter condition for one or multiple fields simultaneously and perform filtering on the data loaded to the results table with or without executing a query.
In-place filters apply only to the data you have fetched with your query. For example, if your query is limited to 1,000 records and you use an in-place filter, the command filters only from 1,000 rows; it doesn't apply to the data in Grail. To apply filters on all data in Grail, see Filter logs.
To filter results without executing a query
-
In the query results table menu, select a column header.
-
Under Filter by "<field_name>", enter your condition and select the confirmation button
 .
. -
To add multiple filters, repeat the steps above for each field you're interested in.
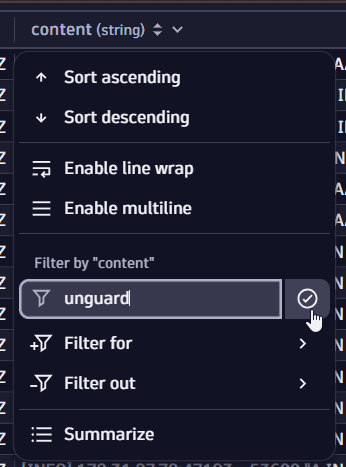 Filter by content
A notification bar with the set filters is displayed on top of the query results table.

- To hide or display the notification bar, select
 in the query summary.
 - To remove filters, select for the respective filters.
To apply the filters to your DQL query, in the notification bar, select Add all to query or individual items.
Filter by timestamp
You can filter logs by timestamp.
To save a filter and reuse it across the whole investigation, you can add the desired timestamp values to your custom timeframes. For details, see Define timeframes.
-
In the query results table, select the desired field value.
-
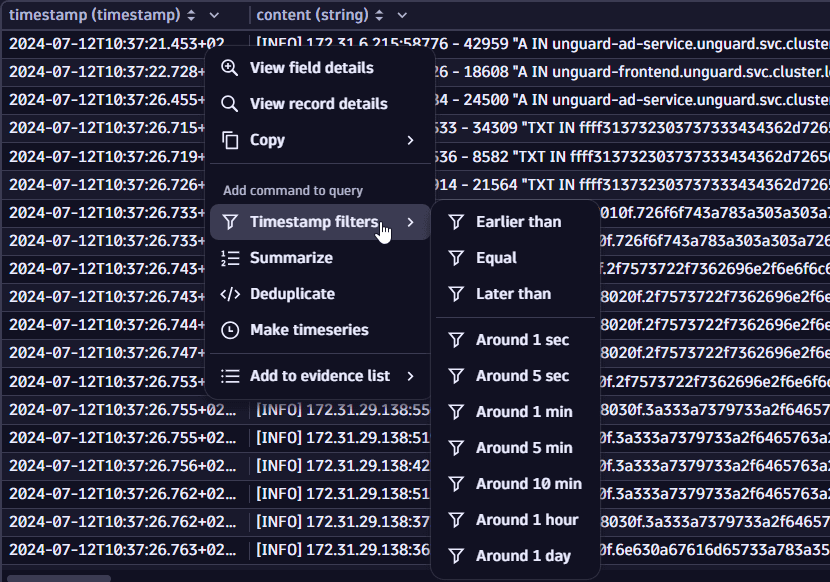
Right-click and select Timestamp filters.
-
Select one of the available operators. This appends the DQL query with a filter for your selection.
 filter options
Available operators are described below.
-
Earlier than: Finds the timestamps that are earlier than the selected value.-
Example:
| filter timestamp < toTimestamp("2024-01-04T18:45:11.918Z")
-
-
Equal: Finds the timestamps that are equal to the selected value.-
Example:
| filter timestamp == toTimestamp("2024-01-04T18:45:11.918Z")
-
-
Later than: Finds the timestamps that are later than the selected value.-
Example:
| filter timestamp > toTimestamp("2024-01-04T18:45:11.918Z")
-
-
Around (...): Creates a time range filter.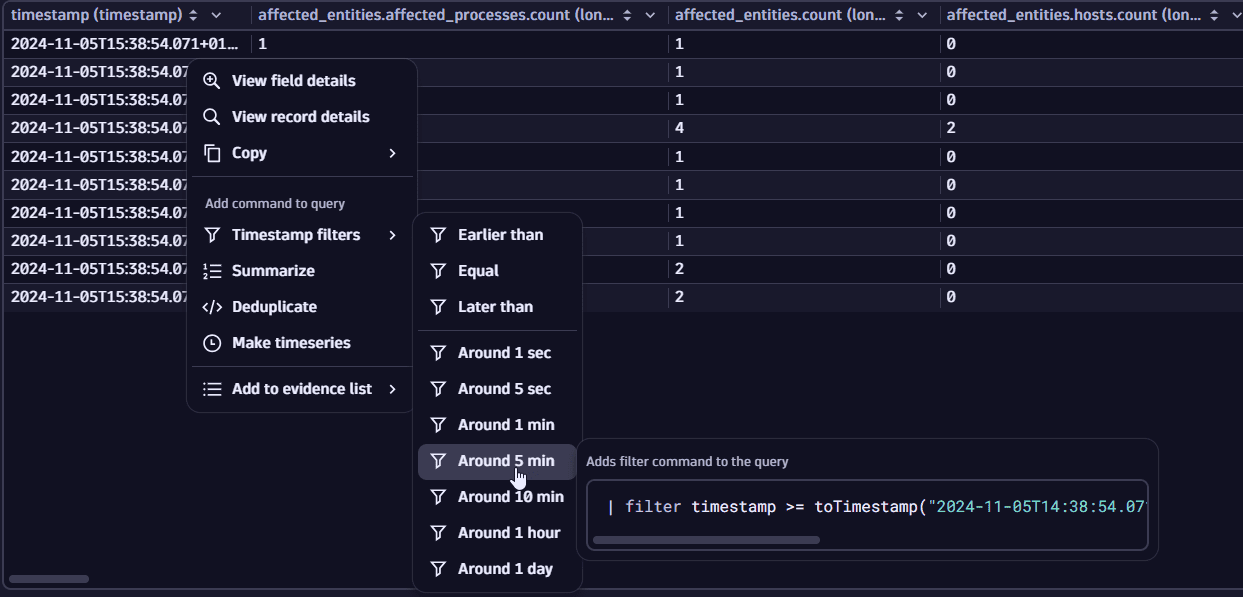 time range filter from a timestamp
-
Example:
Right-clicking the
2024-11-05T14:38:54Zvalue and selectingAround 5 minappends the query with the following filter:| filter timestamp >= toTimestamp("2024-11-05T14:38:54.071000000Z")-5mand timestamp <= toTimestamp("2024-11-05T14:38:54.071000000Z")+5m
-
Filter by reference time
You can create a timestamp filter based on the reference time.
- Define a reference time.
- In the menu of the reference time box displayed on top of the query input, select one of the filter options available. This appends the DQL query with a filter for your selection.