Manage time
- Latest Dynatrace
- How-to guide
With the timeframe, you can define the period from which your data is being queried. If you don't specify the timeframe, the default -2h is applied, meaning that the data being fetched is from the last two hours.
There are several ways to define the timeframe for your queries.
Define timeframe in the DQL query
You can define a custom timeframe in the DQL queries: in the query input, use the fetch command with the timeframe or from and to parameter to override your manual settings from the timeframe selector.
Define timeframe in the timeframe selection
You can define an ad-hoc timeframe, use an existing timeframe, or create a custom timeframe in the timeframe selection section next to the  Run button.
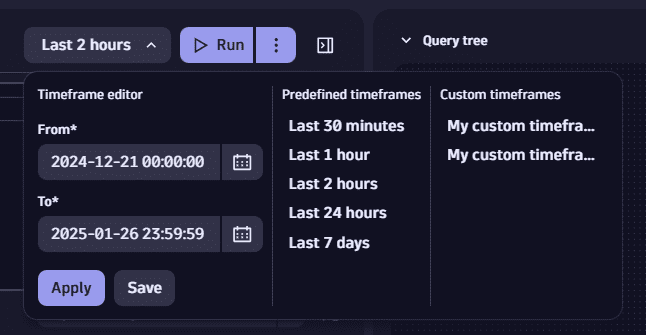
The timeframe selection is disabled when you define the timeframe in the DQL query.
Define timeframe from the results
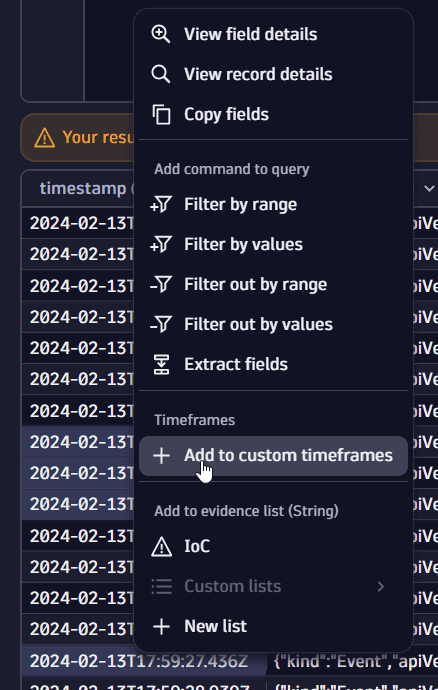
You can create a custom timeframe from a selection in the results.
-
Select multiple values from a field of
timestamptype (use the shift key to select multiple values). -
Right-click and select Add to custom timeframes.
This selects the
min()andmax()values from the selected range and creates a new custom timeframe for your investigation.
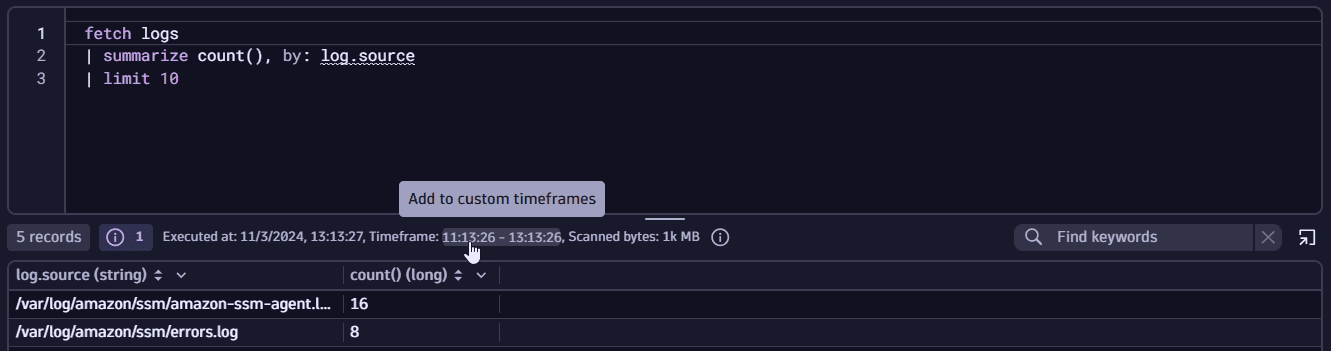
Define timeframe in the query summary
You can define a custom timeframe in the query summary shown below the query input after you execute a query.
- In the query summary, select the timeframe.
- Enter a name and select Save.
Set the reference time
To speed up investigations, you can keep track of the time between events you're analyzing and the time when an incident occurred by adding the time perspective to your queries.
- In the results table, right-click on the timestamp field of the event for which you want to create the reference time.
- Select Set as reference time.
A virtual column with the timestamp offset is added to the nodes in the query tree. The offset displays the time difference between the reference time created and the timestamp of the event in the results table in the specific record.
Once you create a reference time, you can
- Display it for every column with the timestamp type.
- Replace the reference time at any time and the offset will be recalculated based on the new reference value.
- Use the reference time to create timestamp-specific filters directly from the reference time menu next to the investigation title.
Looking for more advanced investigation tools?
See Accelerate root cause analysis for a full overview.