Manage users and groups with SAML in Dynatrace Managed
- Published Jul 19, 2017
Dynatrace Managed supports integration with SAML 2.0 as an SSO IdP (Single Sign-On Identity Provider) for the management of users and groups. SAML can use either HTTP POST (preferred) or HTTP Redirect bindings. When both are present, HTTP POST is used.
Set up SAML 2.0 integration
This procedure requires configuration in Dynatrace Managed and at your IdP.
In Dynatrace Managed
-
From the Cluster Management Console menu, select User authentication > Single sign-on settings.
Example
Single sign-on settings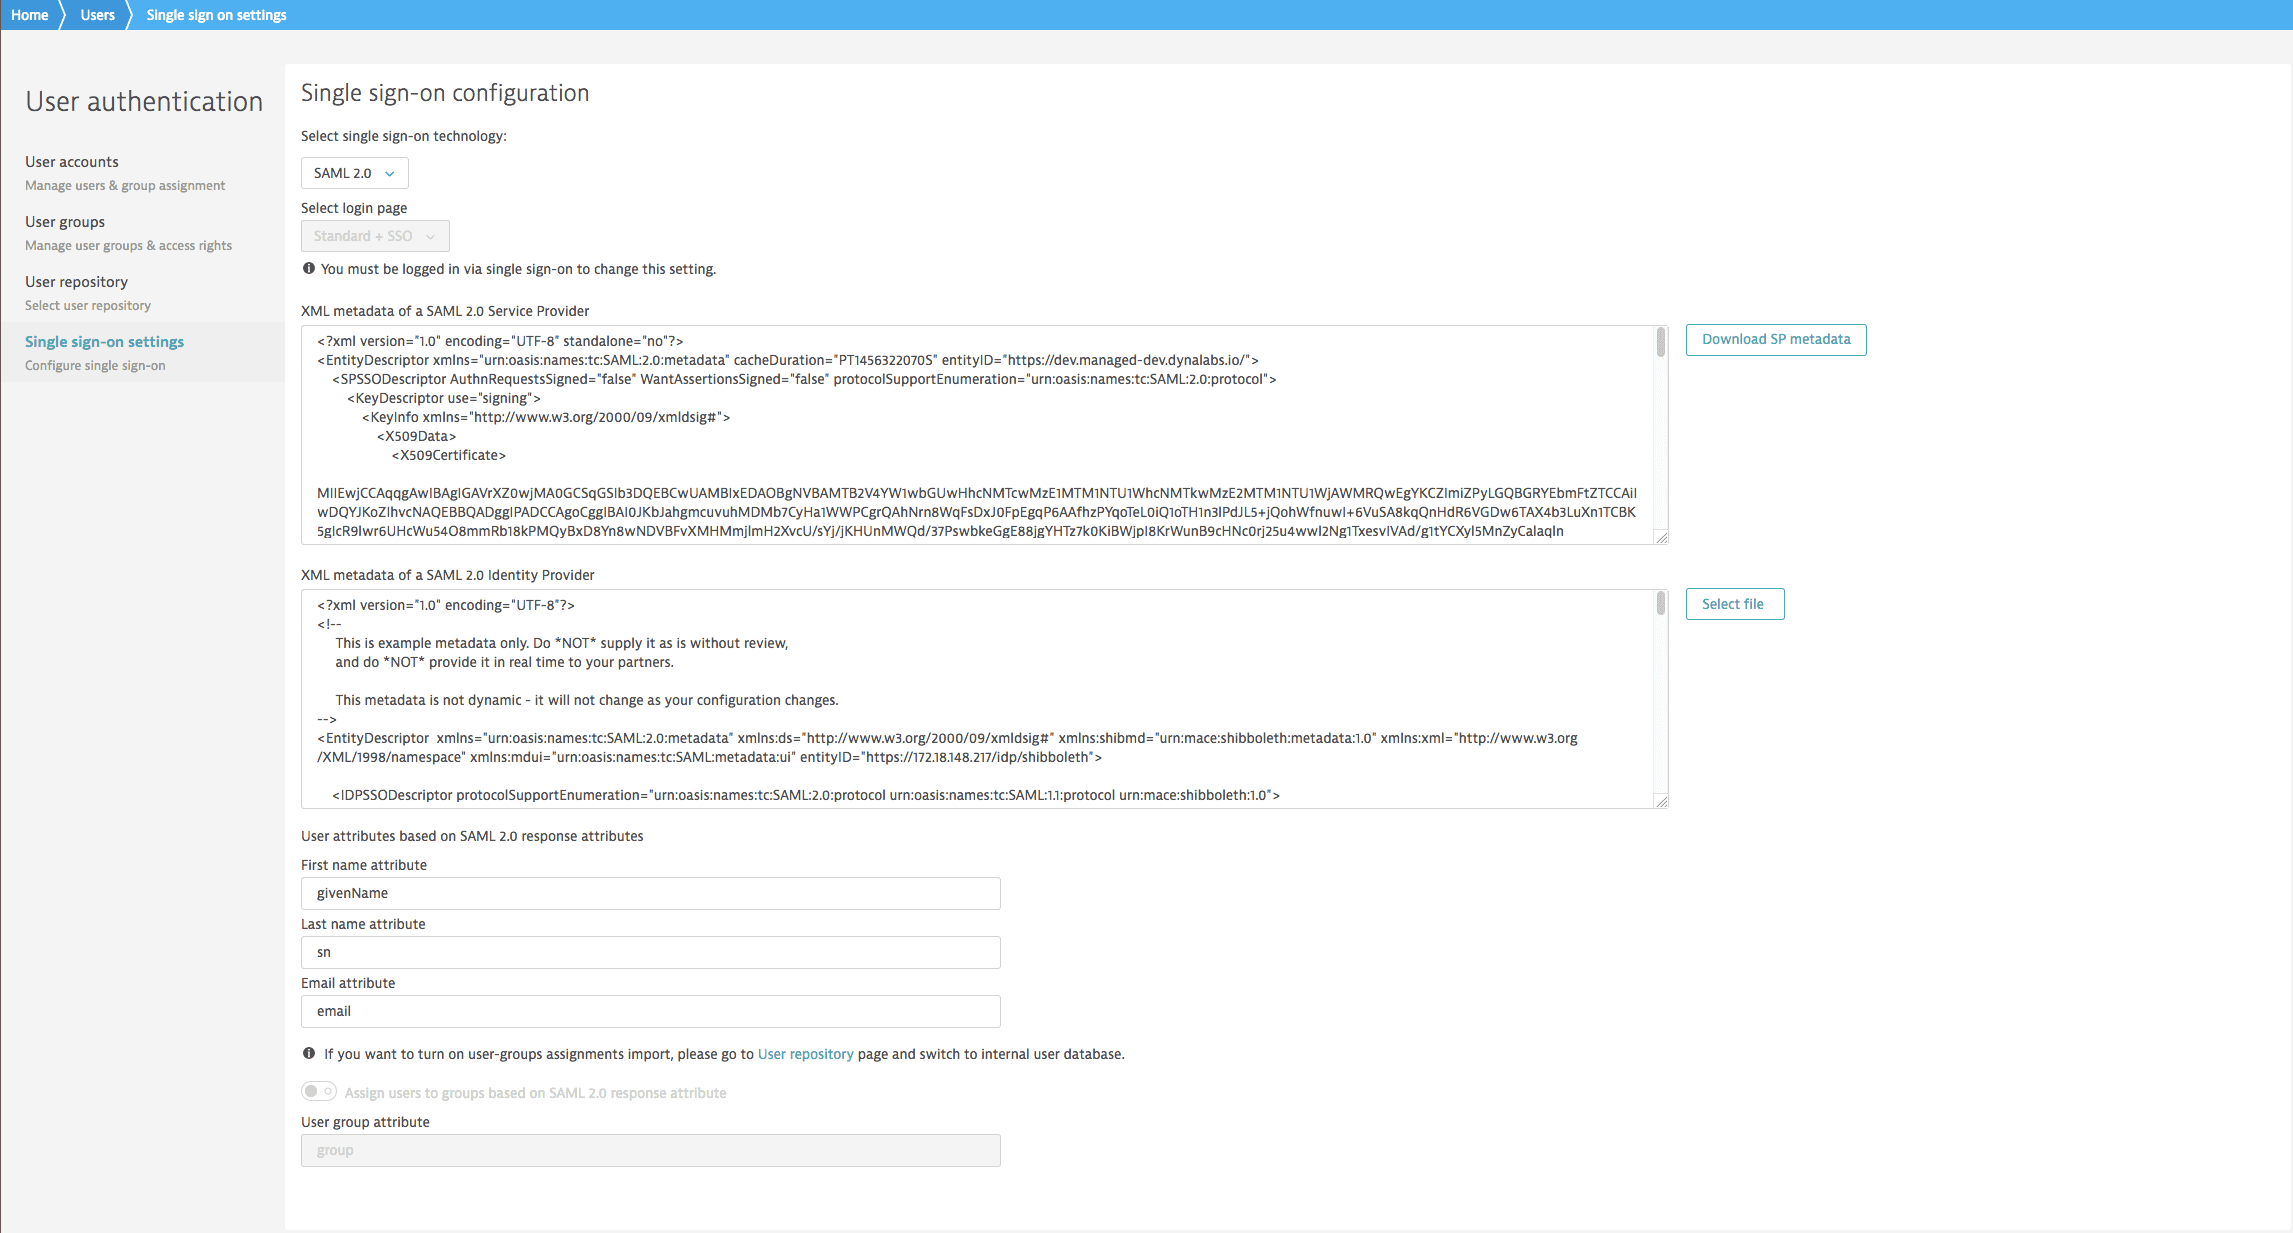 SAML config page
 -
From Select single sign-on technology, select
SAML 2.0. -
From Select login page, select the login options you want to offer users:
- Standard + SSO displays the standard Dynatrace login page, where the user has the choice to sign in using a local user account (as configured through User authentication > User accounts) or to select the Log in using SSO link and use SSO authentication.
- SSO skips the Dynatrace login page, so the user cannot sign in using a local user account, and redirects to the IdP login page for SSO authentication only.
-
Select Download SP metadata to download (to file
sp.xml) the SAML metadata you need to provide to your SP.
The XML metadata of a SAML 2.0 Service Provider box displays the metadata.
On your Identity Provider server (IdP)
Refer to your IdP documentation for details on these steps.
At your IdP server
- Use the
sp.xmlmetadata file you downloaded earlier to configure Dynatrace Managed as a Service Provider (SP). - Download the completed configuration metafile from your IdP server.
In Dynatrace Managed
Back in the Dynatrace Managed Cluster Management Console
- Return to the Single sign-on settings page (User authentication > Single sign-on settings) to continue where you left off.
- Select the Select file button and upload your IdP configuration metafile to Dynatrace Managed.
The XML metadata of a SAML 2.0 Identity Provider box displays the metadata. - Under User attributes based on SAML 2.0 response attributes, enter the user attributes.
- First name attribute
- Last name attribute
- Email attribute
Group assignment configuration
Each Dynatrace Managed user must be assigned to at least one user group, with at least one associated monitoring environment. Without such a mapping, the user can't sign in to Dynatrace Managed and will instead receive an error message stating that no environment has been found.
The Assign users to groups based on SAML 2.0 response attribute switch determines how you manage user-group assignments:
- Manually: Set the switch to the off position if you want to make user-group assignments manually from within Dynatrace Managed. In this case, Dynatrace Managed ignores the list of groups sent in your IdP's authentication response.
- Automatically: Turn on the toggle and enter the group name in the User group attribute field if you want to handle user-group assignment automatically. In this case, any assignments made within Dynatrace Managed are overwritten by the list of groups sent in your IdP's authentication response, such as
which would assign the user to the<Attribute Name="gr"><AttributeValue>Admins</AttributeValue><AttributeValue>Users</AttributeValue></Attribute>
AdminsandUsersgroups.- If the value of the user group attribute in the SAML response contains commas, Dynatrace recognizes it as a comma-separated list of user groups and assigns the user to each group in the list. For example
would assign the user to the<Attribute Name="gr"><AttributeValue>Admins,Users</AttributeValue></Attribute>
AdminsandUsersgroups. - Make sure group names exactly match existing Dynatrace user group names (case-sensitive, no extra spaces). For example,
Adminsandadminswould be two different groups.
- If the value of the user group attribute in the SAML response contains commas, Dynatrace recognizes it as a comma-separated list of user groups and assigns the user to each group in the list. For example
SAML signing certificate update
To submit a new SAML signing certificate, make a PUT request through the Cluster Management API.
-
In Cluster Management Console, get a
ServiceProviderAPItoken.How to get a token
- Select Settings > API tokens.
- Select Generate token.
- Give the token a name, turn on Service Provider API, and Save it.
- In the list of tokens, expand the token you just created and select Copy to copy the token value to your clipboard.
-
Open the User menu in the top-right corner of the window and select Cluster Management API.
-
Submit the token.
How to submit the token
- Select Authorize.
- Paste the token value into the edit box.
- Select Authorize.
- Select Close.
Now you are authorized to issue the necessary API request.
-
Expand the SSO configuration section and select PUT.
-
Select Try it out.
The Description section displays the format expected for the body of the PUT request.{"privateKeyEncoded": "string","publicKeyCertificateEncoded": "string"} -
Paste the contents of the RSA private key and certificate to replace the corresponding
privateKeyEncodedandpublicKeyCertificateEncodedvalue placeholders (string). Be sure to include the fullBEGINandENDtags of each. In this example, the key and certificate are truncated for brevity:{"privateKeyEncoded": "-----BEGIN RSA PRIVATE KEY-----\nMIIEowIBAAKCAQEAp8RXe0PIuDwj1ZbYrShXRxjiFnq8xmLWZlWIYkScX/1KC69M\n...\nPM3kel4na+AGibenqRs7PA6rqFeXDg193pepzWqvqmJ98W8YYecZ\n-----END RSA PRIVATE KEY-----","publicKeyCertificateEncoded": "-----BEGIN CERTIFICATE-----\nMIICzTCCAbWgAwIBAgIRAIpaHcbUOpvhKf6exsxJjVowDQYJKoZIhvcNAQELBQAw\n...\nuw==\n-----END CERTIFICATE-----"} -
Select Execute to submit the request.
Response codes
200- Certificate update was successful.400- Invalid input. Verify that you pasted the complete key and certificate, including the fullBEGINandENDtags of each, into the body of the request as shown in the example.510- Failed operation. Check the server logs for details.
ADFS configuration
If you choose to integrate Dynatrace Managed with Active Directory Federation Services (ADFS), perform the following steps on the ADFS side and then in Dynatrace Managed.
Configuration on the ADFS side
-
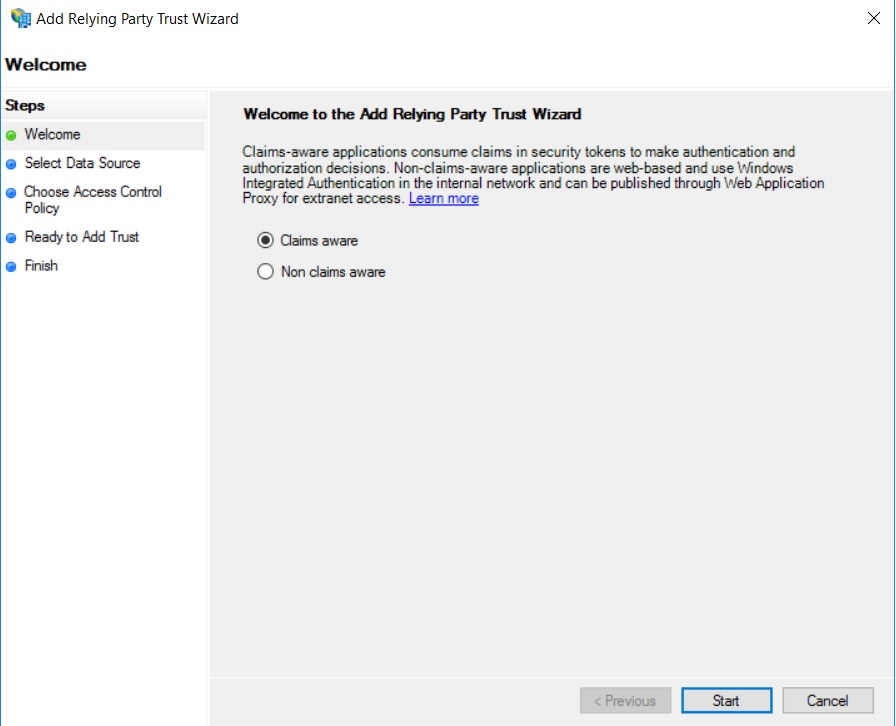
Use the Add Relying Party Trust Wizard to add a new relying party trust using Dynatrace SP metadata configuration.
Add Relying Party Trust Wizard example
 ADFS SAML provider
 -
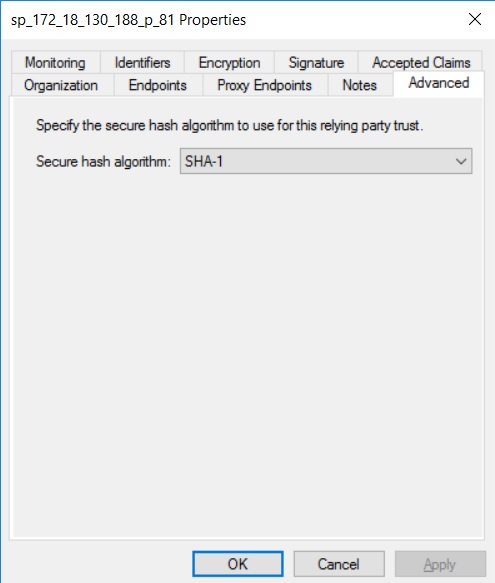
On the Advanced tab, set Secure hash algorithm to
SHA-1orSHA-256.Advanced tab example
 ADFS SAML provider
 -
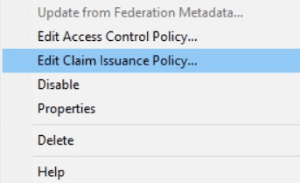
Add a claim issuance policy to the added relying party trust.
Edit Claim Issuance Policy example
 ADFS SAML provider
 -
Define a rule to send LDAP attributes as claims.
Example rule: send LDAP attributes as claims
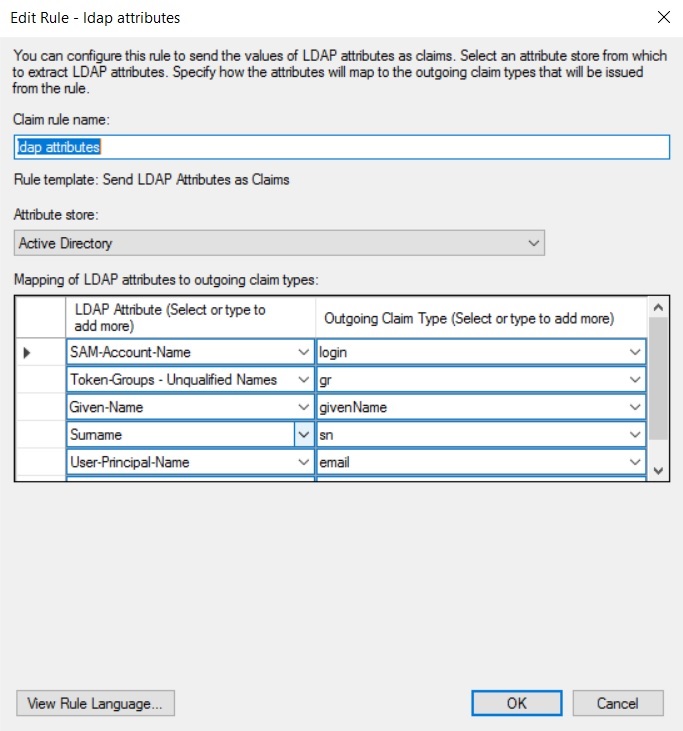 ADFS SAML provider
 -
Define rules to transform LDAP attributes to
Name ID(create a rule appropriate to your needs).-
Example of a rule to transform the LDAP
loginattribute toName ID.Example rule: LDAP
loginattribute toName ID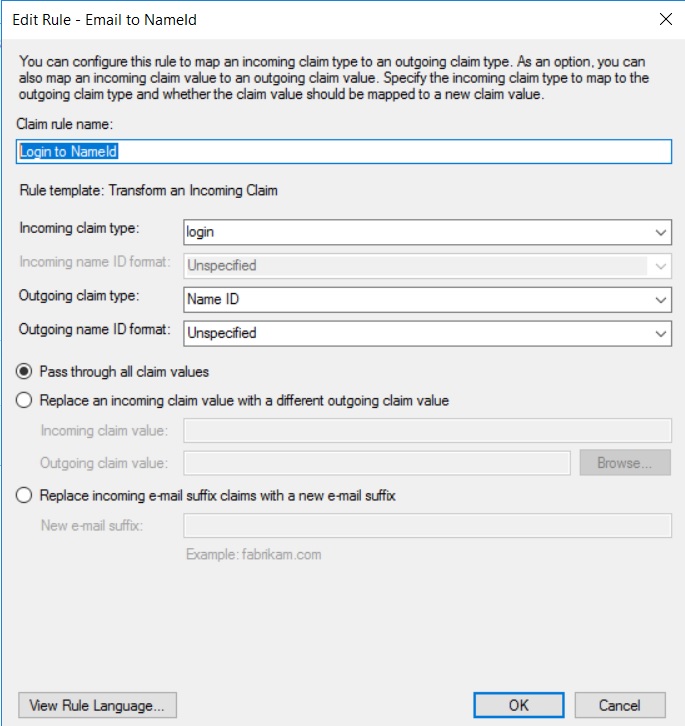 ADFS SAML provider
 -
Example of a rule to transform the LDAP
emailattribute toName ID.Example rule: LDAP
emailattribute toName ID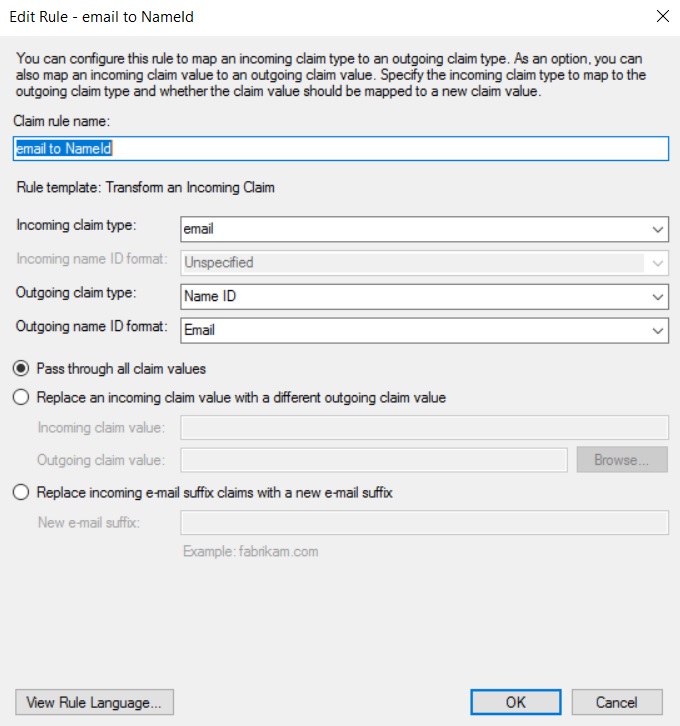 ADFS SAML provider
-
Configuration on the Dynatrace Managed side
On the Dynatrace Managed Single sign-on settings page, set the User group attribute appropriately.

FAQ
What's the proper NameIdFormat?
NameId is a login on the Dynatrace Managed side. All formats are accepted by Dynatrace Managed, so you can choose the format that best fits your policy rules.
Our recommendation for NameIdFormat is:
urn:oasis:names:tc:SAML:1.1:nameid-format:emailAddress
Why am I signed out from my services when I request a sign-out from Dynatrace Managed?
Upon sign-out, a global sign-out is triggered, including for your IdP, which then cascades to other services. Otherwise, you would be signed out from Dynatrace Managed, but to reauthenticate it would be sufficient to either select the Log in using SSO link on the login page, or to enter the Dynatrace Managed WebUI URL in the browser when the login page is configured to SSO.
If you want to disable it (not a good idea from a security standpoint), edit your metadata, remove all SingleLogoutService tags, and upload the updated metadata.
Can metadata contain multiple signing certificates?
Yes, customer IdP metadata can contain multiple signing certificates. Dynatrace Managed validates that SAML messages from the customer IdP are signed by one of them.
Are SAML users added automatically to Dynatrace Managed?
Yes, users are added following successful authentication.
What should I do if Content Security Policy rules are violated during sign-in or sign-out?
This could happen when configured SSO IdP redirects sign in or sign out POST requests to other hosts.
To resolve this, go to User authentication > Single sign-on settings and add the redirect URLs to the SSO IdP redirect URLs section.