Install Dynatrace Managed in offline mode
- How-to guide
- 8-min read
Dynatrace Managed is available in an offline version. In offline mode, Dynatrace Managed uses an offline license that disables all features requiring an internet connection—such as connecting to Mission Control for license reporting and health checks, or receiving automatic cluster updates.
In offline mode, you're responsible for keeping Dynatrace Managed up to date and reporting license usage to Dynatrace.
Offline vs. online mode
| Installation step | Online mode | Offline mode |
|---|---|---|
Installation - license1 | license key | license file |
Installation - Mission Control connection checking | Yes (required) | No (skipped) |
Installation - License verification with Mission Control2 | Yes (required) | License usage must be reported manually via Export license data |
Installation - OneAgent self-monitoring download and installation | Yes (optional) | No (skipped) |
Server - updates download (including OneAgent, RUM JavaScript, ActiveGate, NGINX offsets)3 | Automatic from Mission Control | Manual from update email |
Server - certificates handling | Automatic from Mission Control | Only self-signed provided by default |
Network - ports that are required | Same as for online except for Mission Control connection and hosted self-monitoring | |
Mission Control - updates | Published updates are automatically synchronized with the Managed Cluster | Published update URLs are sent via email to license contacts |
Mission Control - health check statistics | Health-check is updated every 5 minutes | No health-check statistics available |
Mission Control - license updates | License updates are synchronized every 5 minutes with the Managed Cluster | License must be updated manually via Cluster Management Console |
Mission Control - designates one part of the Premium HA cluster as primary (surviving) | Automatic from Mission Control | Not supported |
Dynatrace support policy | 3 months + 1 month with Enterprise Success and Support | 3 months + 1 month with Enterprise Success and Support |
To install in offline mode, pass the license file using the --license-file <license-filename> parameter. The activation email includes the full installation command with this parameter and the offline license file attached. The installation log confirms offline mode with offline mode is active entries.
The server verifies the license after startup (not during installation) through a signature (hash) included in the license file. The installer copies the license file to the server's config directory. The license.file entry in the server's config.properties file contains the path to this file.
The Dynatrace Cluster doesn't include installation packages for OneAgent or ActiveGate—in online mode these are downloaded automatically from Mission Control. In offline mode, they must be added manually. Download links are provided in the activation email.
Install Managed Cluster in offline mode
To install a Managed Cluster in offline mode, follow the steps below.

Review requirements

Download files

Verify installer

Retrieve software bill of materials file

Run installer

Activate license

Upload agents bundle
Review requirements
Ensure that your system meets the hardware requirements and system requirements.
Avoid installing the data stores for Dynatrace Managed components on network or remote disks—this can cause performance and stability issues.
Download files
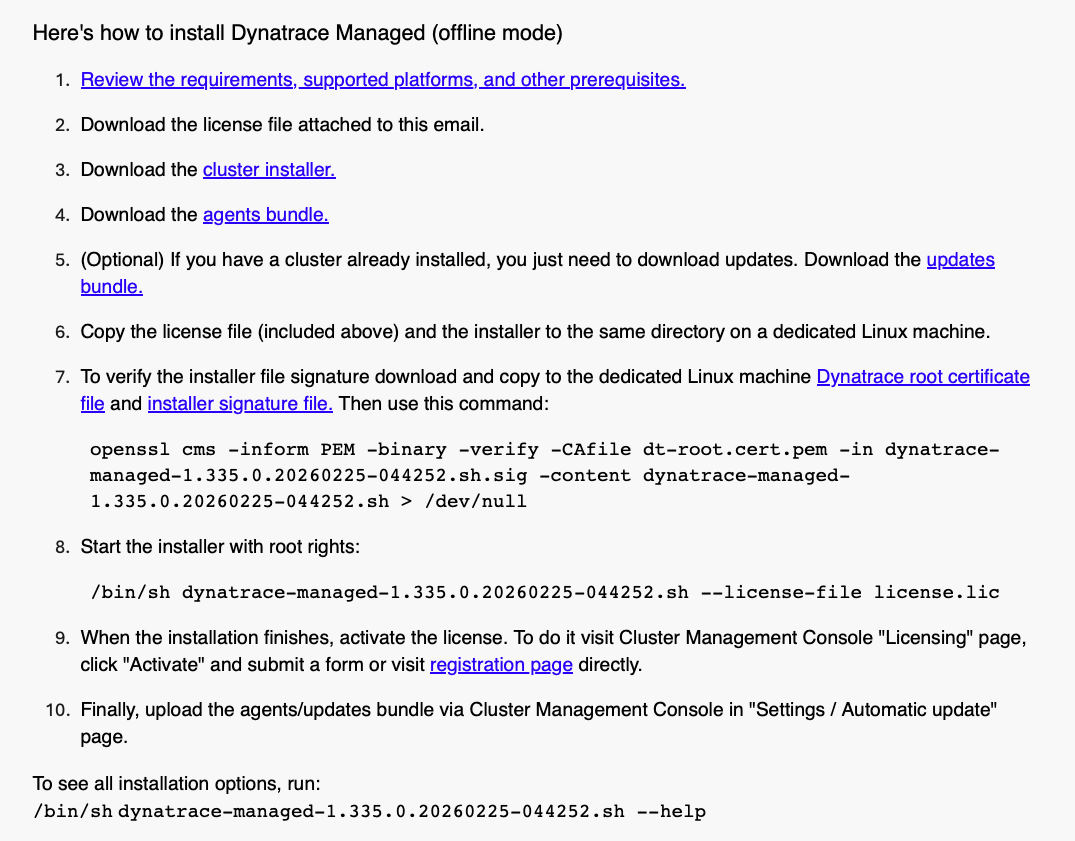
Download the following files from the activation email and copy them to the directory on your Linux host where you want to install Dynatrace Managed:
- License file (license.lic).
- Dynatrace Managed installer (cluster installer).
- OneAgent, RUM JavaScript, ActiveGate, and Synthetic installation packages (agents bundle).
Activation email example
Verify installer
The Dynatrace Managed installer is digitally signed. Use OpenSSL and the Dynatrace root certificate to verify the installer's authenticity. The signature file has the same name as the installer with a .sig extension.
-
Download the Dynatrace root certificate and the installer signature file using the links provided in the activation email.
-
Verify the installer file signature using this command:
openssl cms -inform PEM -binary -verify -CAfile dt-root.cert.pem -in dynatrace-managed-<version>.sh.sig -content dynatrace-managed-<version>.sh > /dev/nullReplace
<version>with your Dynatrace Managed version. -
A successful verification returns
Verification successful. On failure, you seeVerification failurefollowed by details.
Retrieve software bill of materials file
Follow the instructions in step 3 of the cluster installation guide to retrieve an SBOM file.
Run installer
Follow the instructions in Run installer (step 4) and Finalize setup (step 5) of the cluster installation guide. Use the --license-file parameter instead of a license key:
sudo /bin/sh dynatrace-managed-<version>.sh --license-file license.lic
Replace <version> with your Dynatrace Managed version.
Activate license
After the installation, activate your license.
- Log in to Cluster Management Console.
- Go to Licensing and select Activate license.
- If you have internet access, you're redirected to an external registration form (https://mcsvc.dynatrace.com/register.html) with all fields pre-filled. Verify the details and submit.
- If you don't have internet access, open
https://mcsvc.dynatrace.com/register.htmlin a browser with internet access and complete the form manually. - Required: License key and Cluster identifier
- Optional: Installed version (the current cluster version) and Cluster admin email address (an email address through which Dynatrace product experts can contact cluster administrators in case of an emergency)
- If you don't have internet access, open
- If you have internet access, you're redirected to an external registration form (https://mcsvc.dynatrace.com/register.html) with all fields pre-filled. Verify the details and submit.
- Select Activate license. The next page confirms that the license has been activated.
- On the confirmation page, select Download license file to download the
license-activated.licfile. - Select Go to Licensing page.
- On the Licensing page, select More (…) > Apply license in the upper-right corner.
- Select the
license-activated.licfile you downloaded earlier.- After applying the license, the license status changes to Active.
Upload agents bundle
To upload the agents bundle to the cluster:
- Log in to Cluster Management Console.
- Go to Settings > Automatic update.
- Select Upload installation package to upload it to the cluster.
Alternatively, you can manually copy the agents bundle to the following directory on your Linux machine:
/var/opt/dynatrace-managed/agents
Update Managed Cluster in offline mode
Follow the semi-automatic Managed Cluster update instructions in the update guide.
Frequently asked questions
What can you do if an error occurred while uploading the installation package?
An installation package upload error typically occurs when attempting to upload a full package containing a Managed installer, OneAgent, RUM JavaScript, ActiveGate, and Synthetic. In this case, the package size exceeds the 2 GB upload limit.
- Log in to Cluster Management Console.
- Go to Settings > Automatic update.
- Select Upload installation package to upload only selected installation packages to the cluster.
Alternatively, you can manually copy installation packages to the following directories on each cluster node.
-
For the cluster to:
/opt/dynatrace-managed/installer/upgrade -
For OneAgent, RUM JavaScript, ActiveGate, and Synthetic to:
/var/opt/dynatrace-managed/agents
What can you do if there is a problem with the license?
If the license file is corrupted, the installation completes and the server starts, but it indicates a problem with the license. In this case, upload a new license in Cluster Management Console. For details, see Update offline license.
How do you update the license?
To update your license:
- Download the
license.licfile from the activation email. - Log in to Cluster Management Console.
- Go to Licensing and apply the new license.
How do you obtain diagnostic data for further analysis?
In Cluster Management Console, you can download diagnostic data. For details, see Diagnostic archives.