Monitor Azure Functions on App Service Plan for Windows
Capabilities
- Full-stack monitoring powered by OneAgent
- Extension for easy deployment of OneAgent
- Support for Azure Functions that are written in .NET (in-process) and hosted on an App Service Plan on Windows
- Enhanced support for Azure App Service metadata such as compute mode, SKU, and more
- Automatic service detection for functions written in any language for Azure Function Runtime v2+
- Automatic tracing and code-profiling for .NET/.NET Core based functions
- End-to-end tracing across multiple functions for http-based triggers and other instrumented services and applications. Other triggers such as QueueTriggers require custom trace propagation.
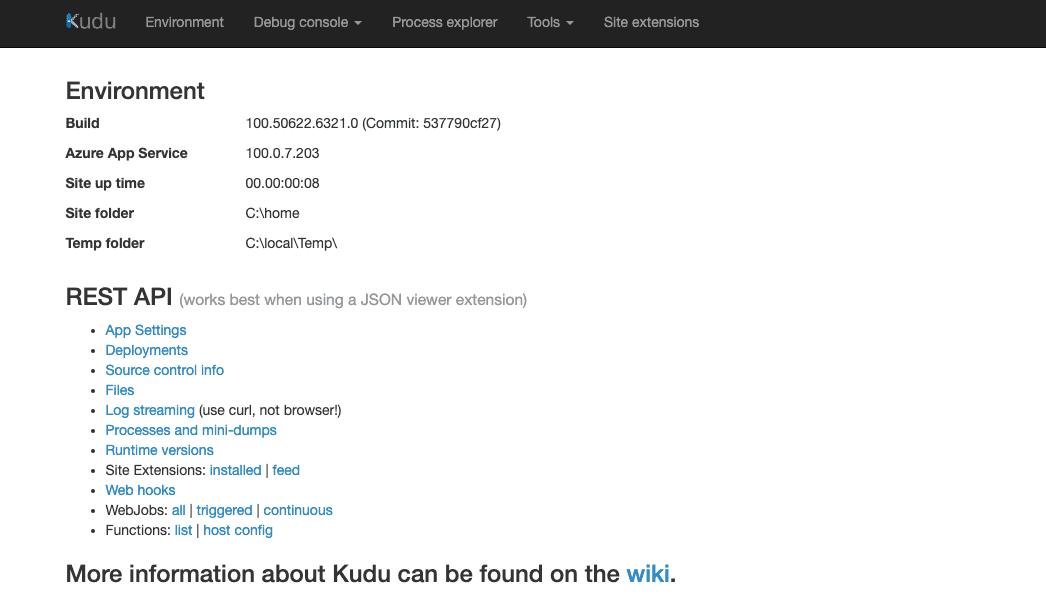
Dynatrace provides an Azure Site Extension to install OneAgent on Azure Functions. Azure Site Extensions are the native extension mechanism provided via Kudu, which is the deployment management engine behind Azure App Services.
The extension doesn't include the OneAgent installer. Instead, the extension uses the Dynatrace REST API to download the latest installer from the cluster, unless a OneAgent default version is configured.
Since Azure Functions are a fully managed hosting platform built on top of Azure App Services, functions/applications are deployed into a sandboxed environment that doesn't allow direct access to the underlying operating system. This results in some restrictions for OneAgent:
- Enhanced I/O monitoring requires Azure Monitor integration.
- Dynatrace Log Monitoring isn't supported for Azure Functions.
- Network zones aren't supported.
Prerequisites
-
Create a PaaS token.
-
Determine your environment ID.
-
Determine your server URL if required.
The server URL is required only if you an ActiveGate for a Dynatrace SaaS endpoint. The URL is automatically generated from the environment ID.
- ActiveGate server URL:
https://<your-active-gate-IP-or-hostname>:9999/e/<your-environment-id>/api(the ActiveGate port is configurable)
- ActiveGate server URL:
Install Dynatrace OneAgent site extension
There are two ways to install the Dynatrace OneAgent site extension: via Azure Portal or using an ARM template. Follow the steps below for instructions.
Install Dynatrace OneAgent site extension via Azure Portal
-
In Azure Portal, go to the App Services and select an app service where you want to add the OneAgent extension.
-
In the left menu, go to to Development Tools > Extensions.
-
Select Add.
-
Select Choose an Extension.
-
From the list of extensions, select Dynatrace OneAgent.
-
Accept legal terms and select Add. It should take a moment until you see the Dynatrace OneAgent extension on the list.
-
In the left menu, go to to Development Tools > Advanced Tools and select Go. This will redirect you to the Kudu site.

-
Select Site extensions.
-
Select Launch on the Dynatrace tile.
-
On the Start monitoring your App Service instance page, enter your environment ID, PaaS token, and server URL. See Prerequisites section for details.
-
optional You can select Accept all self-signed SSL certificates to automatically accept all self-signed TLS certificates.
-
Select Install OneAgent.
-
To check the deployment status, go to Deployment Status.
-
After installation is complete, go to Site extension tab in Kudu and select Restart Site.
-
Restart the App Service application to recycle the application's worker process
After restart, OneAgent starts monitoring your application automatically.
Install Dynatrace OneAgent site extension using an ARM template
Alternatively to the main installation method via Azure Portal, you can make the Dynatrace site extension part of your ARM templates.
Example configuration:
{"apiVersion": "2016-08-01","name": "[parameters('resourceName')]","type": "Microsoft.Web/sites","properties": {"name": "[parameters('resourceName')]","siteConfig": {"alwaysOn": true,"appSettings": [{ "Name": "DT_TENANT", "Value": "<Environment-ID>" },{ "Name": "DT_API_TOKEN", "Value": "<PaaS-Token>" },{ "Name": "DT_API_URL", "Value": "<Server-Url>" },{ "Name": "DT_SSL_MODE", "Value": "default" }]},"serverFarmId": "[resourceId('Microsoft.Web/serverfarms', parameters('resourceName'))]"},"dependsOn": ["[concat('Microsoft.Web/serverfarms/', parameters('resourceName'))]"],"location": "[parameters('location')]","resources": [{"apiVersion": "2016-08-01","name": "Dynatrace","type": "siteextensions","dependsOn": ["[resourceId('Microsoft.Web/sites', parameters('resourceName'))]"],"properties": { }}]}
all.If AlwaysOn isn't set to true, the installation of OneAgent is triggered on the start-up/first request to Kudu.
To check the deployment status, go to Deployment Status.
After installation is complete, go to Azure Portal and restart the App Function application to recycle the application's worker process. Immediately after restart, OneAgent will begin monitoring your application.
Automate the installation and update of Dynatrace OneAgent site extension with Kudu REST API
After you install the Dynatrace OneAgent site extension, you can use the Kudu REST API to automate installation and update of the Dynatrace OneAgent site extension. See the automation setup page on GitHub for details.
The root URL to access the REST API is https://<Your-AppService-Subdomain>.scm.azurewebsites.net/dynatrace/, where you need to replace <Your-AppService-Subdomain> with your own value. To authenticate, you can use either the user publishing credentials or the site-level credentials. See Accessing the Kudu service for details.
Method
Endpoint
Description
Response
GET
/api/status
Returns the current status of the OneAgent installation.
The returned "state" field can be:
NotInstalledDownloadingInstallingInstalledFailed
For automation, use isAgentInstalled and isUpgradeAvailable to determine whether OneAgent is installed and whether an upgrade is available.
{"state": "Installed","message": "OneAgent installed","version": "1.157","isAgentInstalled": true,"isUpgradeAvailable": false,"isFunction": false,"functionAppSettings": null}
GET
/api/settings
Returns the current settings, including Dynatrace credentials.
The value for apiUrl can be left empty for a SaaS environment.
{"apiUrl": "","apiToken": "<your-api-token>","environmentId": "<your-environment-id>","sslMode": "Default"}
PUT
/api/settings
Starts OneAgent installation with the given settings. These settings are stored only if the installation finishes successfully.
In the payload, you need to send the data in the format received by the GET /dynatrace/api/settings request.
If an update is available in the status request, this PUT request can be used to start the upgrade.
Empty response
Override OneAgent configuration
To override the default configuration, you can use the following parameters.
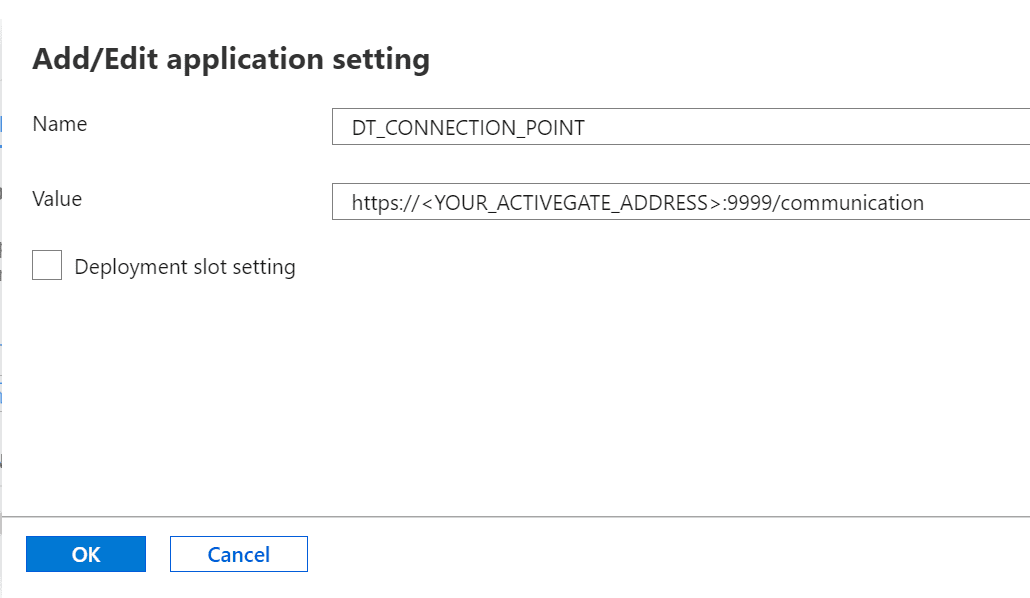
To add the DT_CONNECTION_POINT parameter
-
In Azure Portal, select the web function you want to monitor.
-
Select Settings > Configuration > Application Settings.
-
Select New application setting.
-
Enter the following key/value pair:
- Name:
DT_CONNECTION_POINT - Value:
https://<YOUR_ACTIVEGATE_ADDRESS>:9999/communication, making sure to replace<YOUR_ACTIVEGATE_ADDRESS>with your own value.

- Name:
-
Select OK to save the configuration.
Update OneAgent
Dynatrace doesn't provide OneAgent updates on Azure Functions automatically. To update OneAgent on Azure Functions, go to Azure Portal, browse to your site extension, and, if an update is available, select Update. You can monitor the progress until the update is finished.
Then restart Azure Functions to recycle the application worker process.
The extension provides its own REST API for automating OneAgent updates. See REST API for details.
Update the site extension
To update the site extension on Azure App Service, go to the Azure Portal, browse to your site extension, and, if an update is available, select Update.
An update to the site extension doesn't force an update to OneAgent.
When upgrading the extension from version 1.x to version 2.x, if you have Always On selected on your App Service, the upgrade of OneAgent is either triggered automatically, or on the first request to the UI extension. If you don't have Always On selected, you must restart App Service, so that the extension process starts.
Uninstall OneAgent
Removing the extension also removes OneAgent.
If the application is running at the time of removal, the extension recognizes the running application, taking care to not remove any Dynatrace artifacts to prevent issues with the application. Instead, only the extension including the configuration is removed, so that, on the next restart of the application, OneAgent is no longer active.
Monitoring consumption
See Serverless monitoring for details on monitoring consumption for Azure Functions.