Supported authentication methods in Synthetic Monitoring
- How-to guide
- 9-min read
Dynatrace Synthetic Monitoring offers various methods for monitoring web applications or API endpoints that require authentication. Read on for an overview of the most common scenarios and the appropriate methods to use.
Browser monitors
The HTTP authentication and certificate authentication methods are supported for both single-URL browser monitors and browser clickpaths.
The web form (HTML-based) is supported only for browser clickpaths.
Web form (HTML-based) authentication for web applications
The most common scenario is a webpage with web form (HTML-based) authentication, which requires you to enter a username and password.
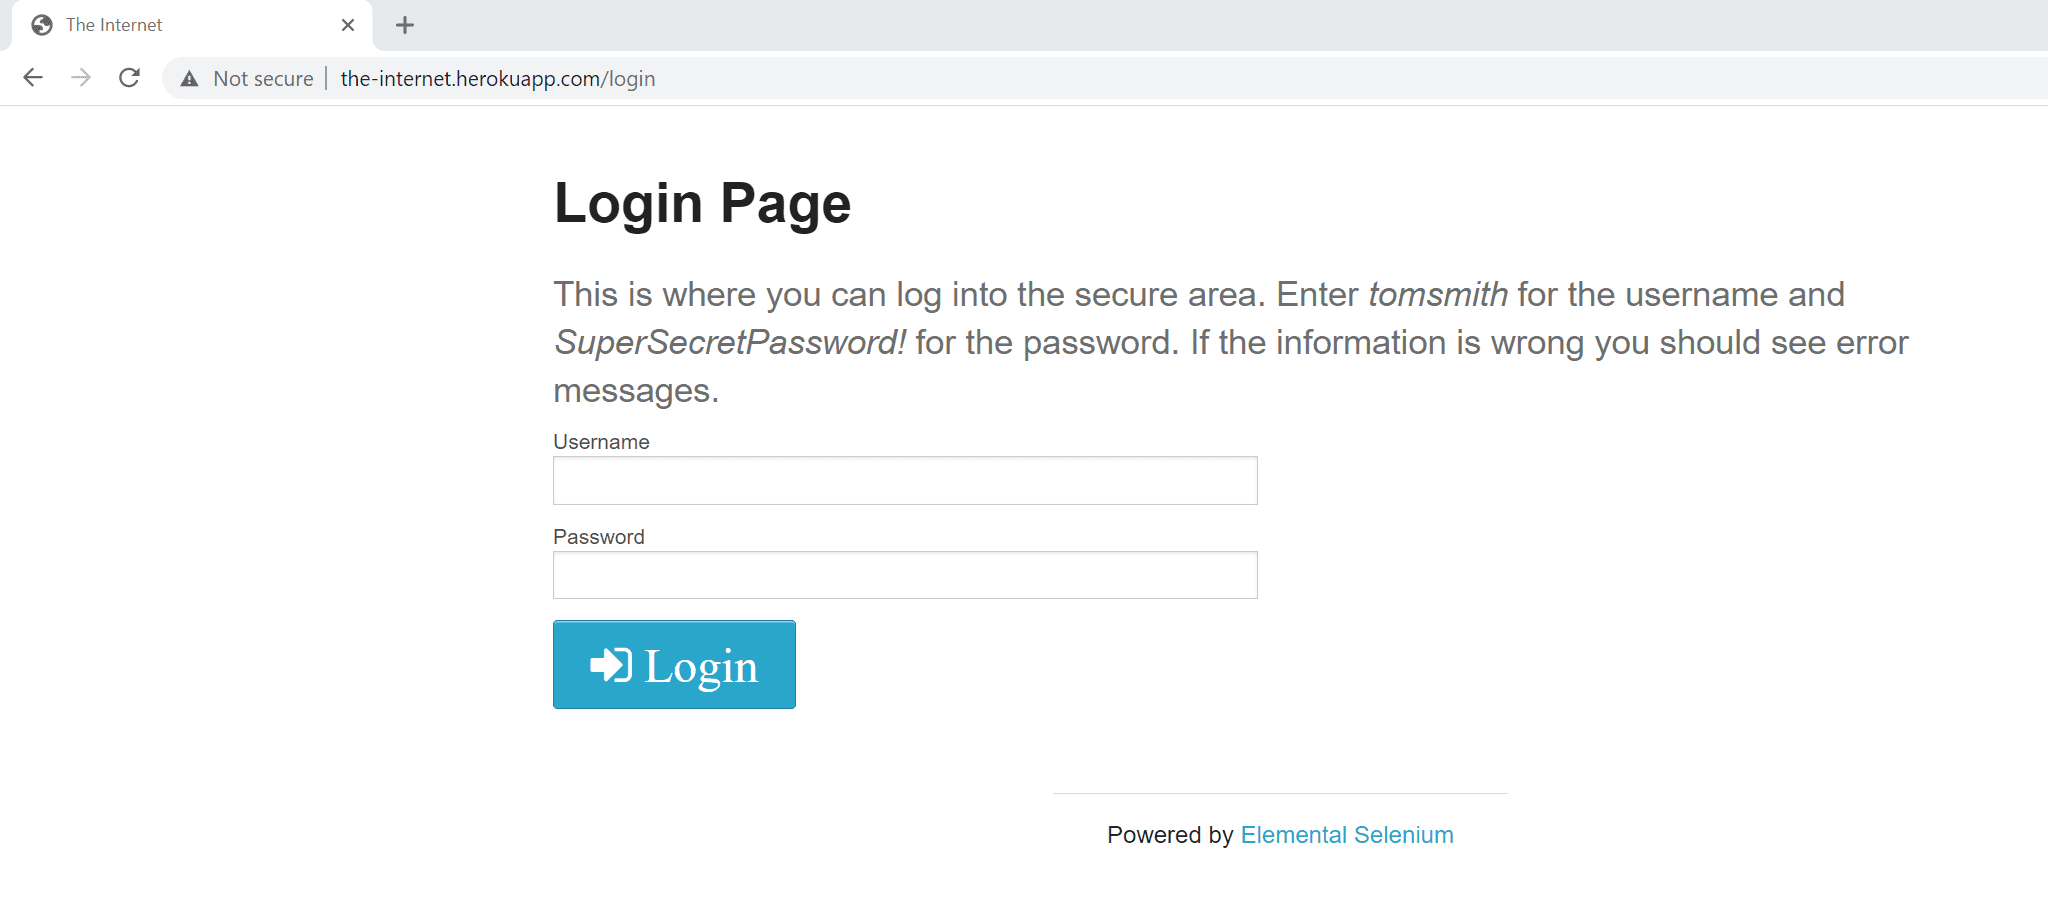
You can monitor a transaction in a browser clickpath by recording credentials in a web form.
- Go to Synthetic Classic > Create a synthetic monitor > Create a browser monitor.
- Specify the monitor name, starting URL, and other options before selecting Record clickpath at the bottom of the page.
- While recording, manually enter the username and password for authentication; Dynatrace automatically captures the credentials.
- After recording, you have the option of storing the credentials to the credential vault.
- Complete the configuration of your clickpath.
Single-URL monitors with web form authentication
Deprecated
Web form authentication is no longer supported for the single-URL browser monitors. You can instead create browser clickpath monitors for the test scenarios that require web form login. Your previously configured single-URL monitors will run as before, but we recommend to re-record them as clickpaths to clearly separate each step of the login process.
Re-recording is required if you want to modify any part of your monitor's configuration. You can no longer save changes in their current format.
Starting from Dynatrace version 1.324+, the single-URL monitors with the web form login will be automatically updated by adding a free JavaScript step to support the login process.
Basic, digest, NTLM, or Negotiate (Kerberos) authentication for web applications
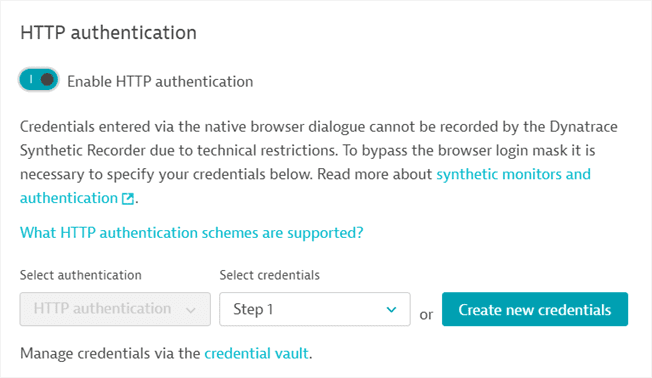
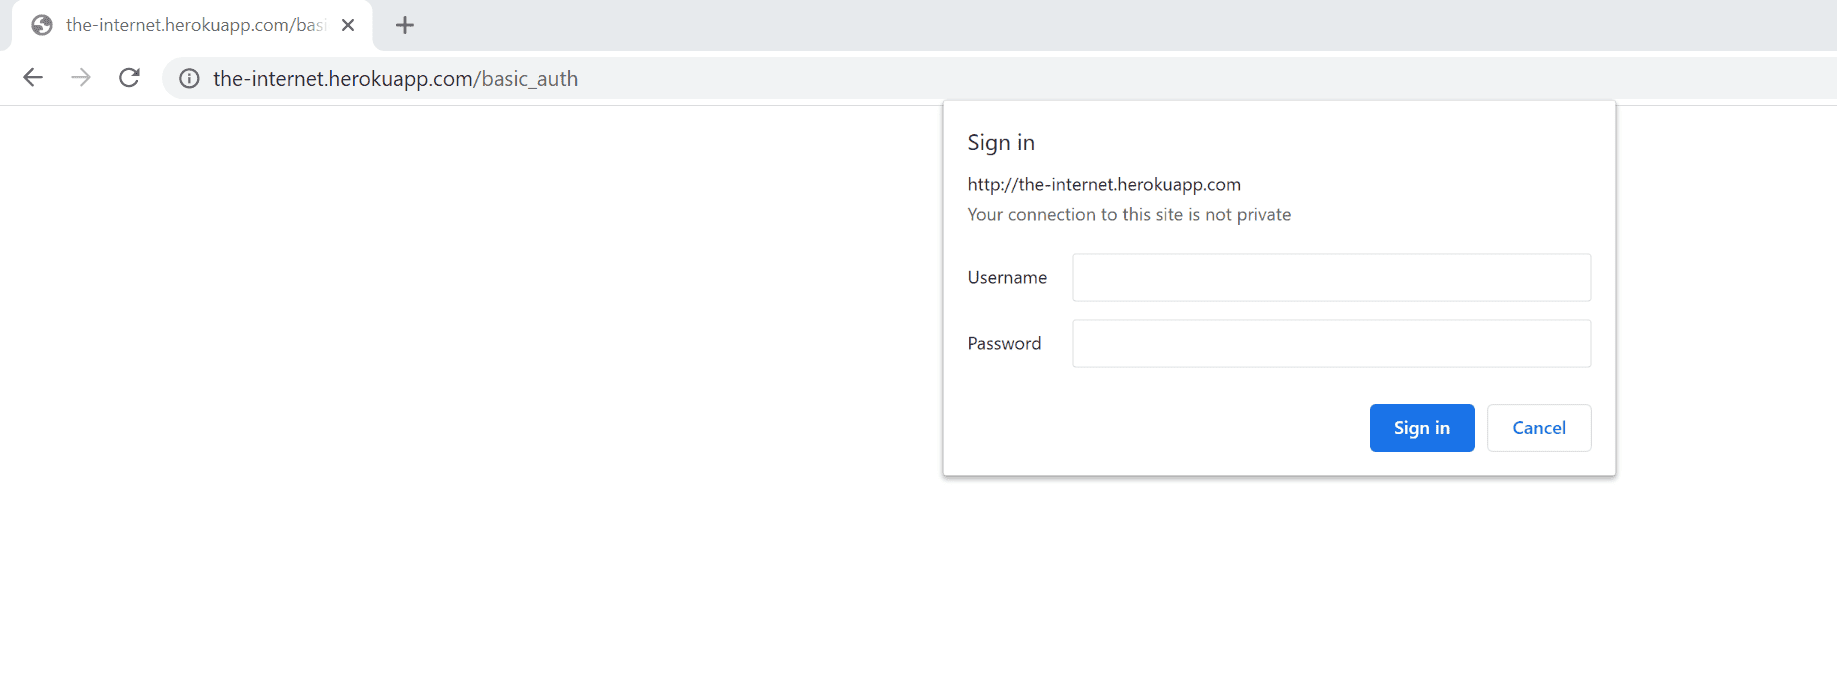
If you need to monitor a page with a browser-native dialog box (that's not part of the web application) to authenticate (as in the image below), it's likely that the basic, digest, NTLM, or Negotiate authentication methods are used in the background.
Negotiate (Kerberos) is supported for browser monitors executed in private locations on
- Windows
- ActiveGate version 1.311+ Linux
- ActiveGate version 1.311+ Containerized
- Go to Synthetic Classic > Create a synthetic monitor > Create a browser monitor.
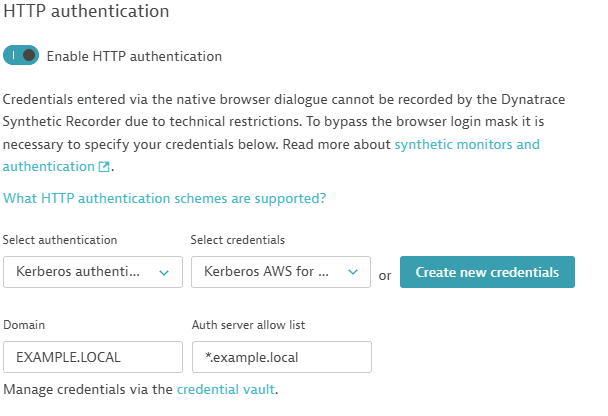
- In Additional options, turn on Enable global login authentication.
- Select either:
- HTTP authentication if the login happens via the native browser dialogue
- Kerberos authentication if the login happens via Kerberos protocol. Fill additional required fields:
- Domain: User's domain name
- Auth server allow list: List of allowed servers for Kerberos authentication. Wildcards can be used. Exact details are provided in the Chrome Enterprise documentation
- Either use an existing credential from the credential vault (Select credentials) or Create new credentials.
- Complete the configuration of your single-URL browser monitor.
Supported username formats
- Browser monitors:
<username>and<domain>\<username> - HTTP monitors:
<username> - NTLM authentication in browser and HTTP monitors:
<username>
Client certificate authentication for web applications
Certificate authentication is available for browser monitors executed from any public location and on Linux-based private locations. Once you set up your browser monitor, you need to specify client certificate details in the Advanced setup tab of monitor settings in edit mode.
-
Go to Synthetic Classic > Create a synthetic monitor > Create a browser monitor.
-
Specify the monitor URL and name.
You cannot specify a client certificate when initially setting up a single-URL browser monitor.
-
Complete the configuration of your single-URL browser monitor.
Next, in edit mode, add client certificates for browser monitor execution.
-
Select the Advanced setup tab in browser monitor settings.
-
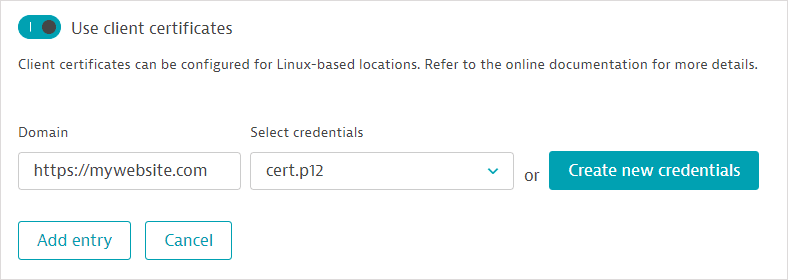
Turn on Use client certificates.
-
Select Add client certificate.
-
Enter the Domain that the certificate is valid for.
-
Select a credential from the list of certificate credentials displayed. Alternatively, select Create new credential to upload and use a new client certificate. Any certificate credential you create is automatically designated as owner only and stored in the credential vault.
You can specify and upload certificate files in PFX, P12, or PEM format.
-
Select Add entry.
-
Repeat these steps to add multiple certificates for use in your clickpath. However, each certificate must be tied to a single domain.
-
Save changes.
HTTP monitors
HTTP monitors support basic, NTLM, token, OAuth 2.0, or certificate-based authentication.
Basic or NTLM authentication for endpoints
-
Go to Synthetic Classic > Create a synthetic monitor > Create an HTTP monitor.
-
Select Add HTTP request and choose the HTTP request type.
-
In the Additional options of the request, Set authentication/authorization.
-
Select Basic authentication or NTLM.
-
Either use an existing credential from the credential vault (Select credentials) or Create new credentials.
Dynatrace automatically generates the required
Authorizationheader with the information you've provided.Supported username formats
- Browser monitors:
<username>and<domain>\<username> - HTTP monitors:
<username> - NTLM authentication in browser and HTTP monitors:
<username>
- Browser monitors:
-
Finish configuring your HTTP monitor.
Bearer or token authentication for endpoints
-
Go to Synthetic Classic > Create a synthetic monitor > Create an HTTP monitor.
-
Select Add HTTP request and choose the HTTP request type.
-
In the Additional options of the request, Set additional HTTP headers.
-
Select Add header.
-
Fill out the header, for example, set:
Header name =
AuthorizationHeader value =
Bearer <your-token>or
Header name =
AuthorizationHeader value =
Api-Token <your-token> -
Finish configuring your HTTP monitor.
OAuth 2.0 authorization for endpoints
OAuth 2.0 authorization is available for HTTP monitors and is most commonly used when querying API endpoints. Dynatrace provides the OAuth2 authorization request type, which is a specialized HTTP request template for OAuth 2.0 authorization requests.
You first need to set up an OAuth 2.0 request for an access token, which you then use in all subsequent HTTP requests in your monitor that queries the API endpoint. The returned token is not stored to the credential vault, but it's easily accessible as an autocomplete option in your subsequent HTTP requests.
- Go to Synthetic Classic > Create a synthetic monitor > Create an HTTP monitor and provide a Name.
- Select Add HTTP request and choose the OAth2 authorization request type.
- Enter the URL from which you're requesting an authorization token (Access token URL) and request Name.
- Select Add HTTP request to view expanded request settings. Note that the OAuth 2.0 request is automatically created as a
POSTrequest. - Fill out or edit these important settings in the request details.
-
Depending on how your authentication server is set up, opt to Add authorization data to the Request body or Request URL. Fill out the POST parameters (
grant_Type,scope,client_id,username, andpassword) in the Request body or Request URL. You can add or modify parameters as needed.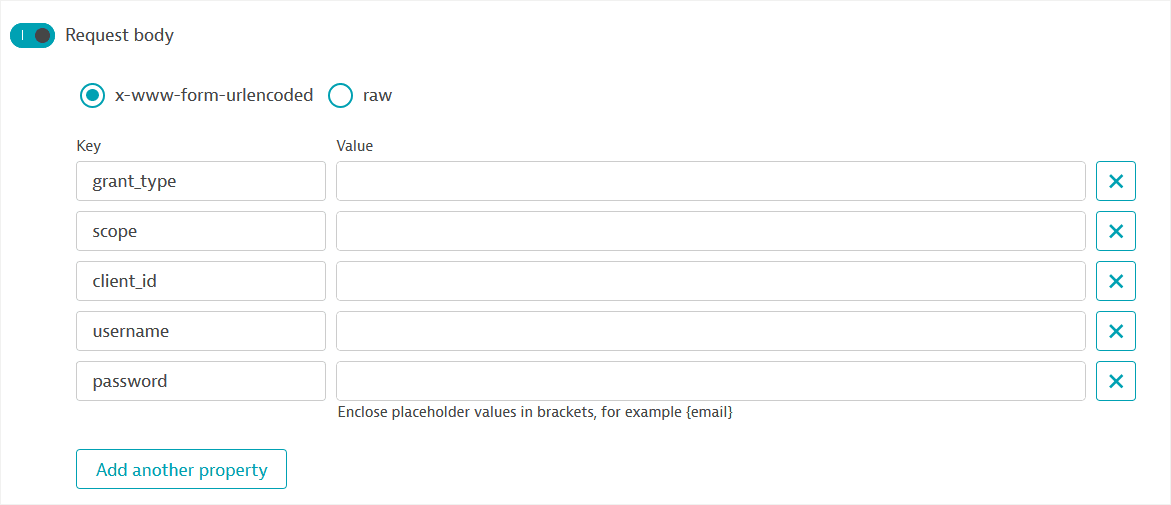

-
A post-execution script is automatically enabled, where:
- The request fails if the returned status code is not
200. - The
api.fail()method defines the Failure message that appears in case of failure in the Events card on the HTTP monitor details page and in execution details. - If the request is successful, the response body, which is a JSON-formatted string, is stored in a JavaScript object (called
bearToken-2in this example). - The
api.info()method sends information to a log file, which is accessible on private Synthetic locations.
Custom log messages also appear in the
customLogsattribute in HTTP monitor execution details.
- The request fails if the returned status code is not
-
Set token request authentication enables you to specify additional authentication details (Basic authentication, NTLM, or Kerberos) for the server that the OAuth application sits behind.
-
For subsequent HTTP requests
- Create an additional HTTP request for the endpoint you need to monitor (Add HTTP request).
- In the Additional options of the second request:
-
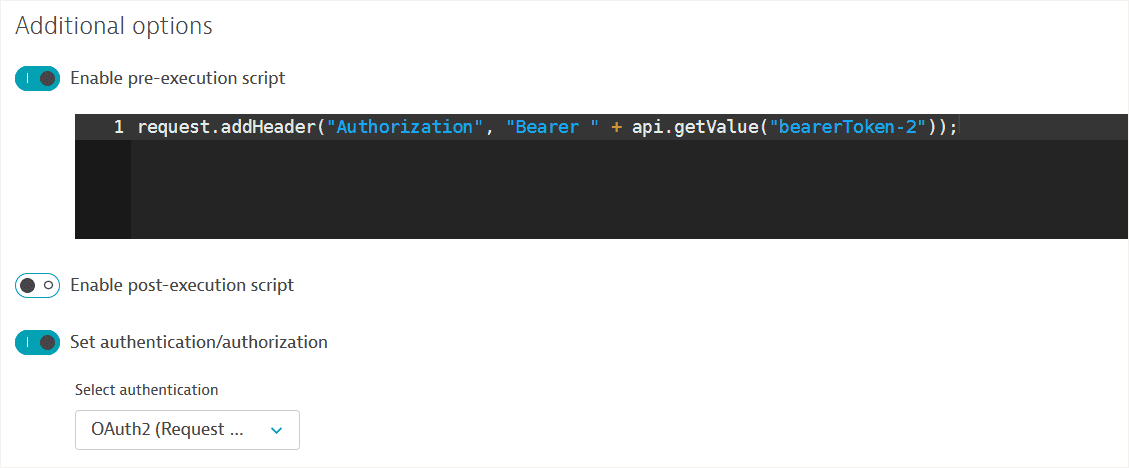
Enable Set authentication/authorization and select the OAuth2 method. Note that this option is only available if you've first created an OAuth 2.0 authorization request (described above).
An autogenerated pre-execution script referencing the OAuth token received in the request created above is displayed.
-
As an alternative, set an HTTP
Authorizationheader with the JavaScript object containing the OAuth token as the Header value.
-
- Finish configuring your HTTP monitor.
Client certificate authentication for endpoints
- Go to Synthetic Classic > Create a synthetic monitor > Create an HTTP monitor and provide a Name.
- Select Add HTTP request and choose the HTTP request type.
- In the Additional options of the request, Add client certificate.
- Either use an existing certificate from the credential vault (Select credentials) or Create new credentials.
- Finish configuring your HTTP monitor.
To assure full mutual authentication, disable Accept any SSL certificate when using certificate authentication.
 Synthetic Classic