AI data governance with Amazon Bedrock
- Latest Dynatrace
- Tutorial
- 5-min read
Emerging AI regulations such as the European Union Artificial Intelligence Act provide the means to deploy a comprehensive strategy combining organizational and AI model oversight, covering everything from model training to AI/user interactions.
When running your AI models through Amazon Bedrock, Dynatrace helps you to comply with regulatory record-keeping requirements.
What you will learn
In this tutorial, we first configure your model training and deployment observability. Afterward, we configure your application to observe user inference requests.
Steps
The general steps are as follows:
- Configure Dynatrace
- Configure your AWS account to send data to your Dynatrace tenant
- Configure your application
See below for the details of each step.
 Configure Dynatrace
In this step, we create a Dynatrace token and we configure OpenPipeline to retain the data for 5+ years.
Create Dynatrace token
To create a Dynatrace token
- In Dynatrace, go to Access Tokens.
To find Access Tokens, press CTRL+K to search for and select Access Tokens. - In Access Tokens, select Generate new token.
- Enter a Token name for your new token.
- Give your new token the following permissions:
- Search for and select all of the following scopes.
- Ingest bizevents (
bizevents.ingest) - Ingest metrics (
metrics.ingest) - Ingest logs (
logs.ingest) - Ingest events (
events.ingest) - Ingest OpenTelemetry traces (
openTelemetryTrace.ingest)
- Ingest bizevents (
- Select Generate token.
- Copy the generated token to the clipboard. Store the token in a password manager for future use.
You can only access your token once upon creation. You can't reveal it afterward.
Configure OpenPipeline
The default retention period for BizEvents is 35 days. Depending on the regulations, this might not be enough.
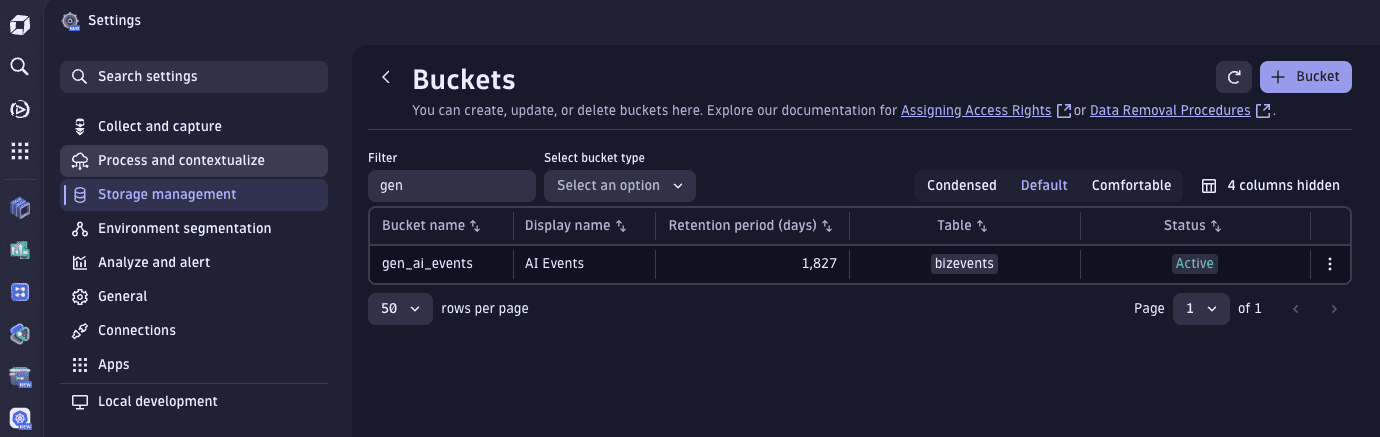
To change the retention period, you can create a custom Grail bucket.
- Go to Settings > Storage management > Bucket storage management.
- In Bucket Storage Management, select Bucket.
- On New bucket:
- Set Bucket name (for example,
gen_ai_events) - Set Retention period (in days) (for example,
1,825, which is about 5 years) - Set Bucket table type to
bizevents
- Set Bucket name (for example,
- Select Save.
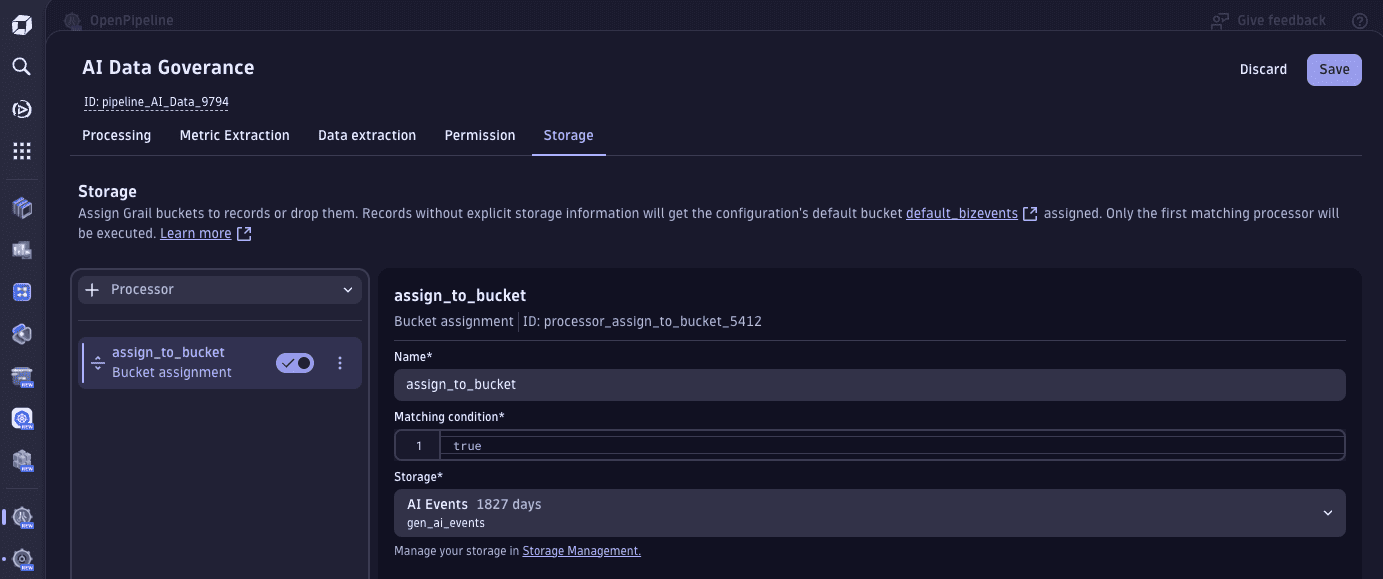
When the bucket is available, we can configure OpenPipeline to redirect AI-relevant events to storage there.
- Go to
 Settings > Process and contextualize > OpenPipeline > Business events > Pipelines.
 - On the Pipelines tab, select Pipeline and name your pipeline (for example,
AI Data Governance). - On the Storage tab, select Processor > Bucket assignment.
- Configure the processor:
- Enter a Name for the processor
- Set Matching condition to
true - Set Storage to the bucket you created in the previous procedure
- Select Save.
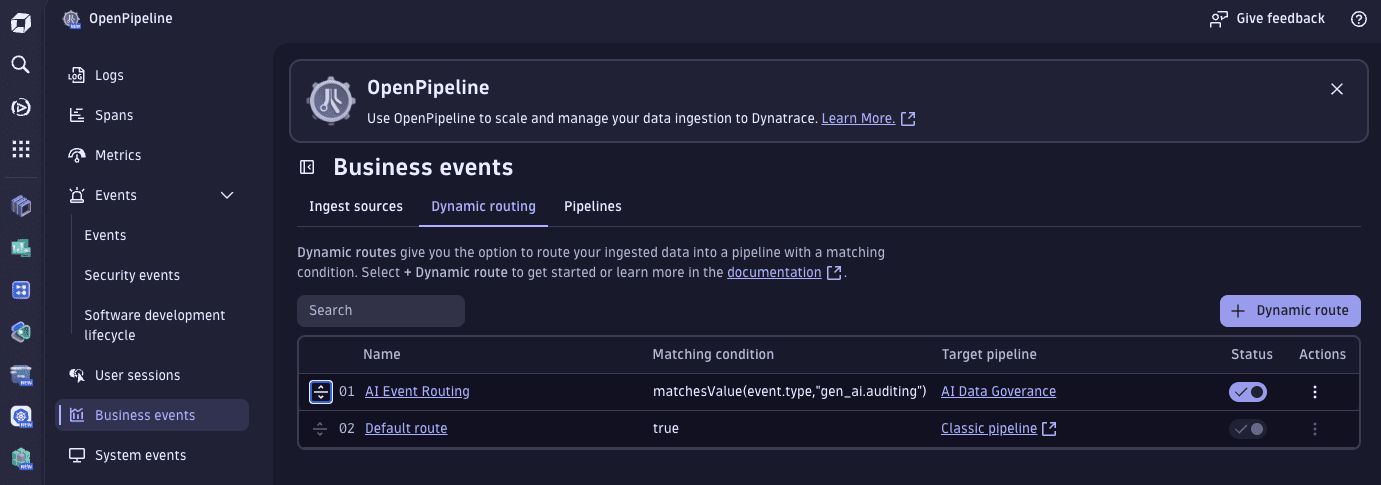
Finally, we route the ingestion of AI events to the pipeline.
- Still in OpenPipeline > Business events, select the Dynamic routing tab.
- On the Dynamic routing tab, select Dynamic route to Add a new dynamic route.
- Enter a Name for the new route (for example,
AI Event Routing) - Set Matching condition to
matchesValue(event.type,"gen_ai.auditing") - Set Pipeline to the pipeline you created in the previous procedure.
- Enter a Name for the new route (for example,
- Select Add.
- Select Save.
Finally, to mark it as the first pipeline to trigger, drag it up to be the first row in the table.
 Configure your AWS account
Amazon Bedrock emits events for every configuration action executed, such as when you deploy a new model or when the fine-tuning of your model finishes.
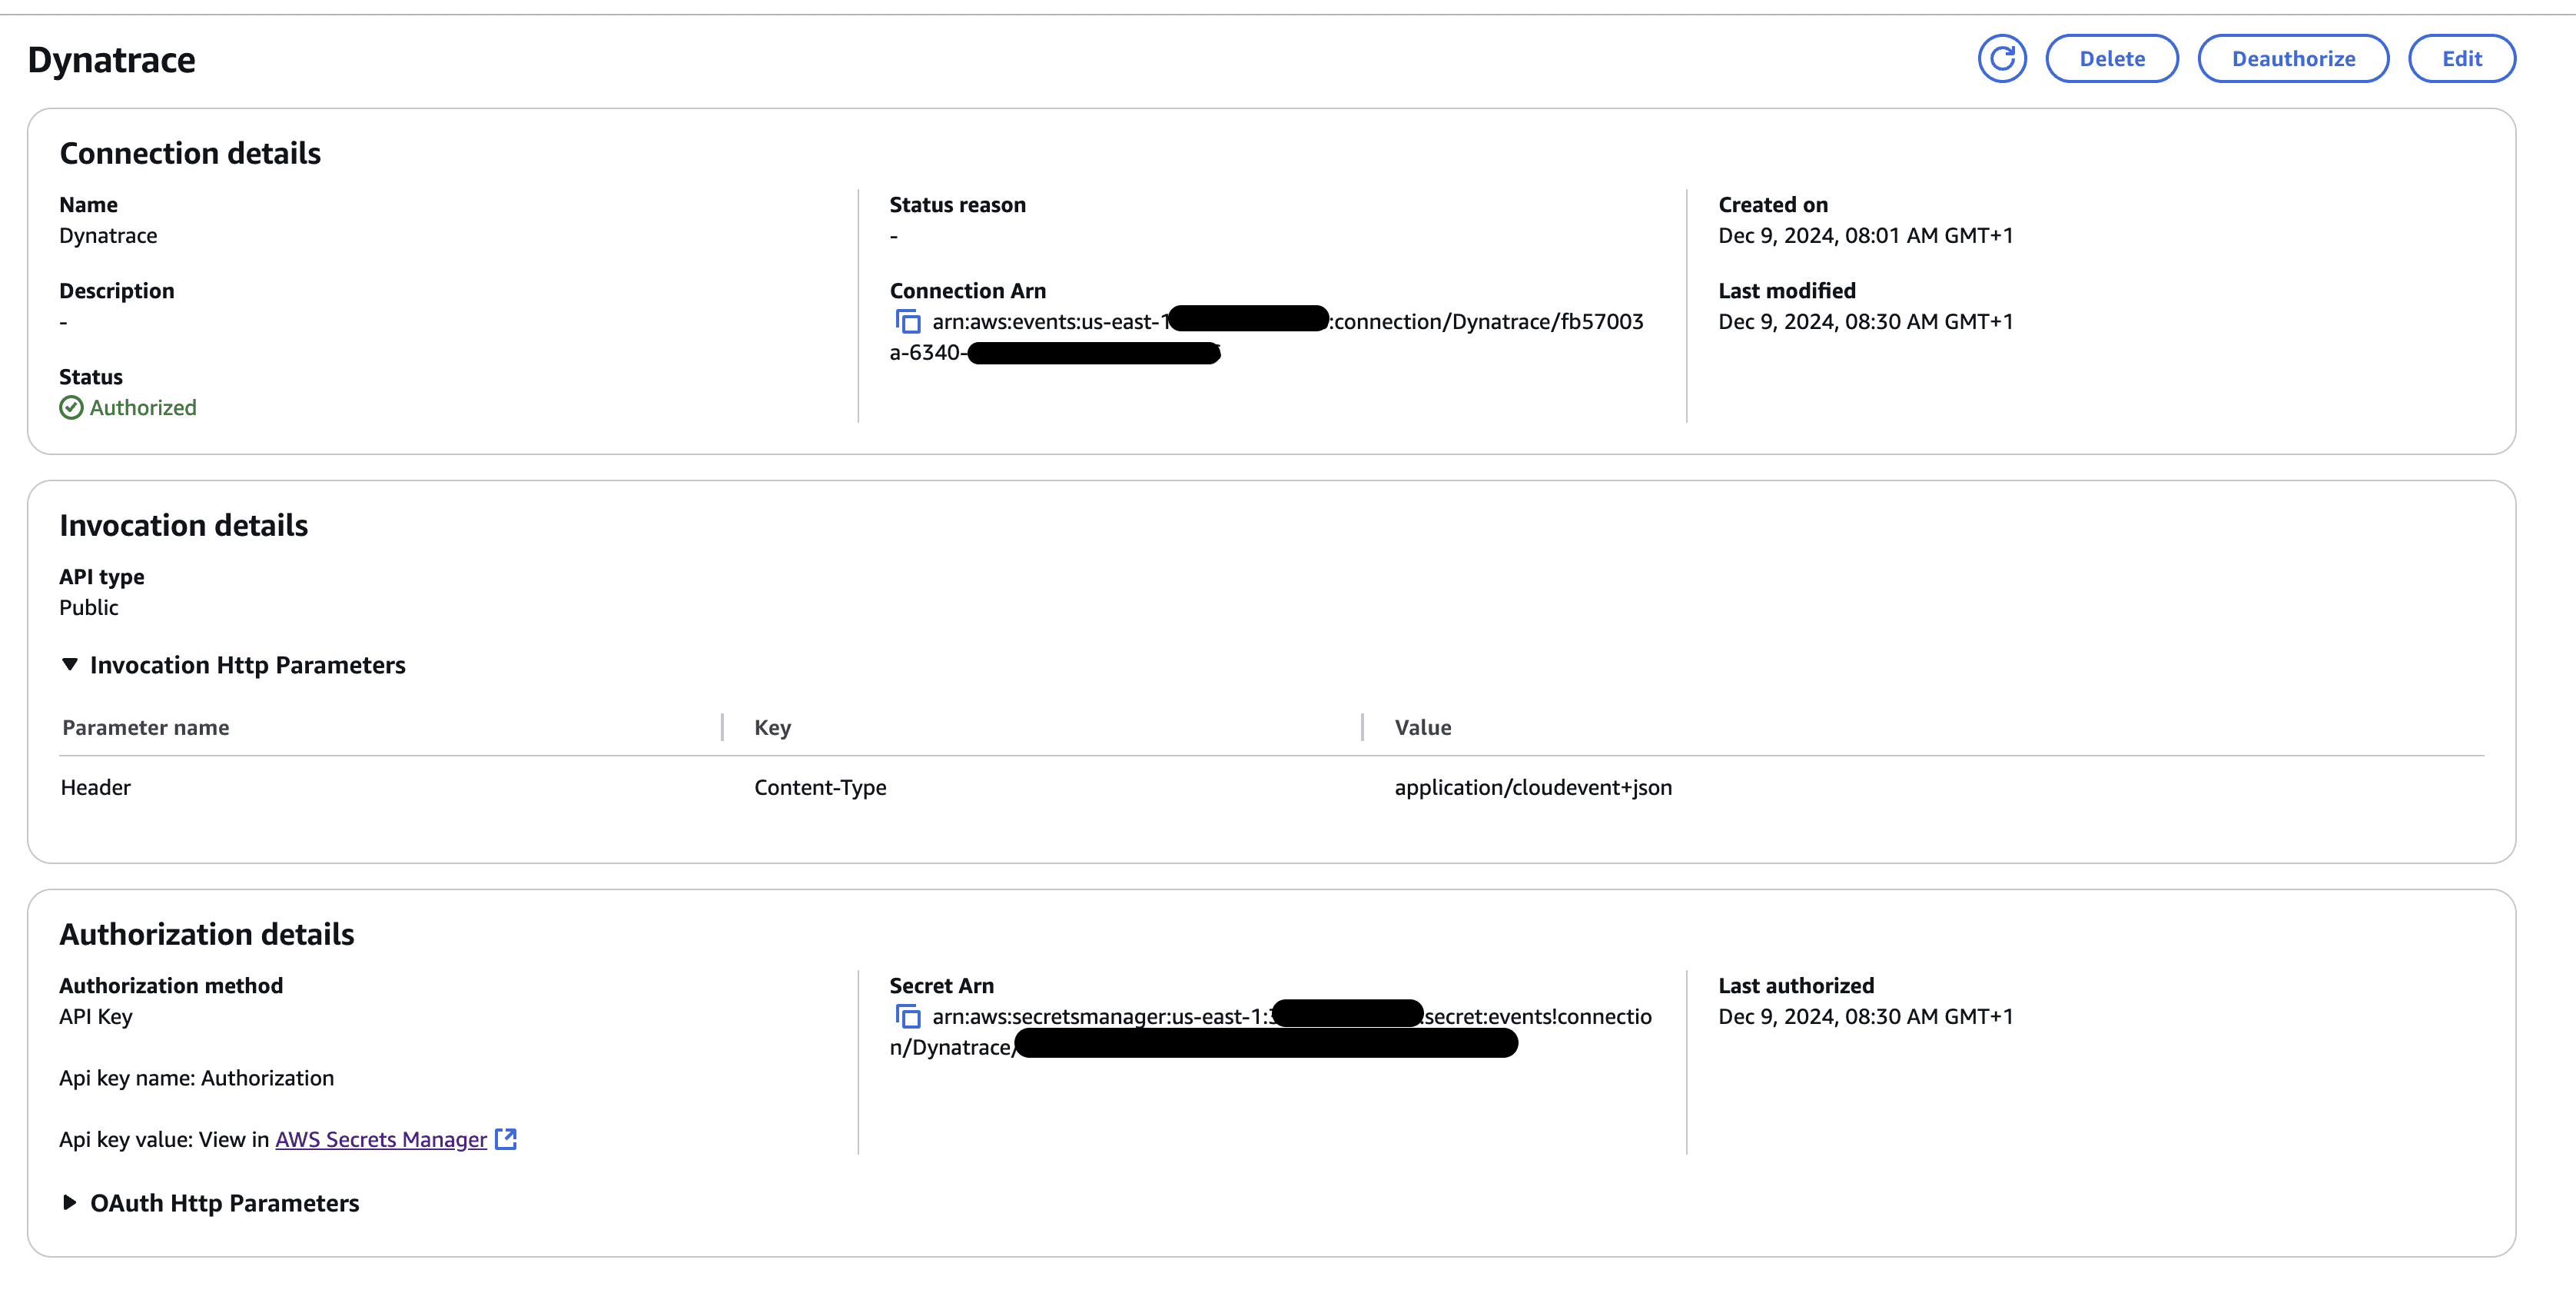
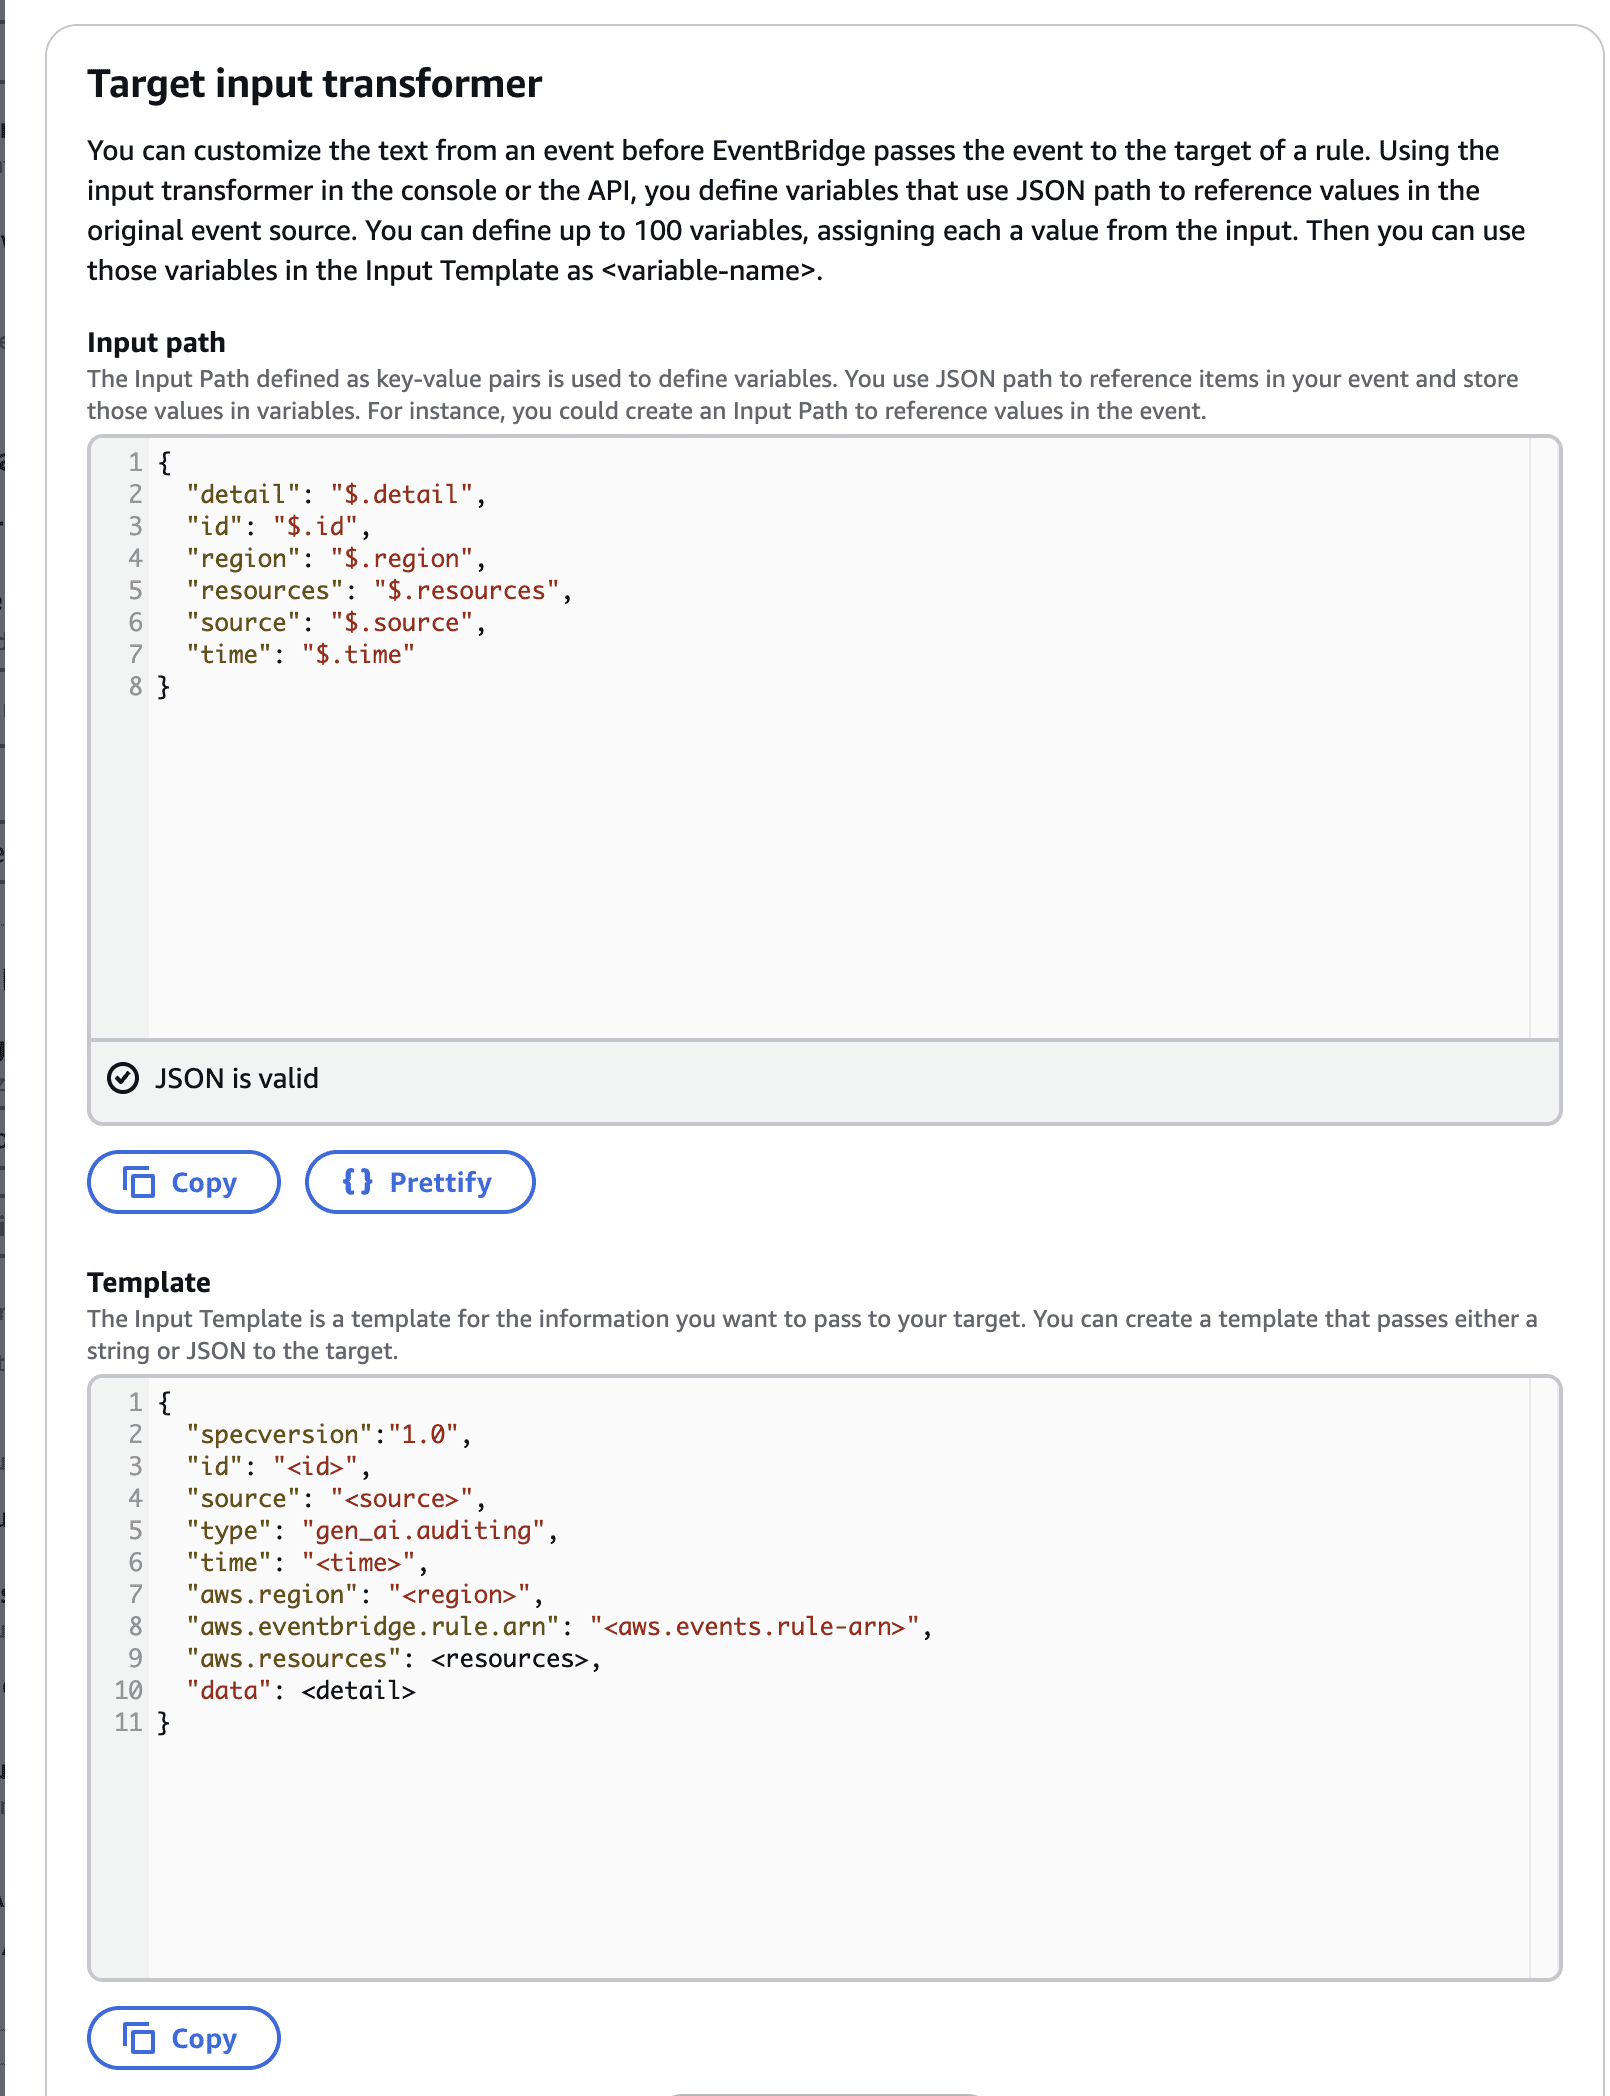
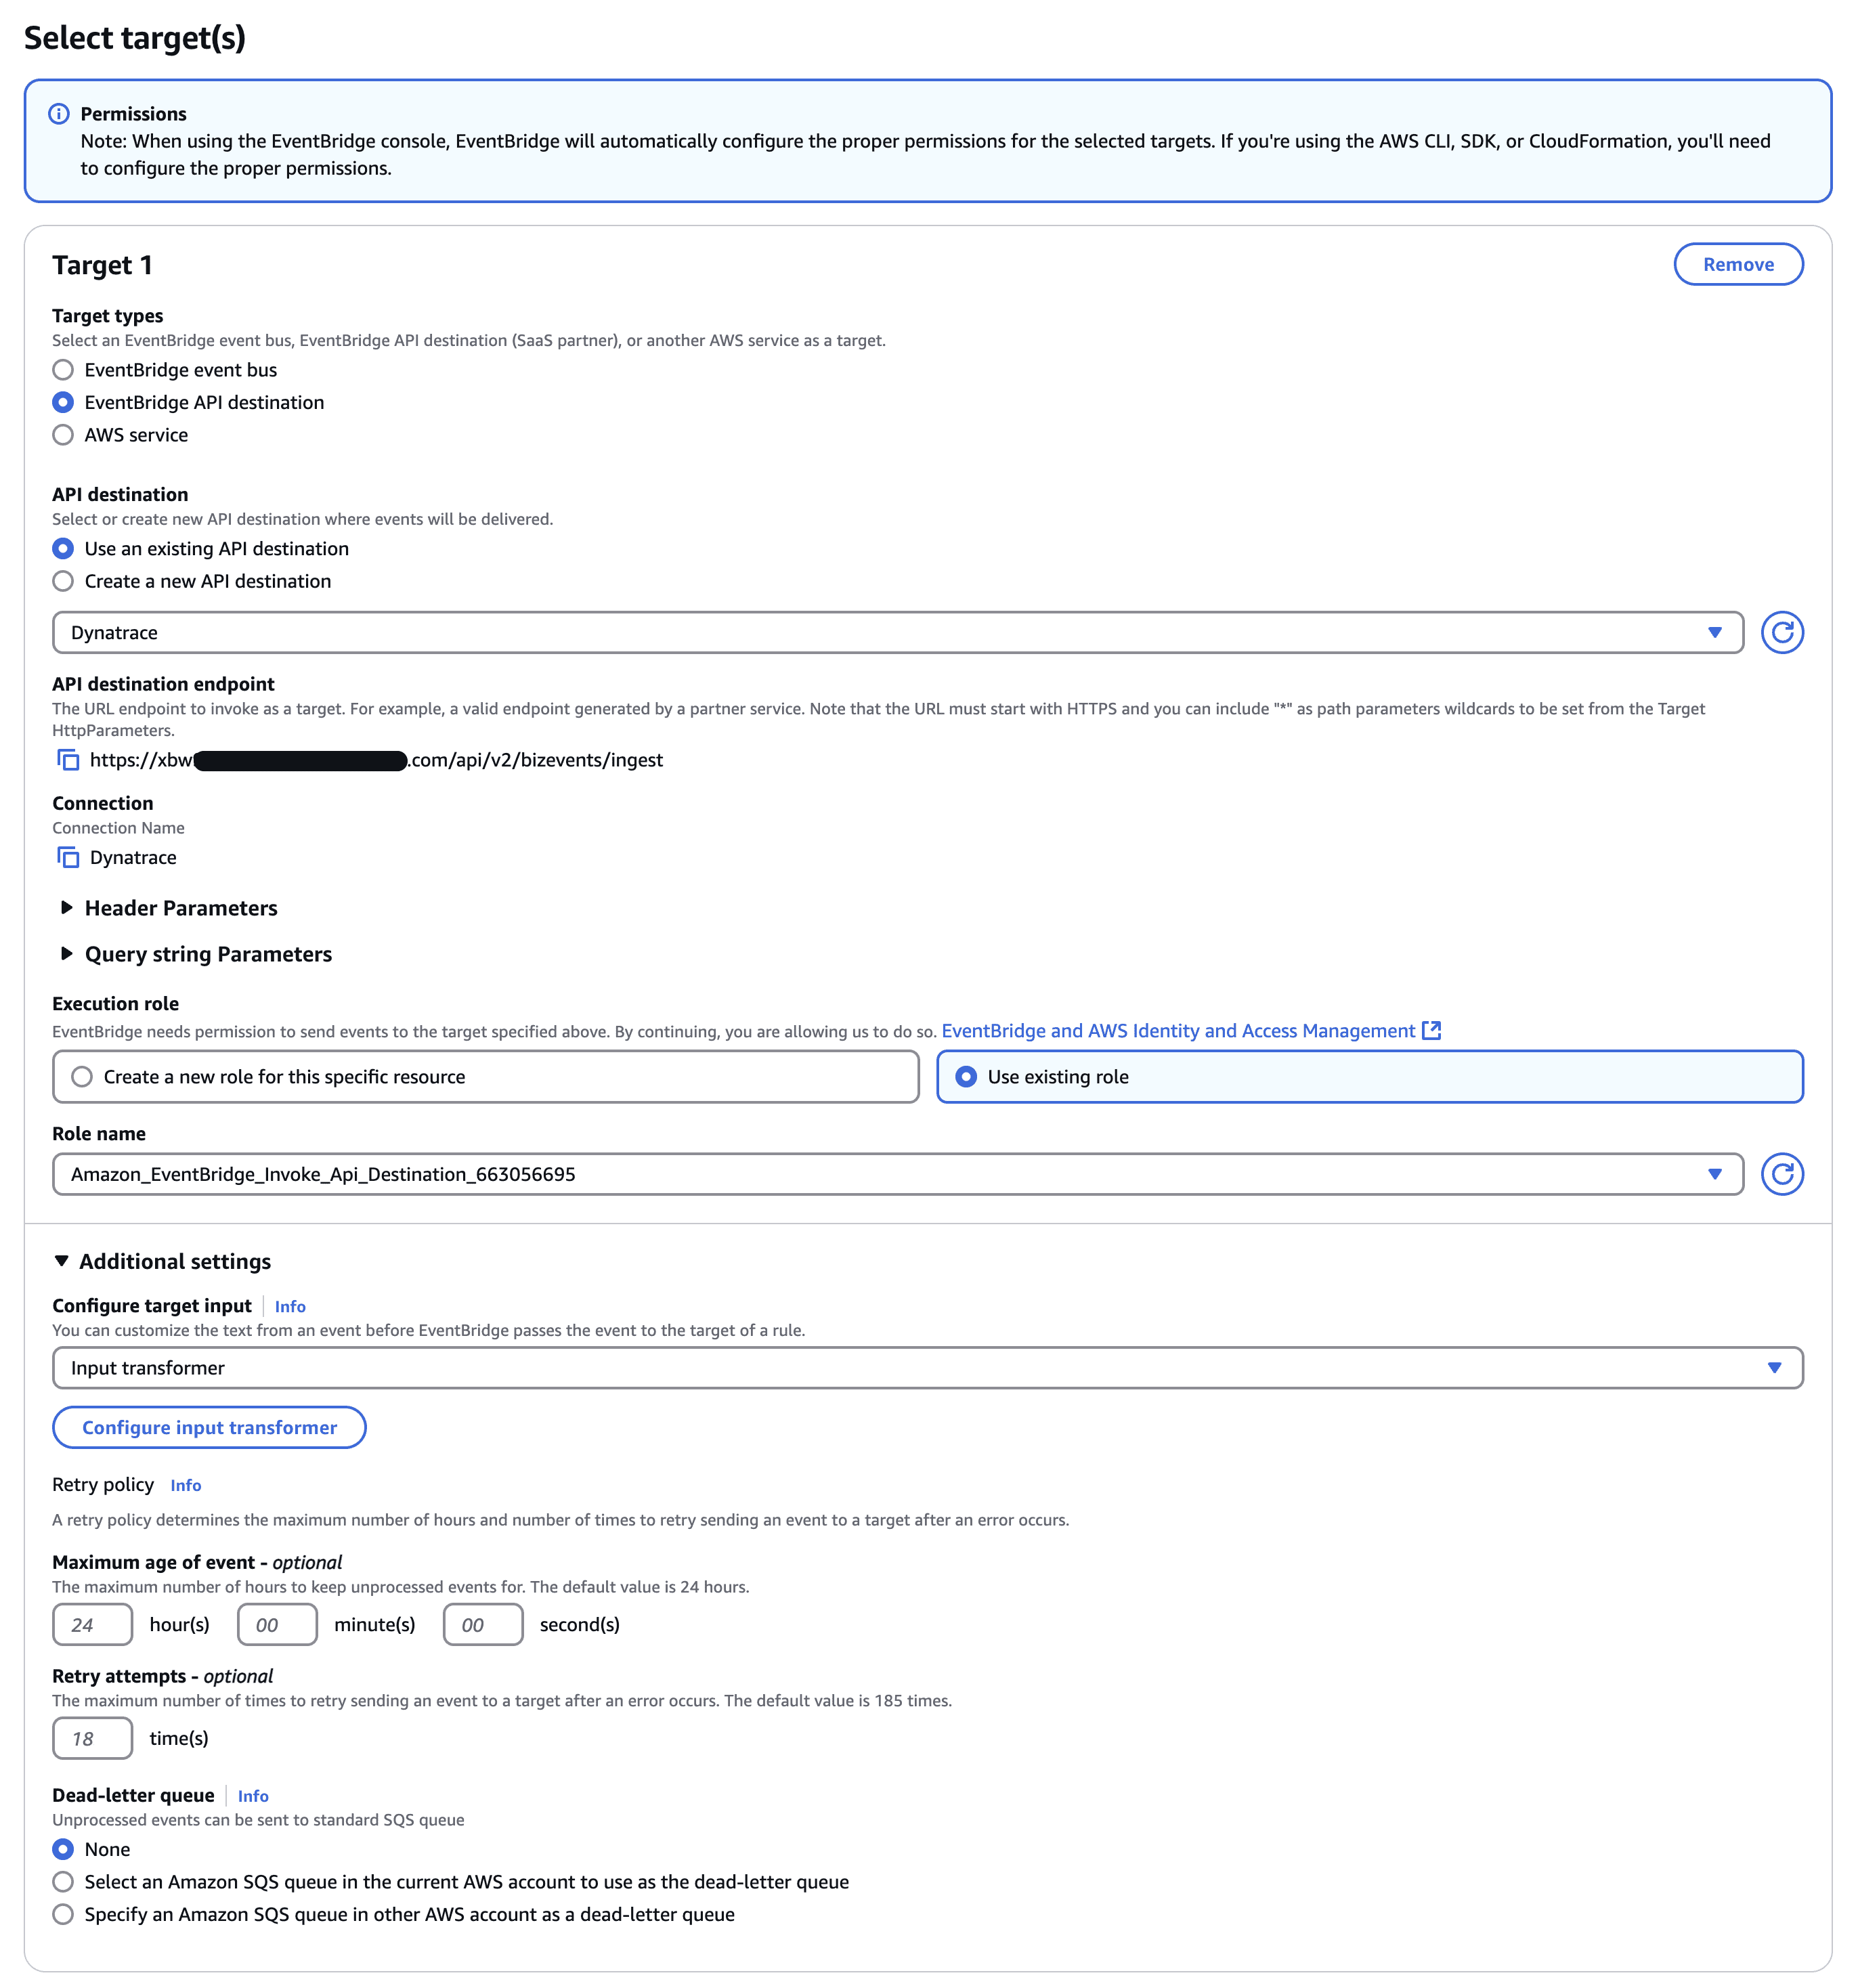
We can set up a rule to forward these events to Dynatrace. Please refer to our integration with Amazon EventBridge using BizEvent to configure the rule.
The only change is in the InputTemplate field, where the property "type" should be set to gen_ai.auditing. This change is required to match the values that OpenPipeline uses to redirect the events to our Grail bucket.
Expand to see how the AWS configuration should look
 Configure your application
We can leverage OpenTelemetry to provide auto-instrumentation that collects traces and metrics of your AI workloads, particularly our fork of OpenLLMetry.
The libraries utilized in this sample use case are currently under development and are in an alpha state. They may contain bugs or undergo significant changes. Use at your own risk. We highly value your feedback to improve these libraries. Please report any issues, bugs, or suggestions on our GitHub issues page.
To install, use the following command:
pip install -i https://test.pypi.org/simple/ dynatrace-openllmetry-sdk==0.0.1a4
Afterward, add the following code at the beginning of your main file:
from traceloop.sdk import Traceloopheaders = { "Authorization": "Api-Token <YOUR_DT_API_TOKEN>" }Traceloop.init(app_name="<your-service>",api_endpoint="https://<YOUR_ENV>.live.dynatrace.com/api/v2/otlp",headers=headers)
And that's it! 
Now you can:
- Fetch all the user/AI interactions, training status, and more on demand.
- Use Notebooks
 or Dashboards
 to create data-driven documents for custom analytics on it.
 OpenPipeline