Rack-aware conversion using replication
- How-to guide
- 4-min read
The replication expansion method is useful for small Dynatrace Managed Clusters where one node can contain a full replica. If your current metric storage (Cassandra database) per node is more than 1 TB, use the rack-aware conversion using restore method. You can use existing nodes to progressively (one after another) reinstall them with the rack-aware parameter. Optionally, you can use additional hardware as new nodes and remove one node while installing a new node with the rack-aware parameter.
The advantage of this approach is that it doesn't affect Managed Cluster availability. To maintain Managed Cluster availability, Dynatrace Managed uses its native replication methods to preserve data. Removing and adding a node to the Managed Cluster takes time. The duration depends on the size of your metric storage and the speed of your disk or network. Some cluster operations may take even one or two days. Dynatrace Managed will prevent all other cluster operations during that time (adding and removing nodes, upgrading, and backup). If you choose to perform reinstallation on the existing host, wait 72 hours before reattaching that host to the Managed Cluster.

 Preparation
-
Prepare the Cassandra database to spread replicas around your Managed Cluster (Python 2.7 is required).
This step applies only to Dynatrace Managed version 1.304 and earlier.
On one of the existing nodes, alter the keyspace to change the snitch settings using Cassandra Query Language (CQL):
sudo <managed-installation-dir>/cassandra/bin/cqlsh <node_IP>Where
<managed-installation-dir>is a directory of Dynatrace Managed binaries and<node-IP>is the current node's IP (node that you are currently using).The CQL shell opens:
Connected to 00aa0a0a-1ab1-11a1-aaa1-0a0a0aa1a1aa at xx.xxx.xx.xxx:9042.[cqlsh 5.0.1 | Cassandra 3.0.23 | CQL spec 3.4.0 | Native protocol v4]Use HELP for help.cqlsh>Then, run:
ALTER KEYSPACE ruxitdb WITH REPLICATION = {'class': 'NetworkTopologyStrategy', 'datacenter1':3};When finished, enter
exit. -
Prepare the Managed Cluster for adding nodes in different racks.
On each existing node, edit
/etc/dynatrace.confand adjust the following settings:CASSANDRA_NODE_RACK = rack1CASSANDRA_NODE_RACK_DC = datacenter1ELASTICSEARCH_NODE_RACK = rack1Run
sudo /opt/dynatrace-managed/installer/reconfigure.shto apply configuration changes for the Managed Cluster node.Run sequentiallyRun the
reconfigure.shscript sequentially, because it triggers process restarts and there's a risk of Cassandra database downtime if it's run on multiple nodes in parallel. -
Prepare new nodes.
Make sure the disk partition allocated for Cassandra storage on the new node is sufficient to contain the entire Cassandra database (with margin for compaction and new data). The disk size should be at least double the combined Cassandra storage of all existing nodes. Keep Cassandra data on a separate volume to avoid disk space issues caused by other data types.
-
Verify that rack settings map correctly to physical racks and data centers. Ideally, there should be an equal number of nodes in each rack at the end of the whole conversion.
 Extend the Managed Cluster into new racks
During the initial Dynatrace Managed deployment, all nodes by default are grouped in a single default rack placed in a default data center. Even if your deployment isn't rack-aware, all nodes already are in datacenter1 rack1. To avoid adding a new node to the default rack, don't use the rack1 as a --rack-name parameter value for the new rack.
If you convert the Managed Cluster in the same data center, use the default datacenter1 parameter value.
Follow these steps to extend the Managed Cluster into new racks.
If the node has difficulties maintaining the data load, you can temporarily stop the Dynatrace Managed server process on that node and free more CPU cycles for Cassandra.
-
Add the new node with rack parameters to the Managed Cluster.
Use the Add a Managed Cluster node procedure and append the
--rack-nameand--rack-dcparameters to the installation command. For example:/bin/sh dynatrace-managed-installer.sh --seed-auth abcdefjhij1234567890 --rack-name rack2 --rack-dc datacenter1Wait until the node fully joins the Managed Cluster. Depending on your database size, Cassandra bootstrapping may take several days.
-
Add another node to the same rack, with the same rack parameters.
For the second node, Cassandra bootstrapping is expected to be quicker.
-
Continue adding new nodes to
rack2. Once you have enough nodes inrack2(1/3 of the target Managed Cluster size), begin adding new nodes with rack parameters torack3minding the disk space requirements. -
Remove the original nodes that were configured without rack awareness (in the default
rack1rack) once you have enough nodes inrack3.
 Verify the conversion
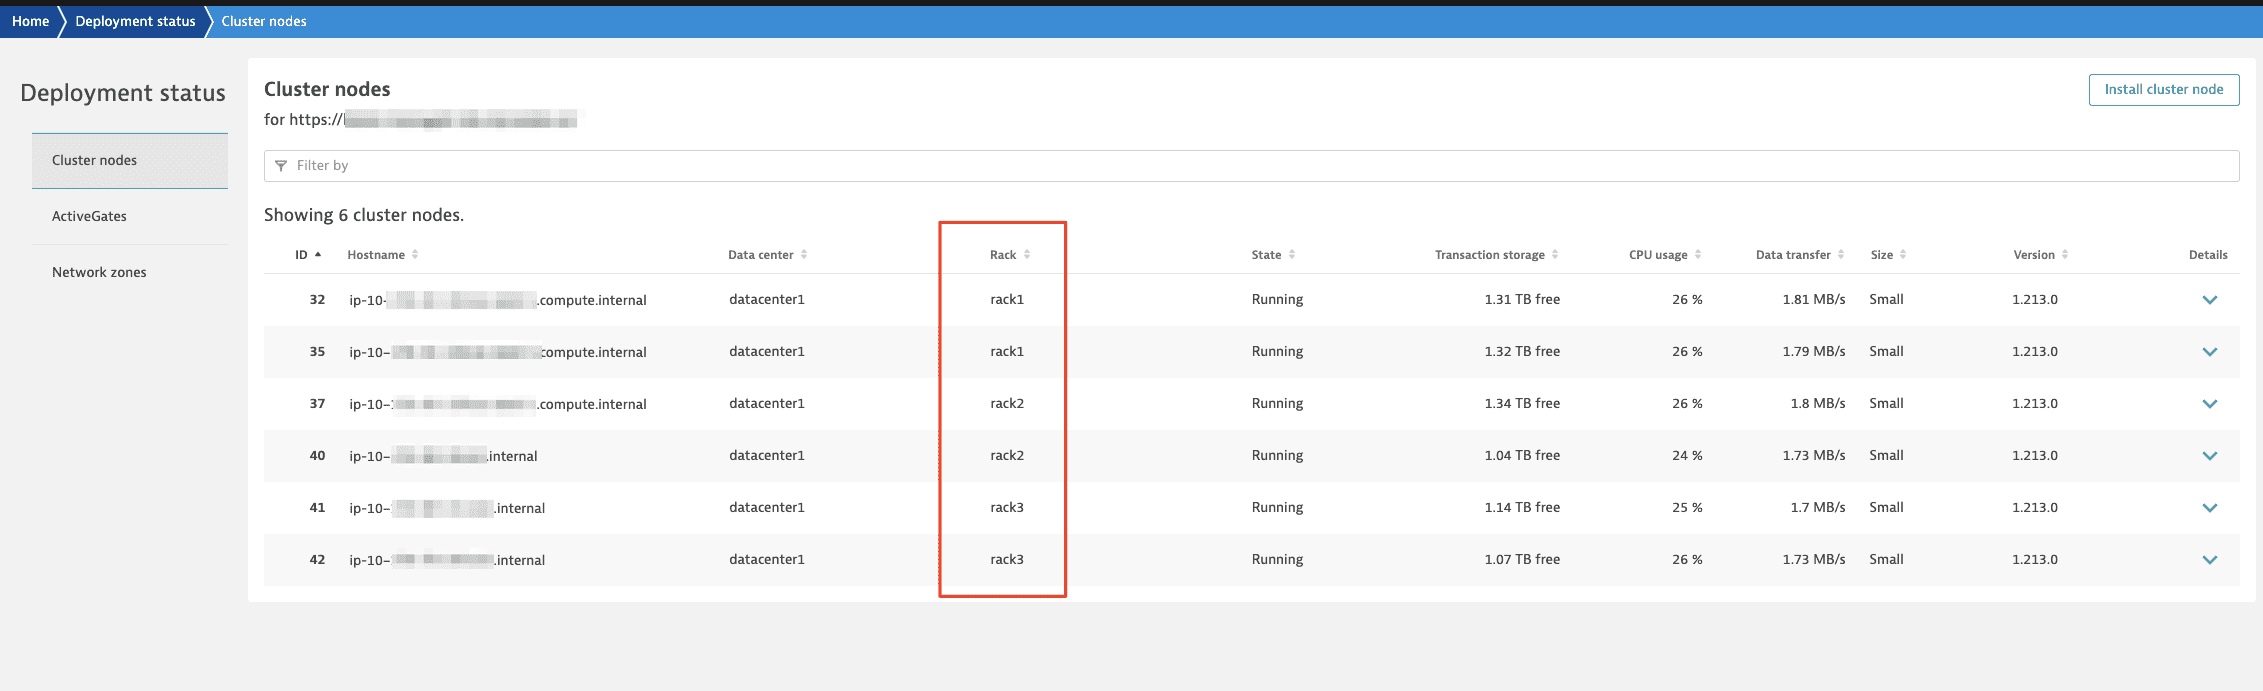
When the conversion is complete, you see racks in the Deployment status page in Cluster Management Console: