Rack aware conversion using restore
- Published Feb 04, 2021
This method is universal and can work for larger clusters and more complex topology changes. However, the restoration process is time-consuming, and due to daily frequency of backups, there is some loss of data involved. Transaction storage (distributed traces) is not contained in the backup.

Preparation
-
Make sure that cluster has a recent backup.
See Back up and restore a cluster. -
Prepare new node(s).
Make sure the disk partition allocated for Cassandra storage on the new node is sufficient to contain the entire Cassandra database (with margin for compaction and new data). The disk size should be at least double of the combined Cassandra storage of all existing cluster nodes. It is a good practice to have Cassandra data on a separate volume in order to avoid disk space issues related to various types of data.
Restoring the cluster into new racks
To restore the cluster into new racks
-
Stop the existing cluster to prevent two clusters with the same ID connecting to Dynatrace Mission Control.
See Start/stop/restart a cluster. -
Execute the official cluster restore procedure (Back up and restore a cluster) using the following modified step:
Launch Dynatrace restore on each nodeIn parallel, on each node, execute the Dynatrace Managed installer using the following parameters:
--rack-name- defines the rack to which this node will belong.--rack-dc- defines the data center to which this node will belong.--restore- switches the installer into the restore mode.--cluster-ip- IPv4 address of the node on which you run the installer.--cluster-nodes- the comma-delimited list of IDs and IP addresses of all nodes in the cluster, including the one on which you run the installer, in the following format<node_id>:<node_ip>,<node_id>:<node_ip>.--seed-ip- IPv4 address of the seed node.backup-file- the path to the backup*.tarfile, which includes the path to the shared file storage mount, the cluster ID, the node ID, the backup version, and the backup*.tarfile in the following format:
<path-to-backup>/<UUID>/node_<node_id>/files/<backup_version_number>/<backup_file>
Backup path example
In this example path:
/mnt/backup/bckp/c9dd47f0-87d7-445e-bbeb-26429fac06c6/node_1/files/19/backup-001.tarthe parts of the path are as follows:<path-to-backup>=/mnt/backup/bckp/<UUID>=c9dd47f0-87d7-445e-bbeb-26429fac06c6<node_id>=1<backup_version_number>=19
While the backup is in progress, two backup directories may be present with different backup version numbers:
- The directory with the lower version number contains the old backup. It will be removed after the backup is completed.
- The directory with the higher version number contains the backup that is in progress.
The backup version number is incremented with each backup execution.
Get the IDs and IP addresses from the inventory you created before you started.
For example:
10.176.41.168- The IP address of the node to restore
1: 10.176.41.168, 3: 10.176.41.169, 5: 10.176.41.170- Node IDs and new IP addresses of all nodes in the clustersudo ./tmp/backup-001-dynatrace-managed-installer.sh--rack-name rack2--rack-dc datacenter1--restore--cluster-ip "10.176.41.168"--cluster-nodes "1:10.176.41.168,3:10.176.41.169,5:10.176.41.170"--seed-ip "10.176.41.169"--backup-file /mnt/backup/bckp/c9dd47f0-87d7-445e-bbeb-26429fac06c6/node_1/files/19/backup-001.tar -
When you load the data as part of the restoration process, it is already placed in the target racks.
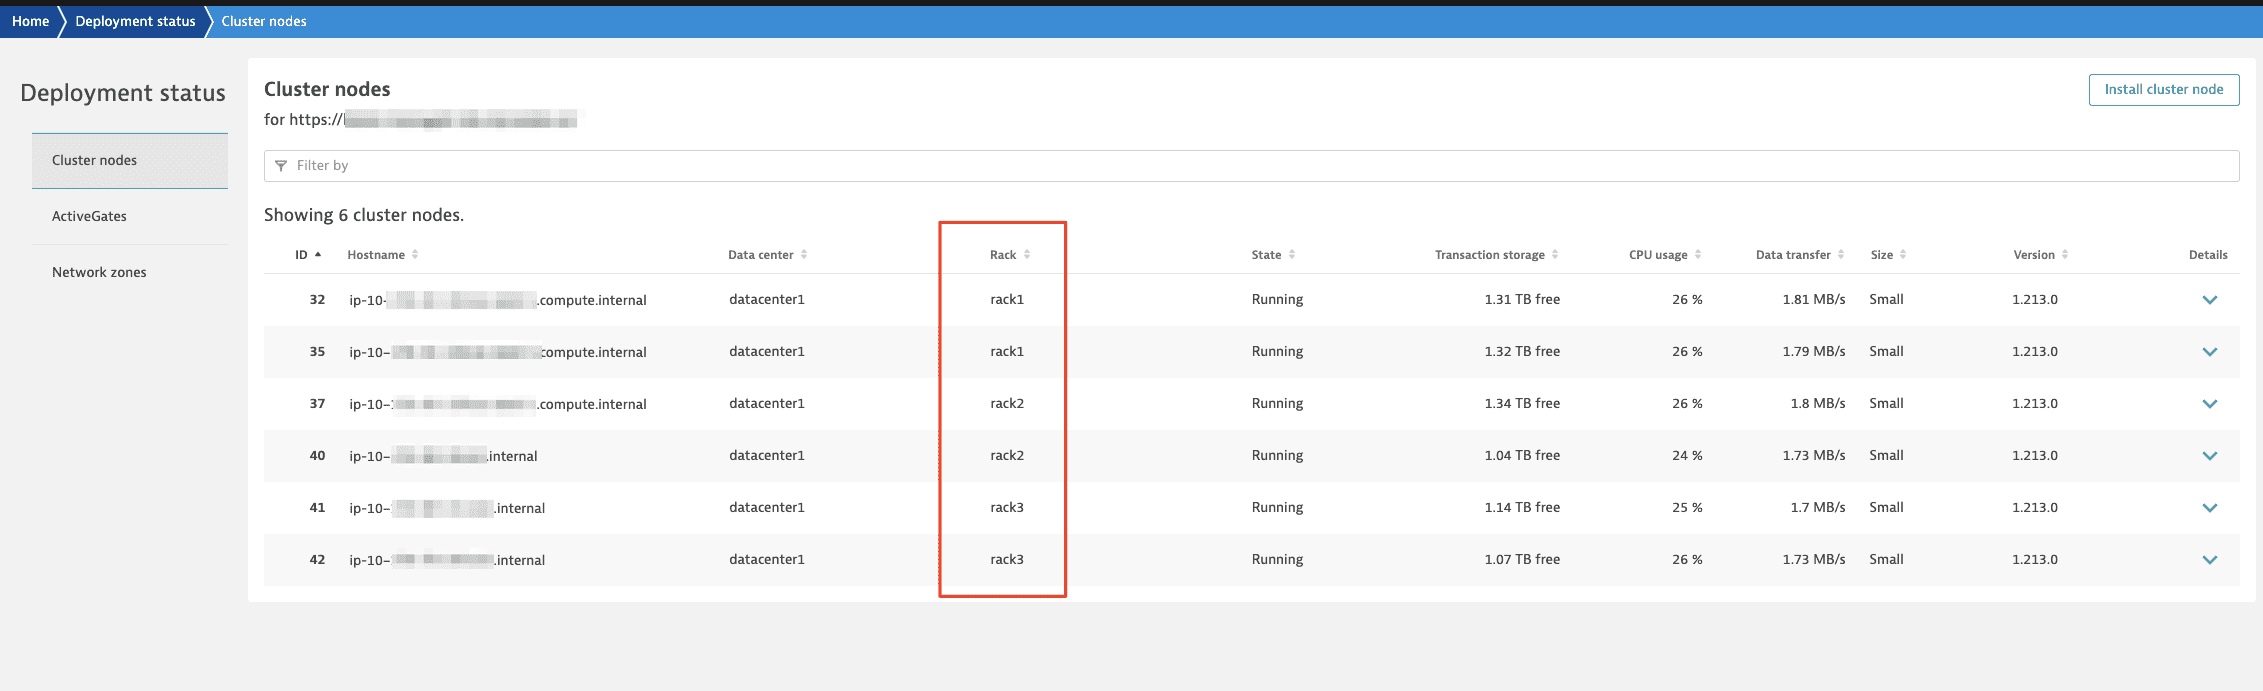
When the conversion is complete, you'll see racks in the Deployment status page in Cluster Management Console: