Install OneAgent on a server
- 3-min read
Follow this guide to install Dynatrace OneAgent for the very first time.
Once you've followed this guide, you'll have OneAgent installed onto a host and can use Dynatrace to monitor that host and its processes.
Prerequisites
This guide assumes that you have:
- A Dynatrace environment.
- Administrator access to a Linux, Windows, or AIX host (that doesn't have any existing OneAgent installations).
- A network that supports SSL communication.
OneAgent setup
To download and install OneAgent on a host:
-
Go to Deploy Dynatrace.
-
Select Start installation. Then select your platform where you want to install OneAgent.
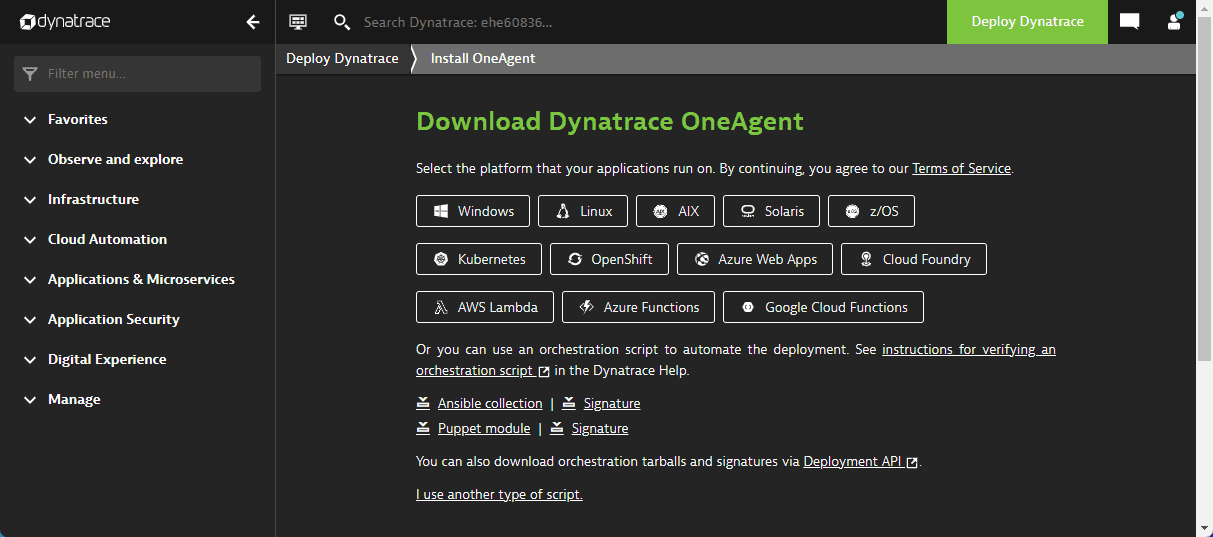 OneAgent platform selection
 -
Paste your PaaS token in the Download token field or select Create token to generate a new Deployment API token.
Copy the token and save it somewhere safe, because you will not be able to access it again.
-
Enter or select the appropriate parameters
-
Architecture
Linux only Select one of the available options from the list.
-
Monitoring mode
Options are Full-Stack, Infrastructure, or Discovery. If you are using a free Dynatrace trial, select Full-Stack to see everything that Dynatrace is capable of observing. You can always change the monitoring mode after installation.
-
For Optional parameters, you can add a Custom host name for easier identification.
The rest of the parameters are out of scope for this guide.
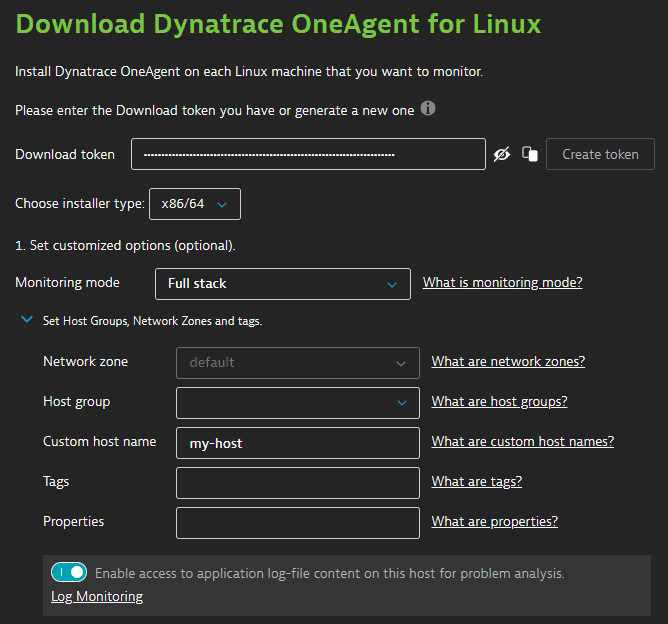 OneAgent deployment parameters
 -
-
Download OneAgent. Either use the provided CLI command or select Download.
-
Verify the signature. Use the provided CLI command. (Note: Linux and AIX only.)
-
Install OneAgent. Either use the provided CLI command or run the executable by selecting it in the GUI. Follow the steps as described in the installer.
If you install via the GUI, you should add the following options in the Optional: advanced command-line settings screen:
--set-monitoring-mode=fullstack --set-app-log-content-access=true -
When the installer shows a Congratulations! Dynatrace OneAgent was successfully installed! message, OneAgent is installed on the host. Select Finish to exit the installer.
-
Because OneAgent can't inject itself into running processes, you'll need to restart all processes that you want OneAgent to monitor.
-
To confirm that OneAgent is monitoring your host, open Dynatrace and go to Infrastructure & Operations > Host. If everything is working as expected, you'll see the name of your host in the Hosts table. See the screenshot below for an example.
OneAgent is now set up and monitoring your host. See Get started to continue your first journey with Dynatrace.