Get started

In the following, you'll learn how to navigate in Vulnerabilities Vulnerabilities to find the information you need to manage vulnerabilities easily.

Target audience

Vulnerabilities Vulnerabilities is dedicated to devsecops engineers.

Prerequisites

Permissions

An admin needs to assign the following IAM policies to the group of users that will access the vulnerability-service:

  • Read Entities
  • Read Security Events
  • One of the following user policies: Admin User, Pro User, Standard User (for details, see Default policies.)

See below for instructions.

  1. In Account Management, select Identity & access management > Group Management.

  2. Select Group to create the group.

    add a group

  3. Enter a name (for example, vulnerability-service) and a description (for example, vulnerability-service group), then select Create.

Once the group is created, you can view details and assign policies.

  1. Select Permission.

    assign policies

  2. In the drop-down menu of Permission name, select and save the three required policies, one at a time.

Once added, the three policies should be displayed in your list of permissions.
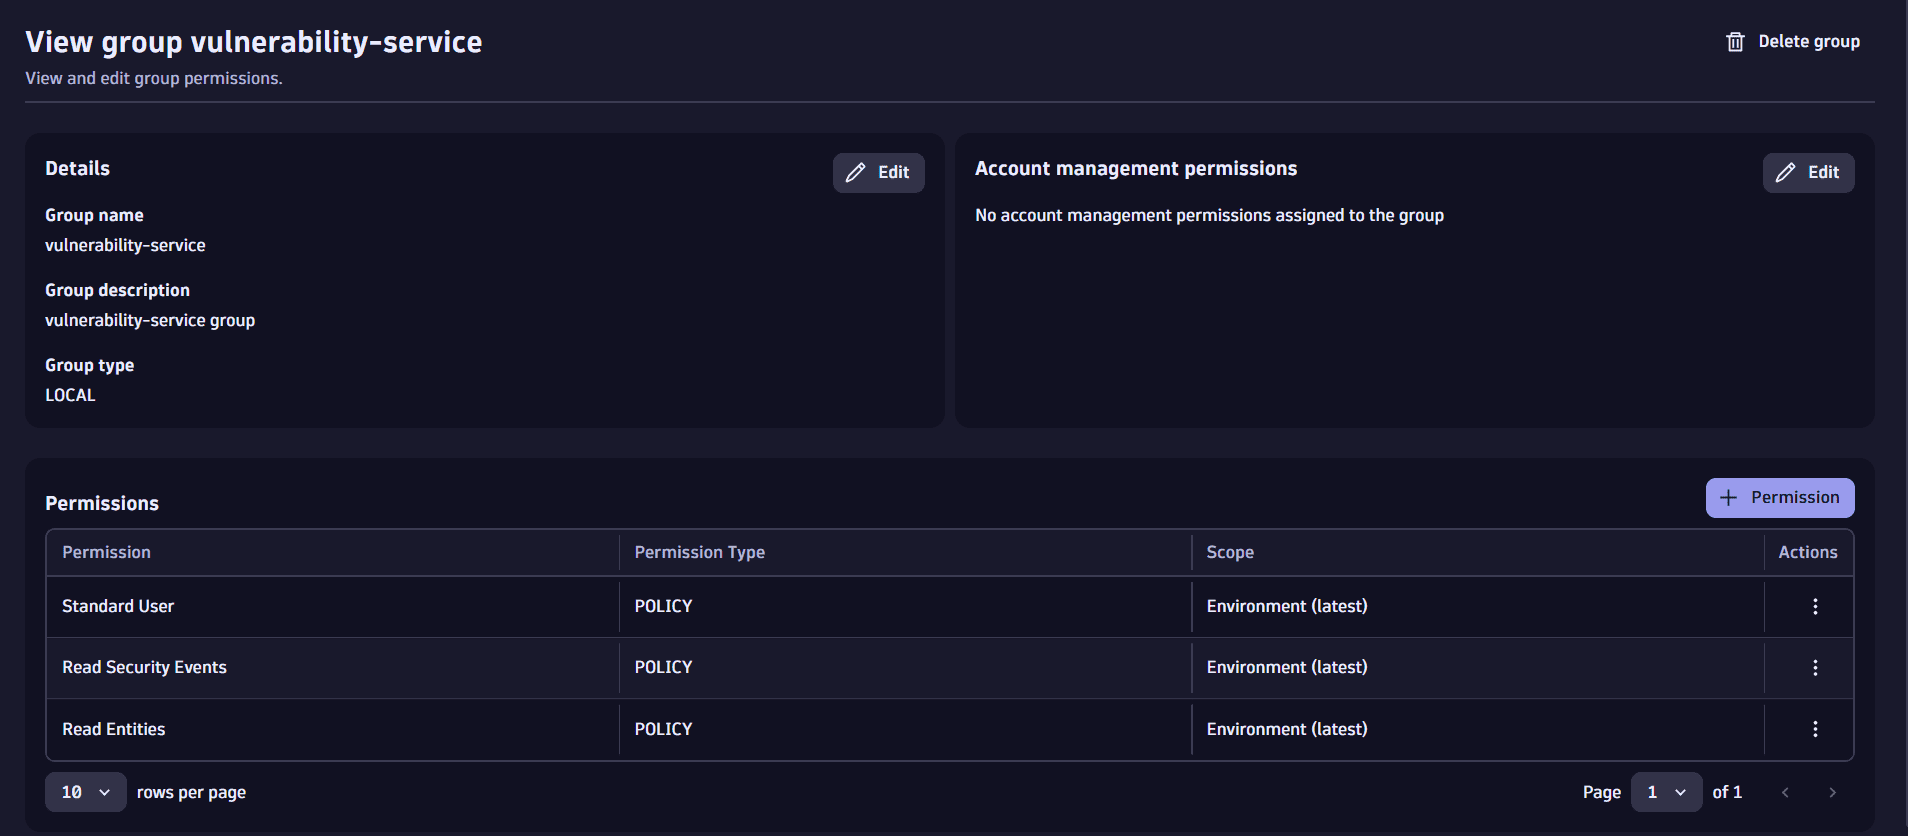
required policies

  1. In Account Management, select Identity & access management > People.
  2. Select Invite user to invite users to the newly created group.

Filter vulnerabilities

See below how you can filter vulnerabilities.

Timeframe filter

With the timeframe, you can define the period from which your data is being queried. If you don't specify the timeframe, the default Last 30 minutes is applied, meaning that the data being fetched is from the last 30 minutes.

When setting the timeframe, the end value must always be Now.

You can apply a timeframe filter on the results table (from the Prioritization page) or per vulnerability (from the details page of a vulnerability).

  1. In the timeframe section, select one of the preset options or select the calendar for customization.
  2. Select Apply.

timeframe filter

Segment selector

Segments provide quick access to predefined logical filters. The segment selector allows you to filter results based on these predefined logical filters. You can apply segments to any Vulnerabilities page.

See below for instructions.

If you already have segments defined, you can skip this step.

Open the Segments Segments app and create segments for your environment. For more information, see Include data in Dynatrace segments.

Make sure to use filter segments that are compatible with entity state events. For examples of such filters, see Examples of how to create segments.

  1. On the Prioritization page, open the help menu in the upper-right corner.
  2. Enable Filter segments support. This adds the segment selector to all Vulnerabilities pages.
  1. On the Prioritization page, open the segment selector .
  2. In Filter by segments, select a segment.
  3. optional To add more segments, select Segments; if available, you can select a value for the selected segment.
  4. When you're happy with the selection, select Apply.

segment filter

Selecting one or multiple segments results in

  • Fewer vulnerabilities and affected entities
  • Scoping the vulnerabilities' Davis Security Score based on your selection

For example,

  • Before selecting a segment: There are 15 vulnerabilities with a 9.4 Davis Security Score on the Prioritization page.
  • After selecting a segment: There are five vulnerabilities with a 8.0 Davis Security Score, because the DSS has been scoped to include less entities and the maximum DSS score of affected entities is 8.0.

For more information on segments and how they work, see

Examples of how to create segments

You can create segments based on applications, services, hosts, and other relevant components monitored by Dynatrace. Here are some examples.

Filter expressions

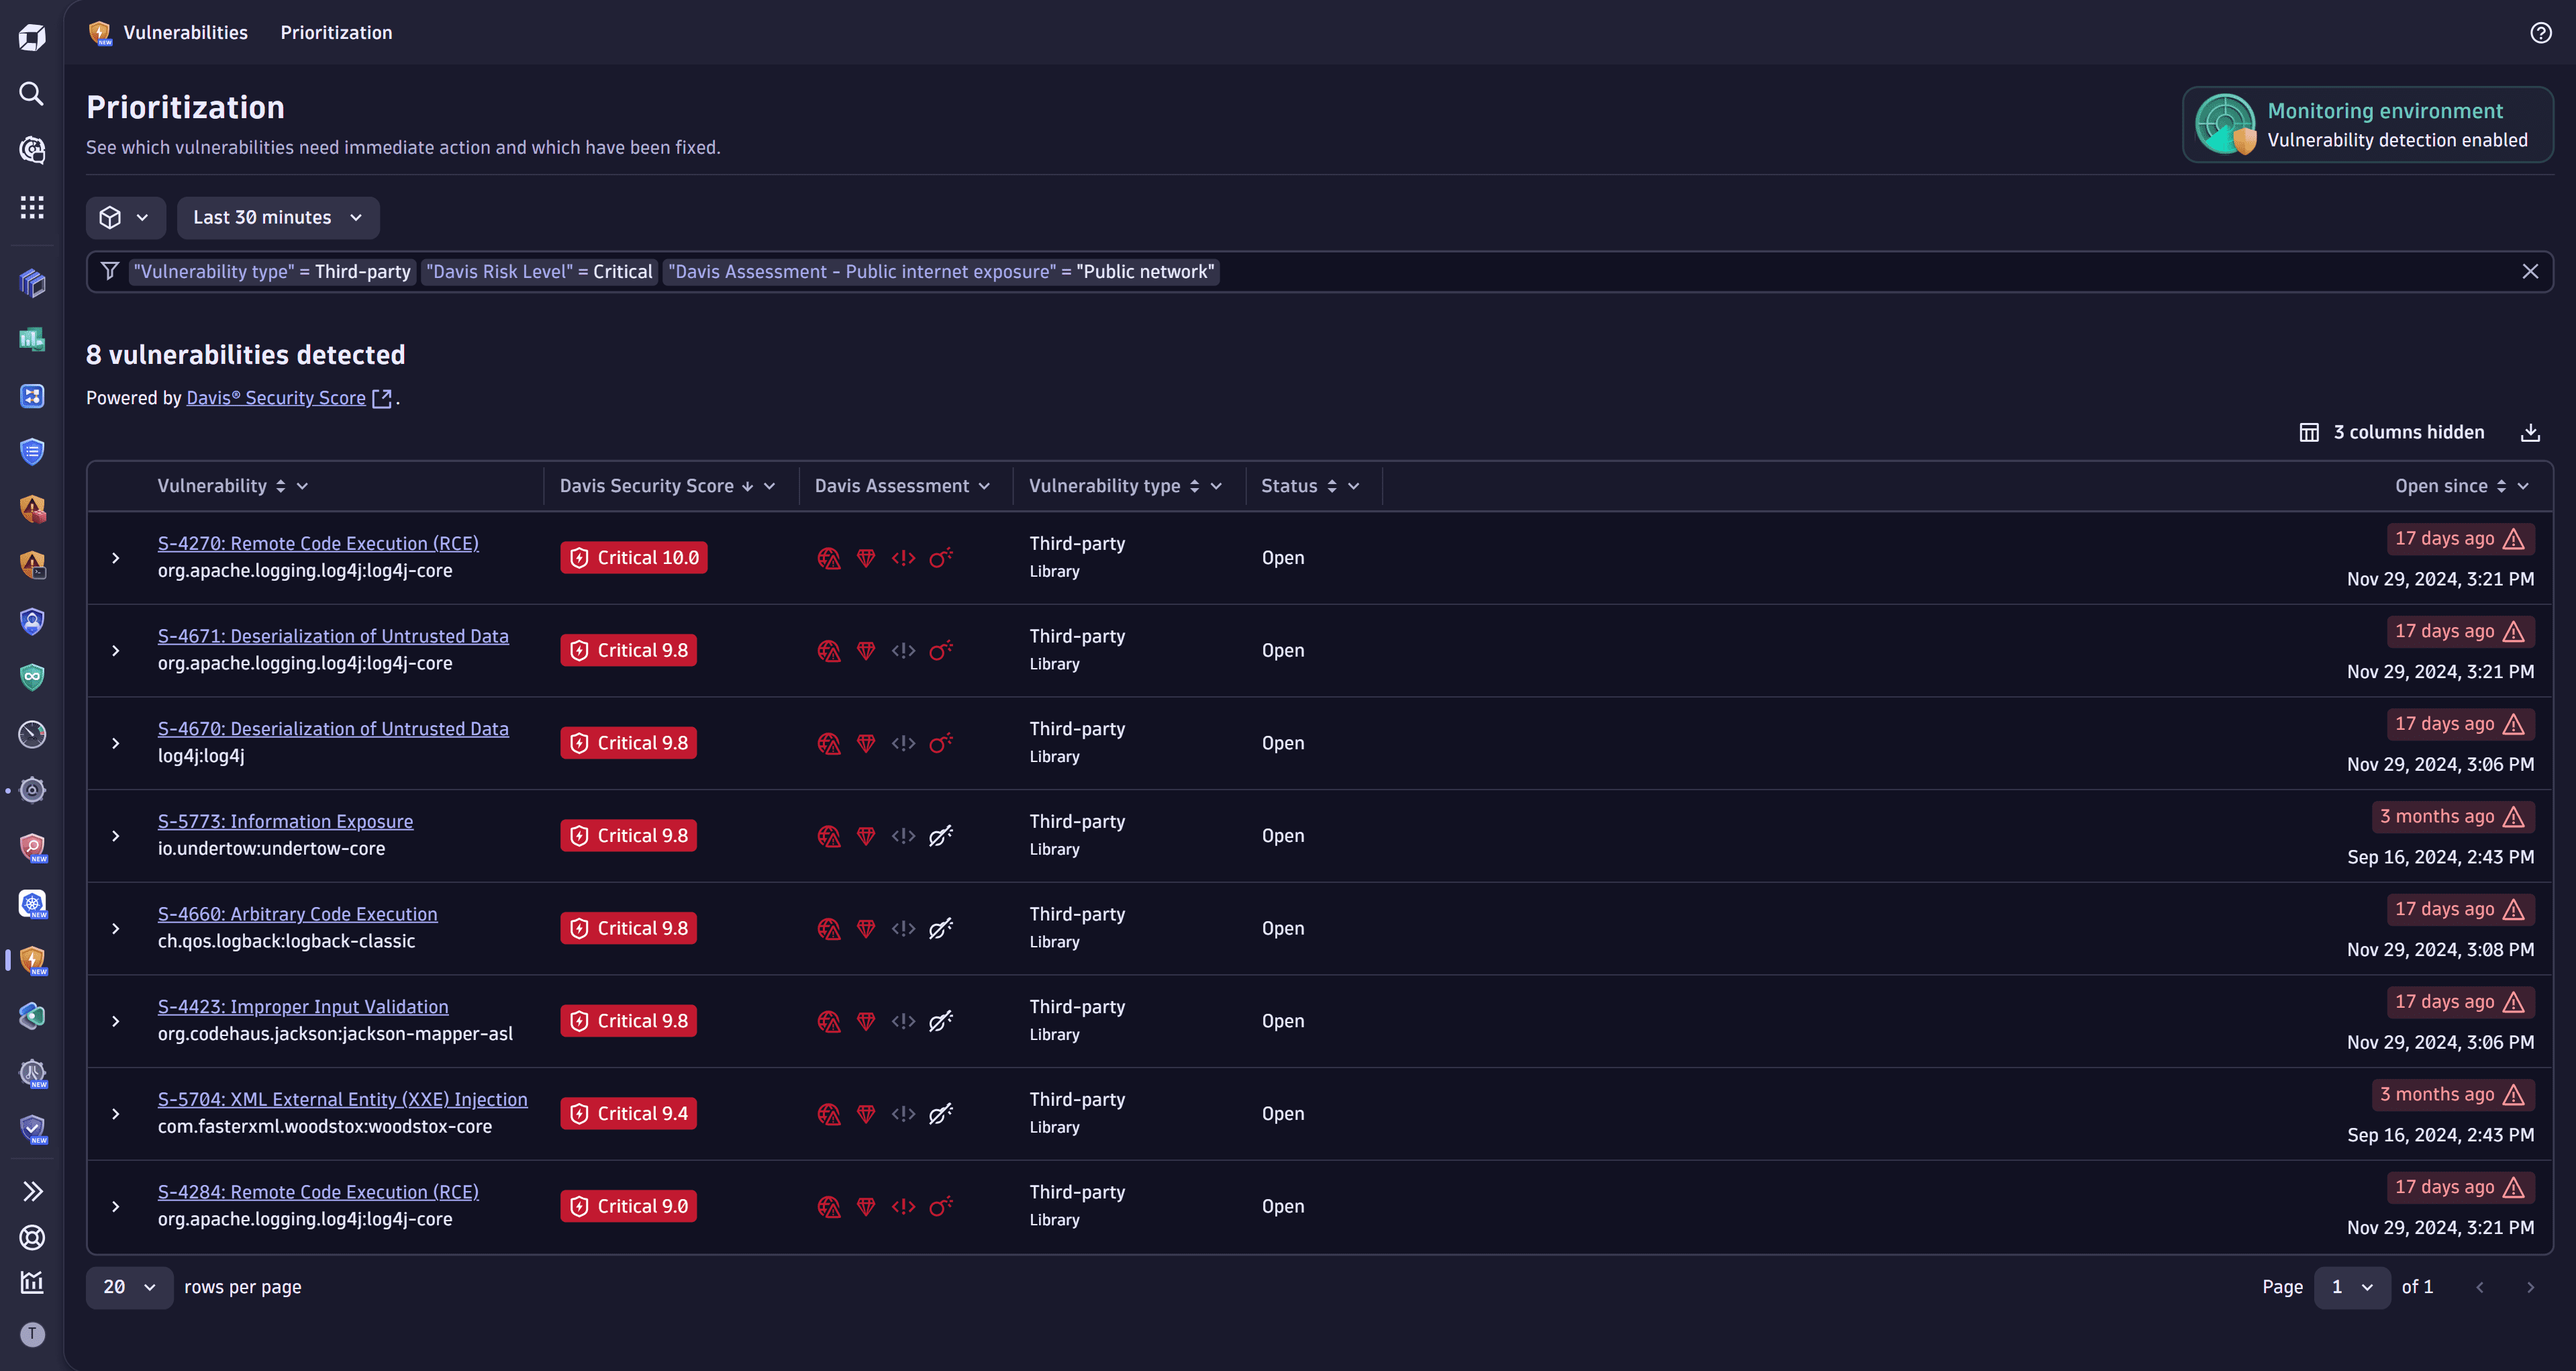
In the filter field you can use complex filter expressions to select which information is to be displayed in the vulnerabilities table:

  1. Go to the Prioritization page.

  2. In the filter field, make your selection. You have the following options:

    • Add multiple filters on the same filter key

    • Use AND and OR operators

    • Use the wildcard (*) to search for patterns

    • Filter numbers with > and <

filter field

To reset the filters to the default mode (open vulnerabilities), select Close tab on the right of the filter field.

If the selected filter doesn't show in the vulnerabilities table, go to the column settings Column and make sure to add the corresponding column to the table.

Format table

Select which columns are to be displayed in the vulnerabilities table:

  1. Go to the Prioritization page.
  2. On the upper-right of the vulnerabilities table, select the column settings Column.
  3. Select the desired columns, then select Confirm.

column settings

Sort columns

Select the order in which results in a column should be displayed:

  1. Go to the Prioritization page.
  2. Select a column title.
  3. Select Sort ascending or Sort descending.

sort list

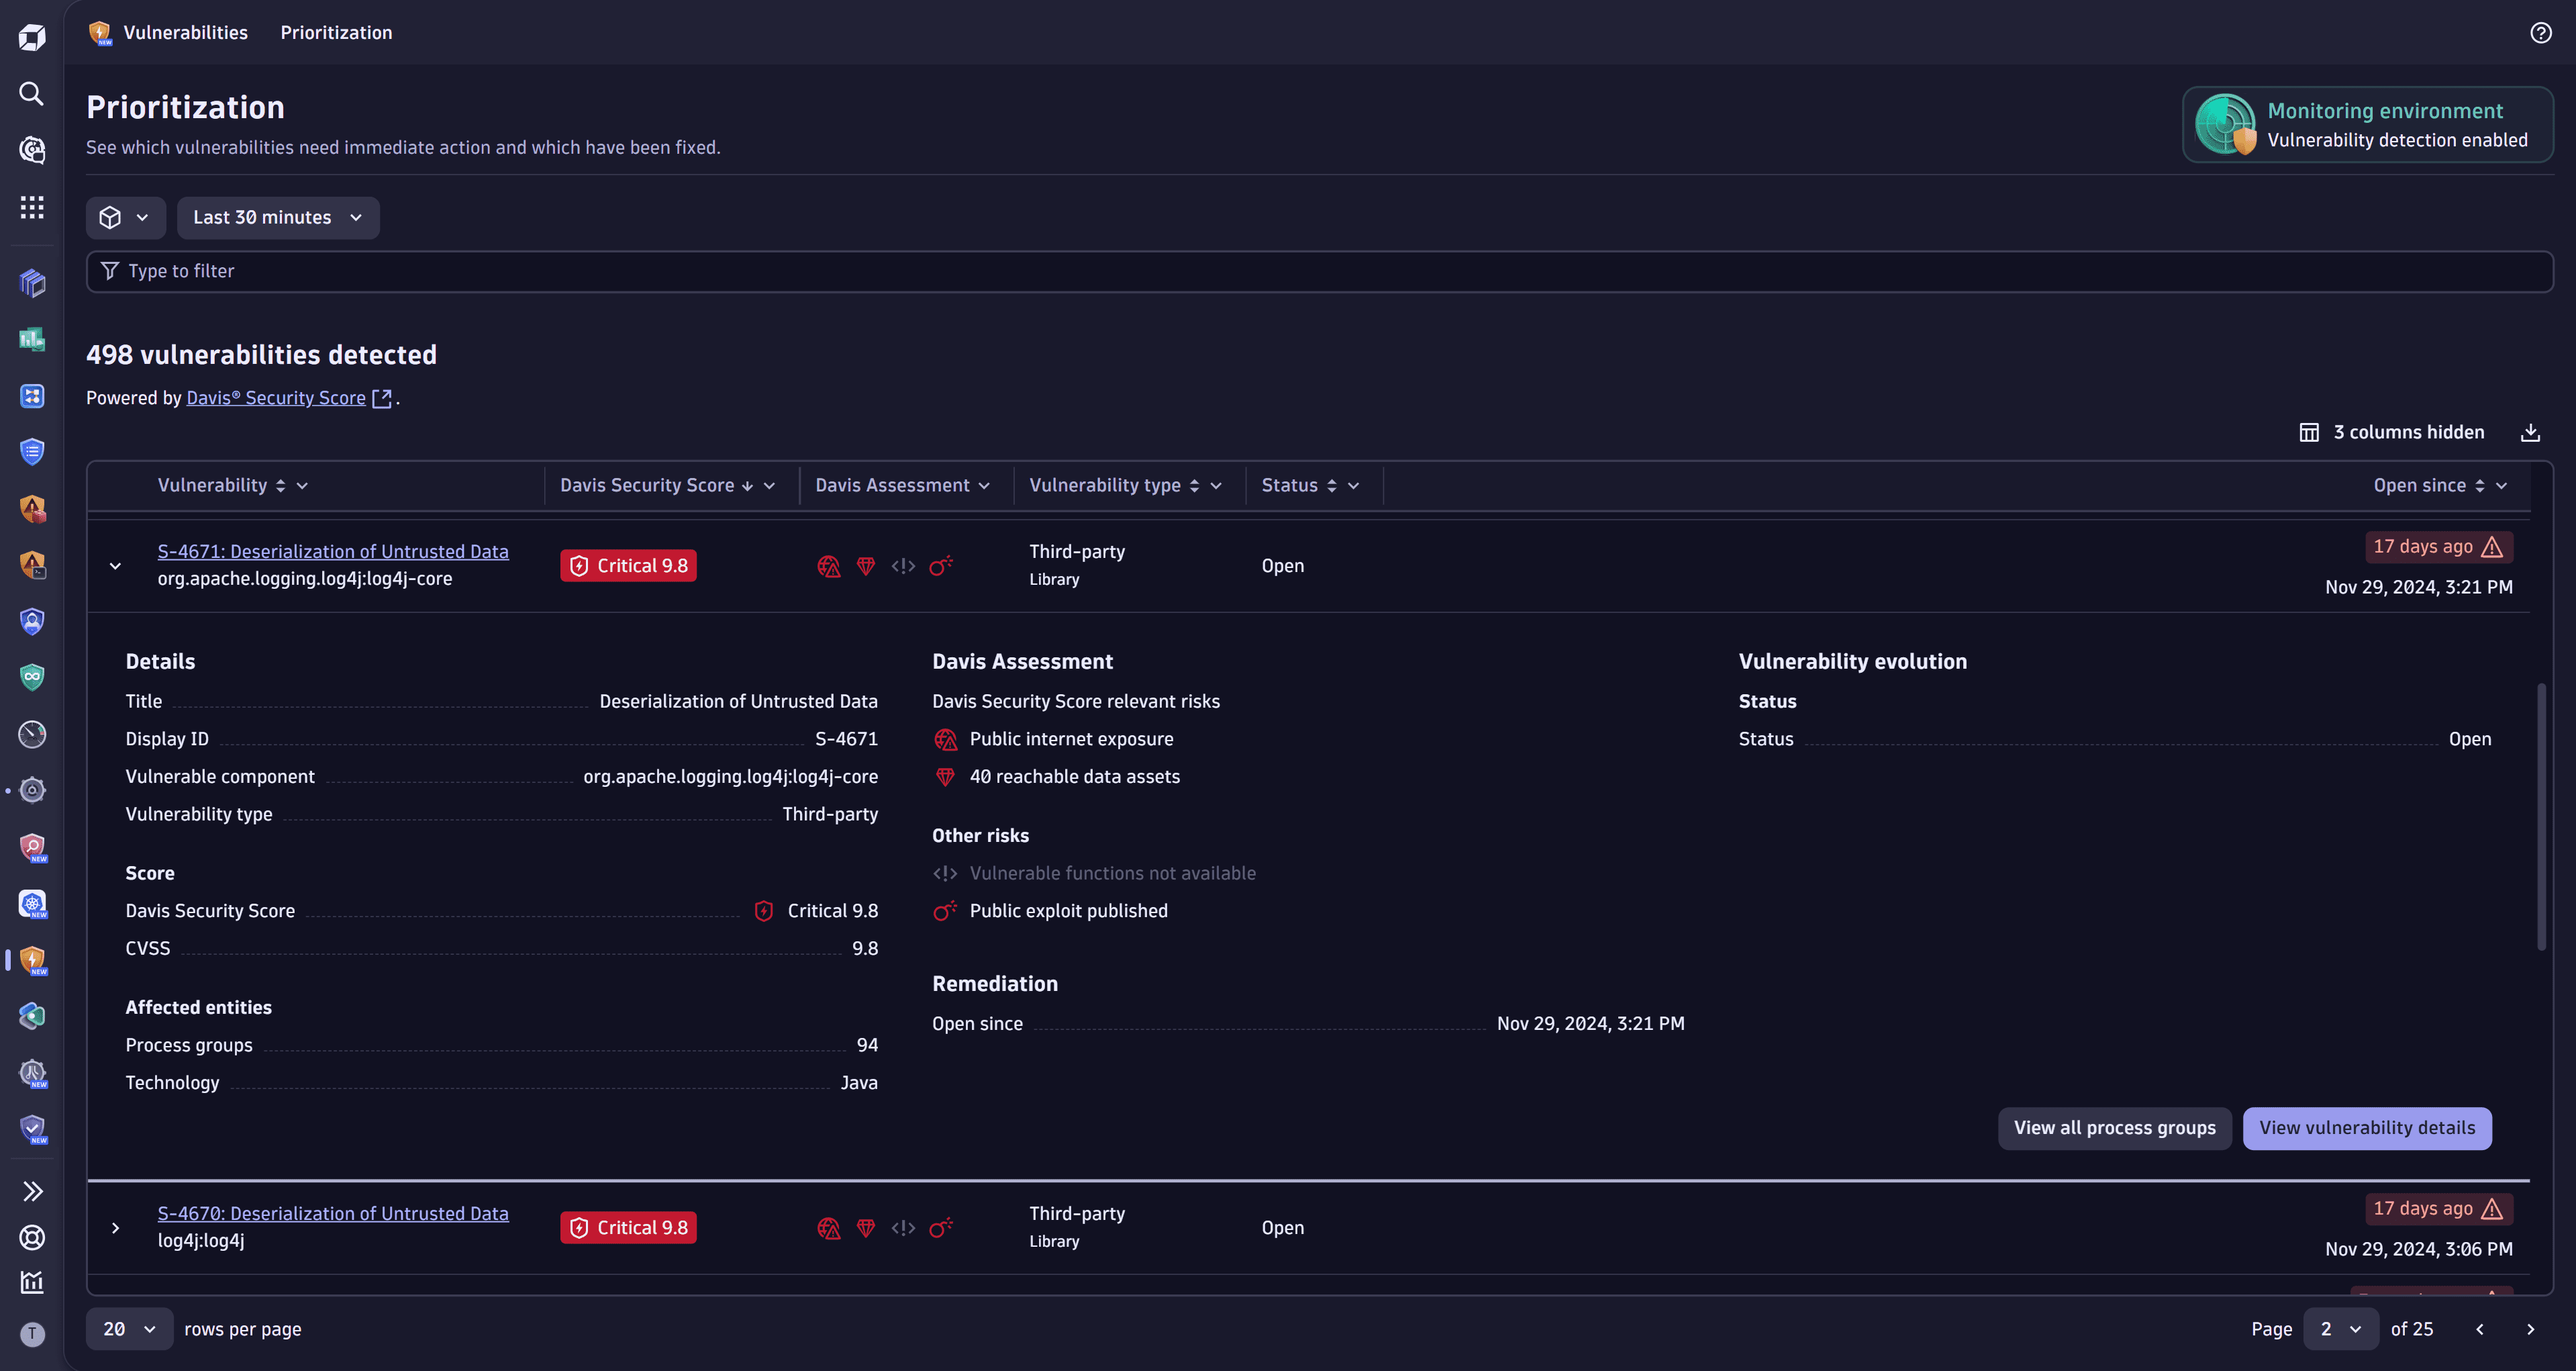
Peek at the relevant info

Take a look at the relevant information while browsing through the vulnerabilities table without navigating to the details page of a vulnerability.

  1. Go to the Prioritization page.
  2. Select See details on the left side of a vulnerability to expand the row.

peek at details

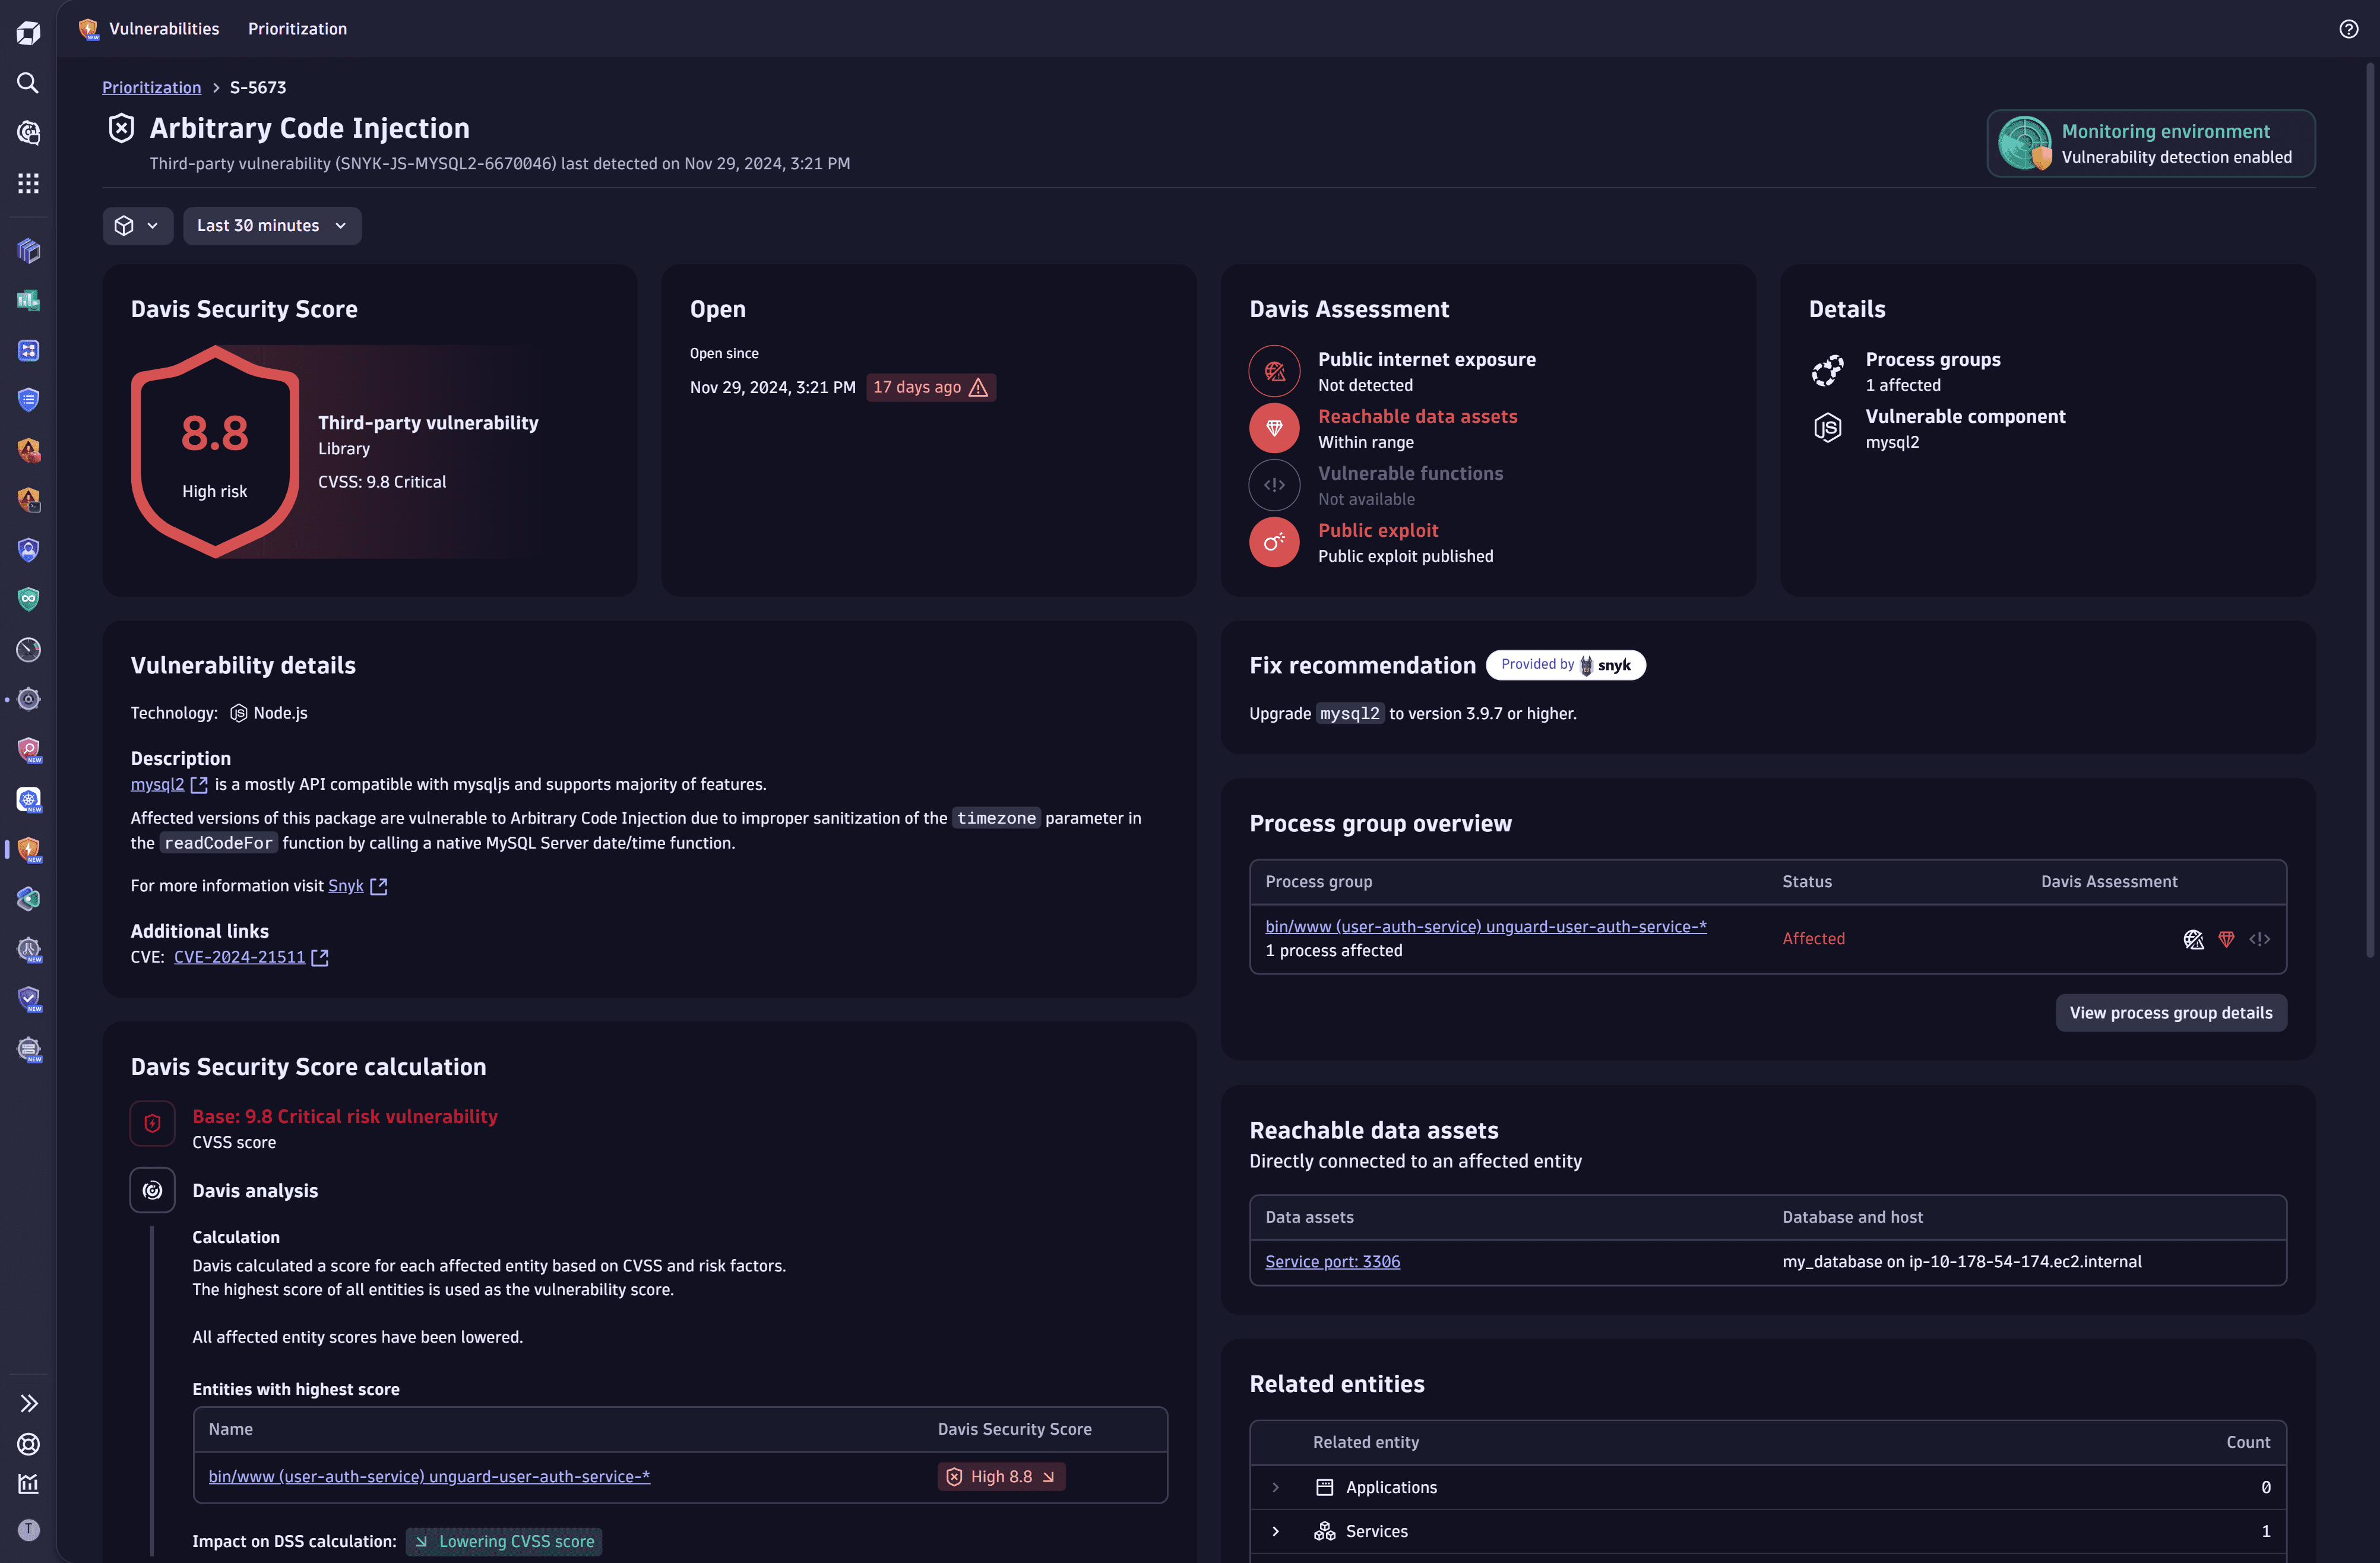
Dive into details

Explore the most essential data on the details page of a vulnerability. This provides you the context needed to analyze the impact and address remediation actions.

  1. Go to the Prioritization page.
  2. Select a vulnerability title.

details page

What's next

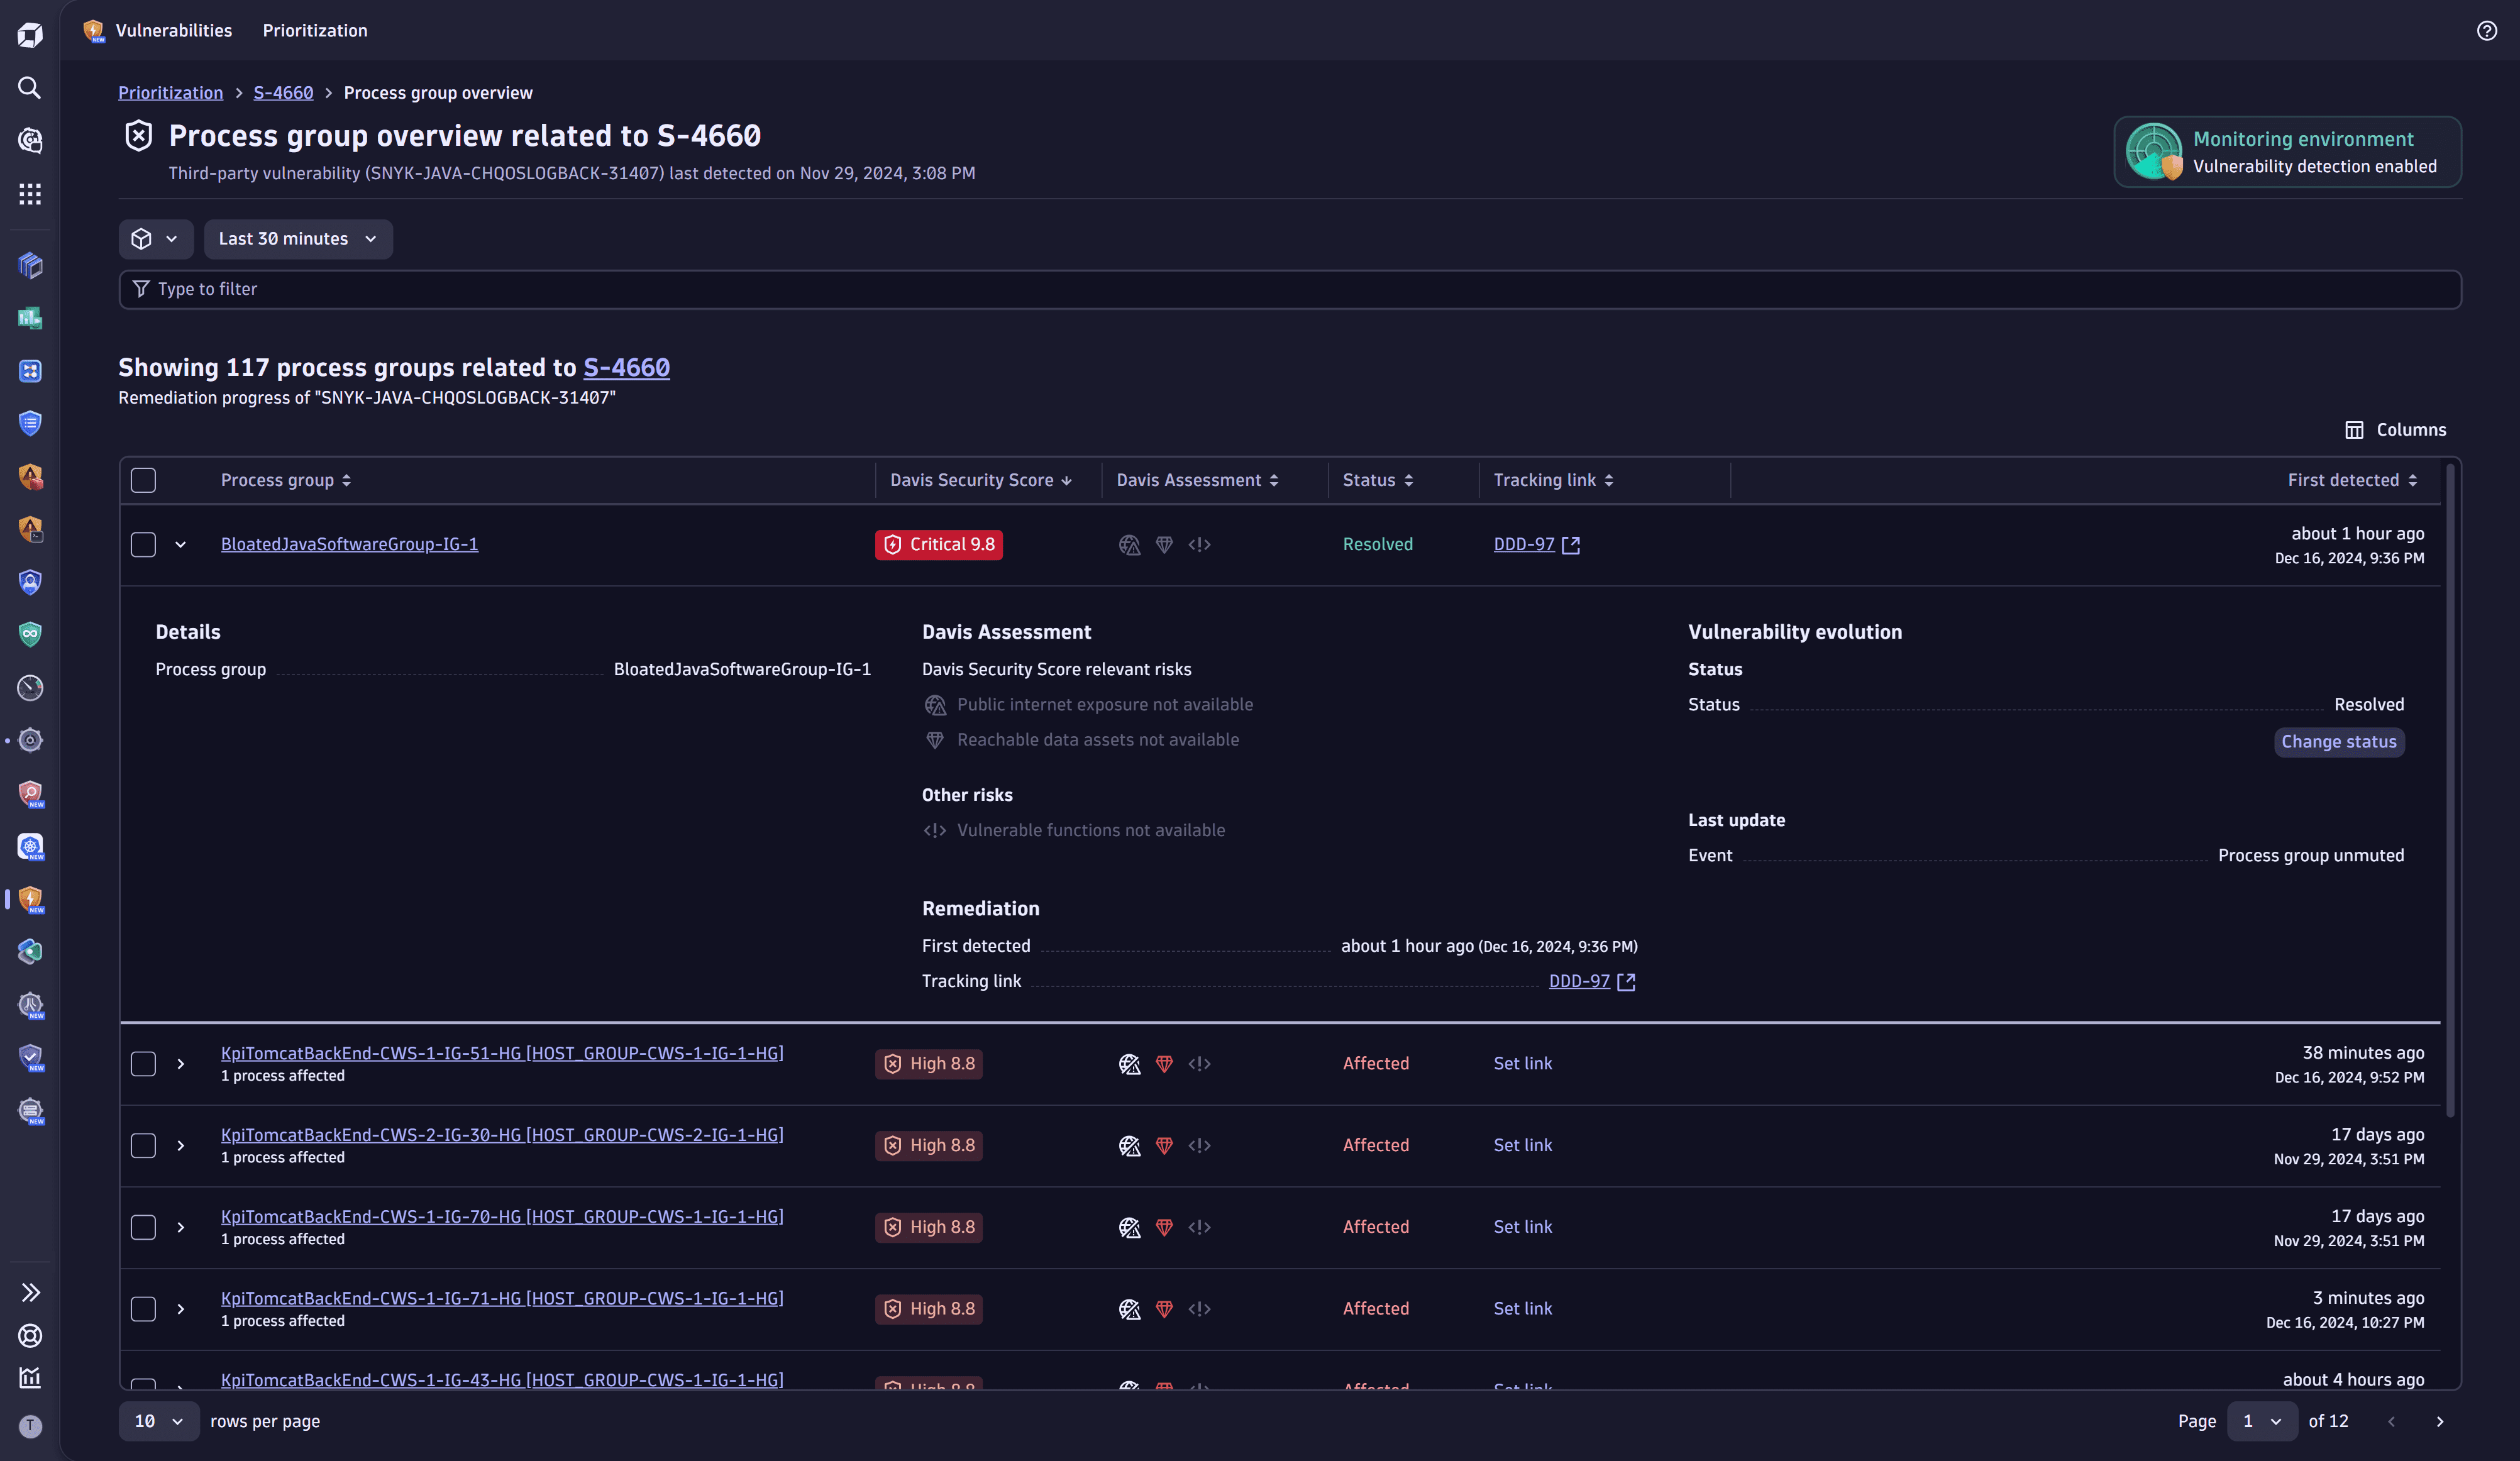
Now that you know your way around Vulnerabilities Vulnerabilities, you can

Try Vulnerabilities Vulnerabilities and share your feedback to help us improve.

Additional resources

For a better understanding of key concepts used in Vulnerabilities Vulnerabilities, associated with use cases and frequently asked questions, see Concepts.