Ownership app
- Latest Dynatrace
- App
- 3-min read
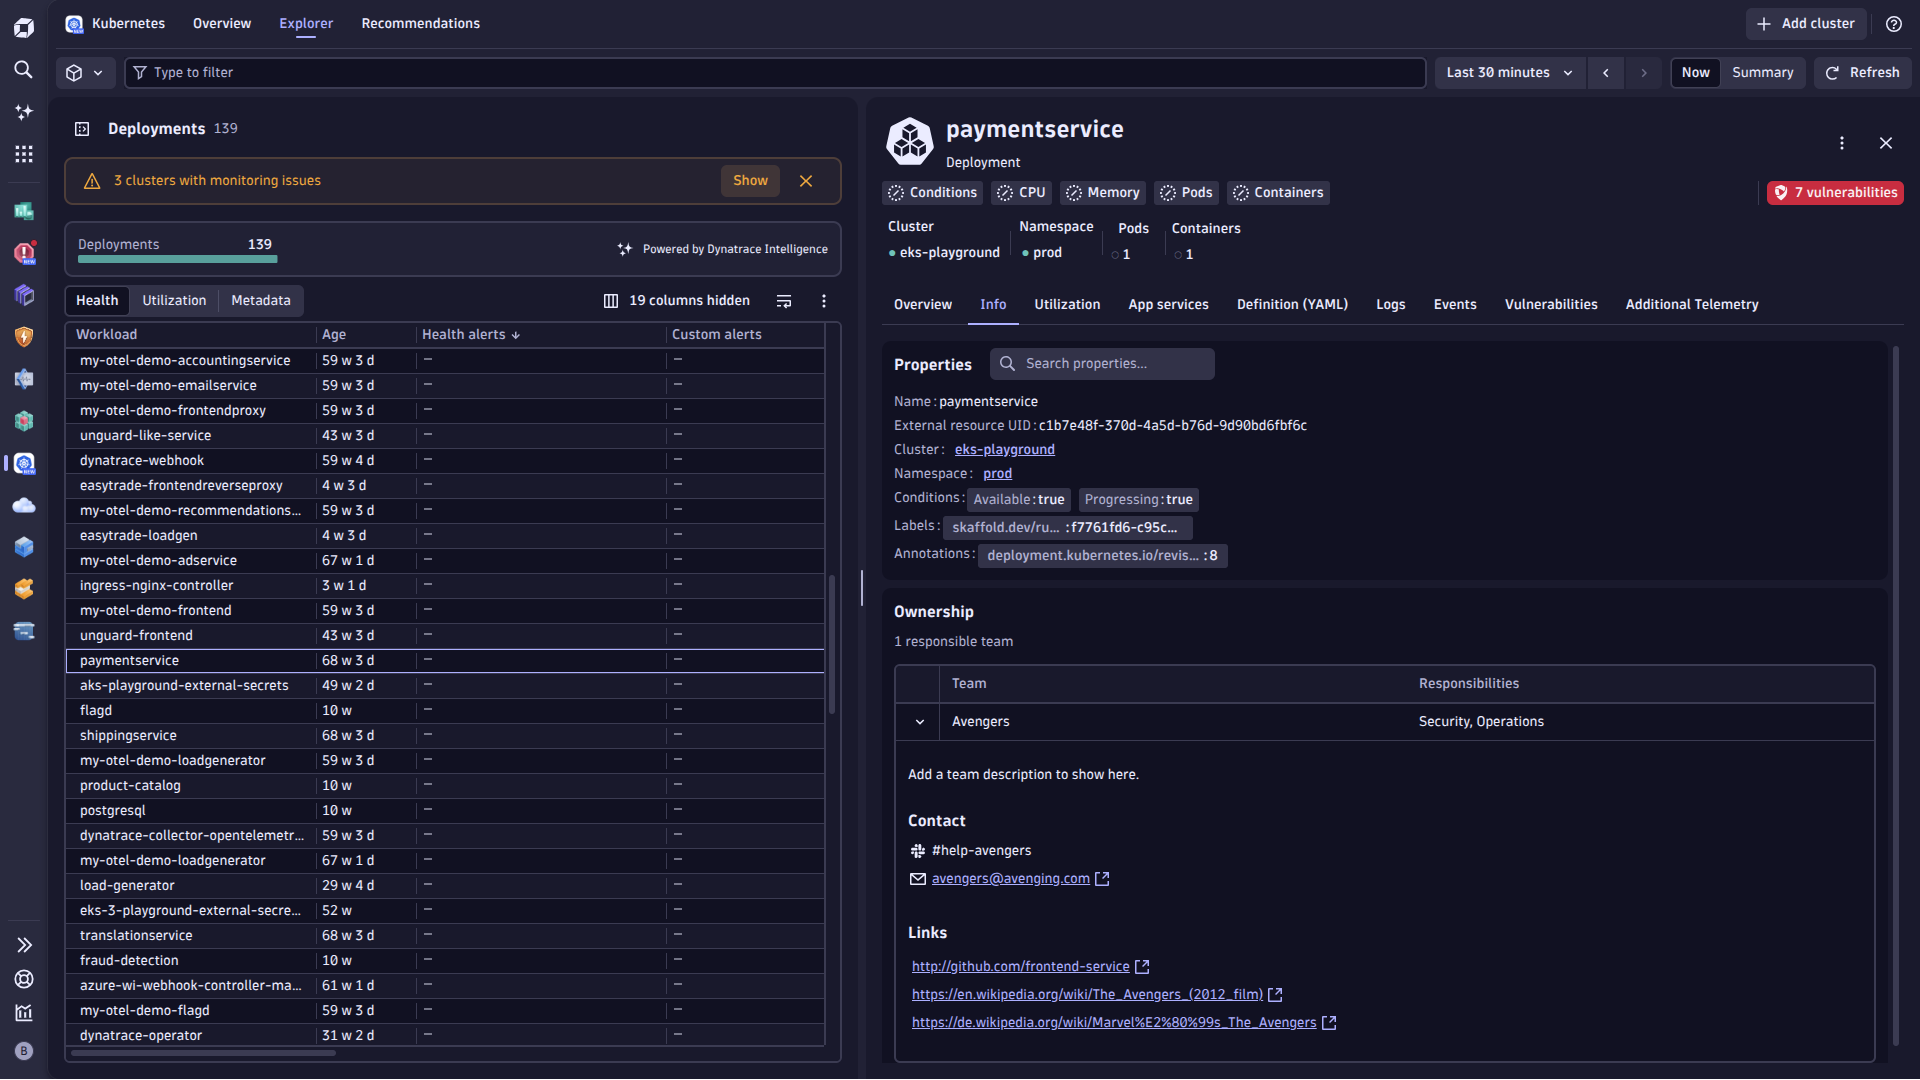
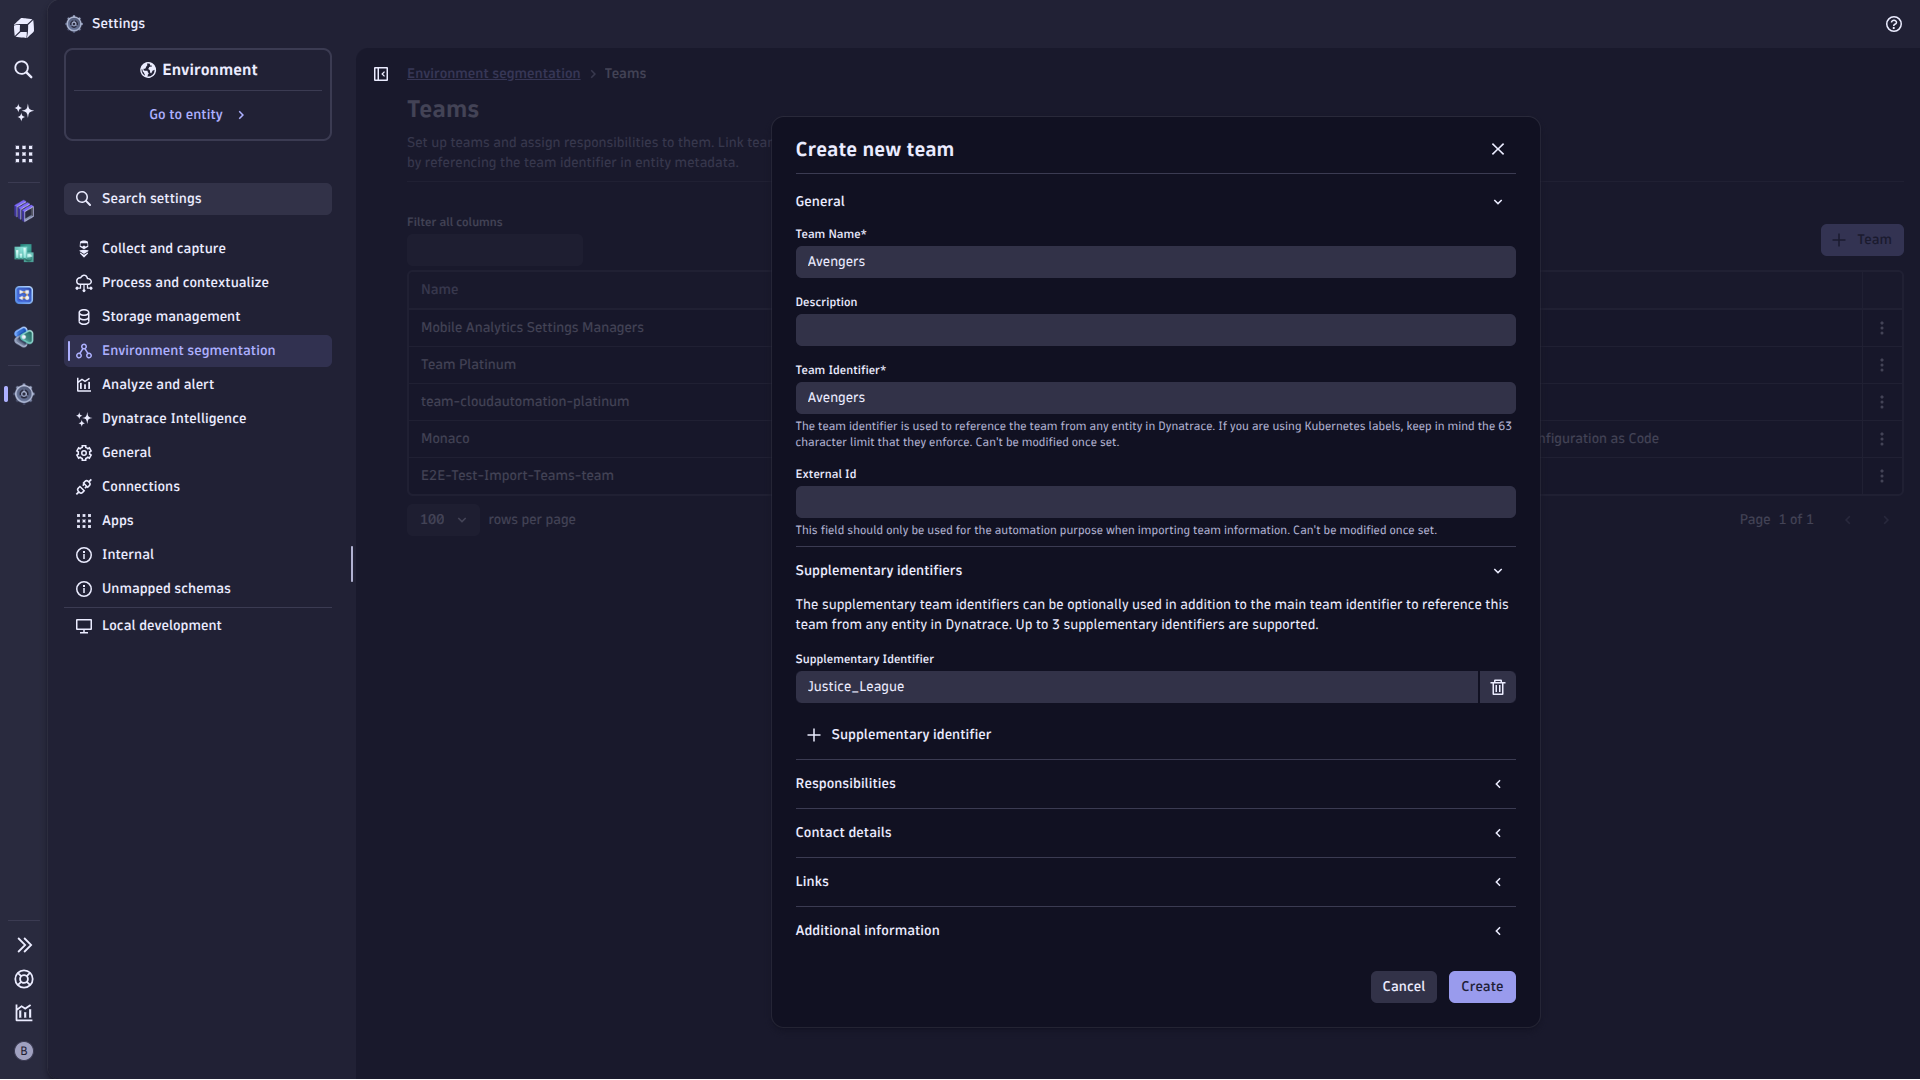
 Ownership is a tag-based app for mapping teams.
By storing ownership information as key-value tags on Smartscape nodes, you can identify the teams responsible for hosts, services, and other entities.
Ownership is a tag-based app for mapping teams.
By storing ownership information as key-value tags on Smartscape nodes, you can identify the teams responsible for hosts, services, and other entities.
Prerequisites
Permissions
You need the following permissions for the Ownership app.
settings:objects:readsettings:objects:writestorage:smartscape:read
You need the following primary permissions in Workflows. Go to Workflows > Settings > Authorization Settings.
app-engine:apps:run: Enables listing and running apps; provides basic access to the Launcher.app-engine:functions:run: Enables use of the function executor.
Alternatively, you can set up users with the AppEngine user policy.
Installation
Make sure the app is installed in your environment.
Get started
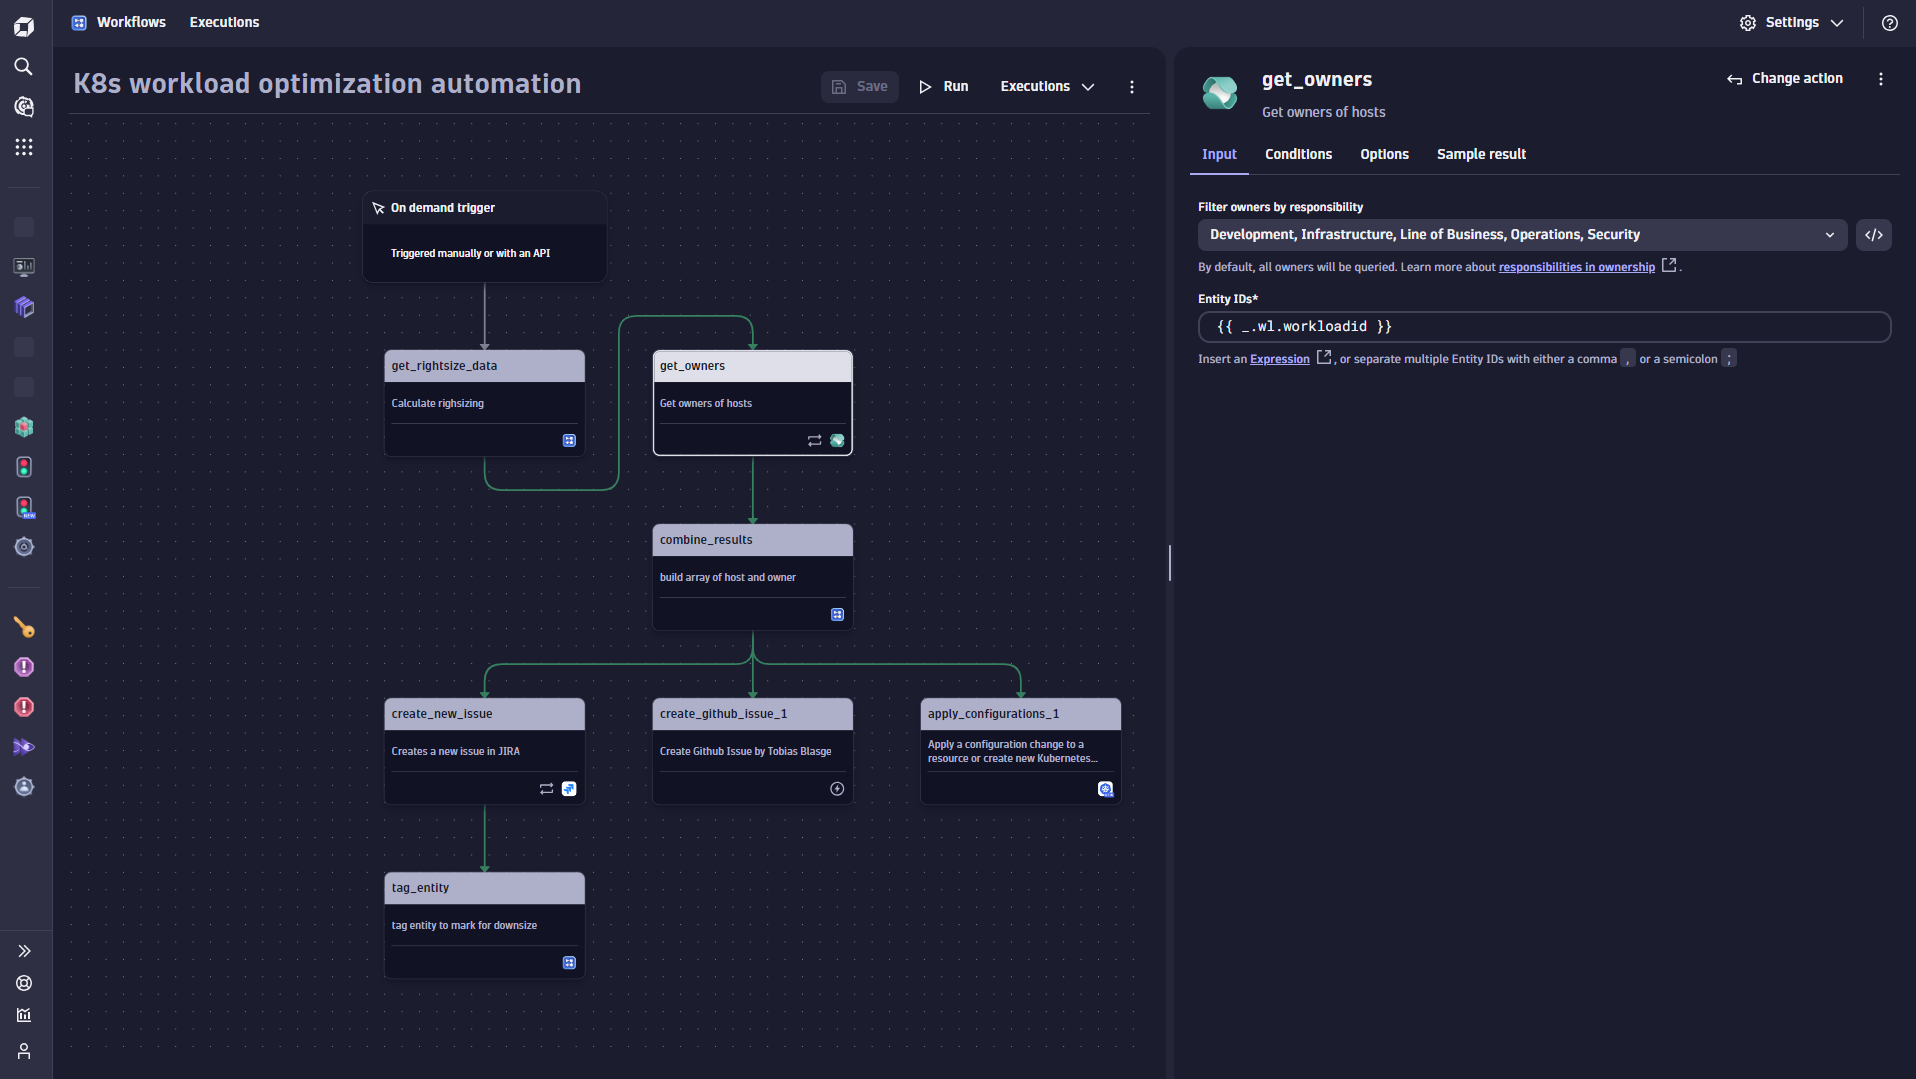
Ownership provides actions for building a workflow querying for an entity's ownership team and related contact information. With these actions, you can extract ownership data about an entity and integrate it with other apps, for example, to send Slack notifications or Jira updates to entity owners based on different triggers.
Furthermore, Ownership allows you to:
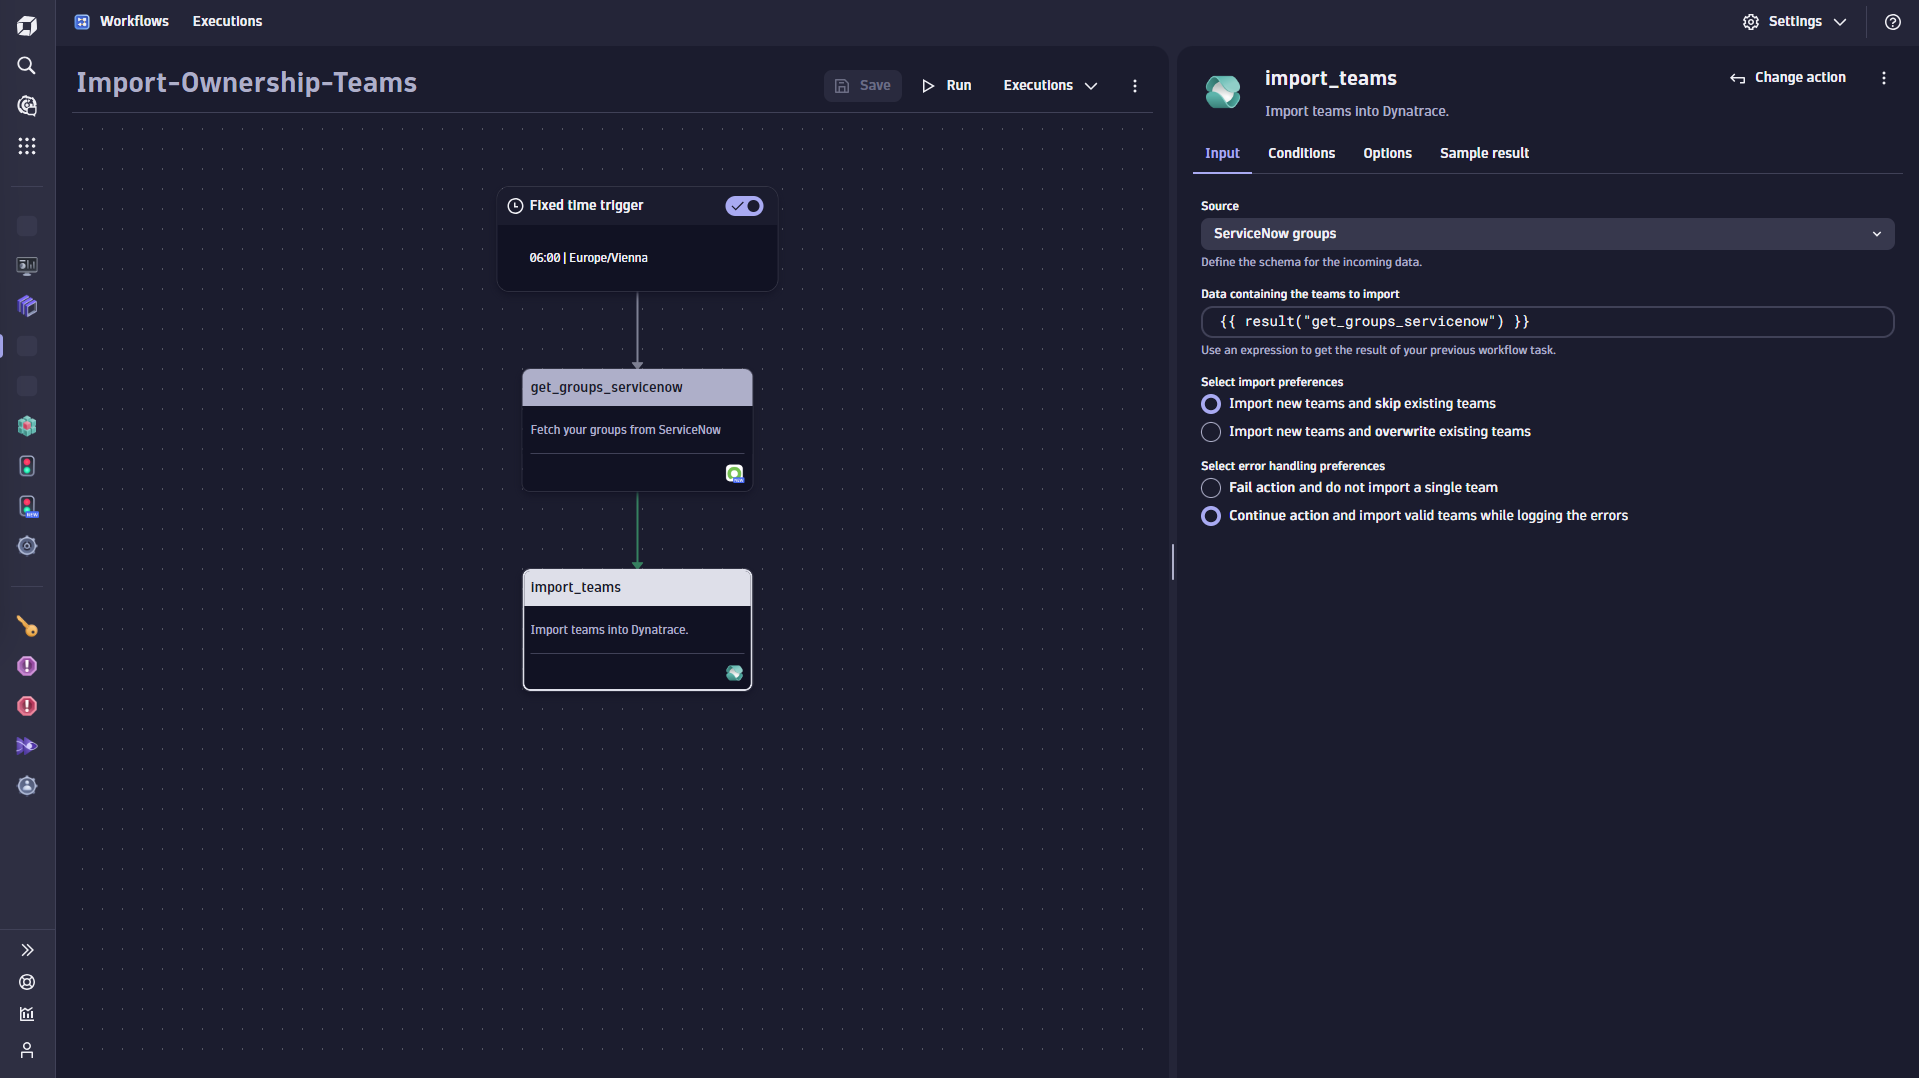
- Import teams using automation workflows from Microsoft Entra ID.
- Import teams using automation workflows from ServiceNow.
- Import teams using automation workflows from any data source using JSON structure.
- Query teams associated with Ownership-enriched Smartscape nodes or classic deprecated entities in a dedicated workflow.
For more details, see Actions for Ownership and Automate team updates using a workflow and Ownership actions.
Use cases
The following use cases show how to leverage Ownership:
- Provide contact information to enhance automated remediation actions, such as targeted notifications via, for example,
 Workflows.
 - Enable team and dependency transparency.
- Reduce Mean Time to Recovery (MTTR) to automatically inform the right teams about new incidents.
- Automatically import and store ownership-team information to keep the information always in sync and up-to-date.
Limitations
- Ownership leverages Smartscape nodes. Learn more about Smartscape data retention.
- A single execution of the Get owners action can retrieve owners of up to 10,000 Smartscape nodes.
Ownership