Configure OpenTelemetry tracing with Envoy
- Latest Dynatrace
- How-to guide
- 4-min read
This integration is based on open source code governed by the respective communities and is not covered under the Dynatrace support policy. While we strive to assist, issues and feature requests should be reported directly to the respective project. Dynatrace cannot ensure fixes/features due to the independent nature of OSS projects.
Always use the most recent release version to ensure you have the latest patches and fixes deployed.
This page describes how to configure your Envoy version 1.30+ instance to export traces to Dynatrace. This lets you monitor traffic flowing through your Envoy proxy directly in Dynatrace.
Prerequisites
-
Envoy 1.30+
-
The OTLP traces URL for the export.
-
The OneAgent Envoy code module is disabled for your environment or host. To do this:
- Go to the applicable configuration page:
- For the entire environment:
- Go to
 Settings > Collect and capture > General monitoring settings > Monitored technologies.
- Go to
- For a particular host, go to Your host > Host settings > General.
- For the entire environment:
- Find Envoy in the list of monitored technologies and select Edit.
- Select the Monitor Envoy toggle, as appropriate, to turn off the OneAgent Envoy code module.
- Go to the applicable configuration page:
Configure Envoy tracing
1. Create a Dynatrace token
Create a platform token, either via the:
- UI, as described in Platform tokens
- API, as described in Platform tokens API - POST a platform token
Your platform token needs the following scopes:
- Read sampling configuration for Adaptive Traffic Management (
adaptive-traffic-management:sampling-configuration:read) - Ingest OpenTelemetry traces (
openpipeline:traces:ingest)
2. Add the Dynatrace cluster entry
Add the following cluster entry under the top-level clusters key in your Envoy configuration file.
- name: dynatrace-oteltype: LOGICAL_DNSdns_lookup_family: V4_ONLYlb_policy: ROUND_ROBINload_assignment:cluster_name: dynatrace-otelendpoints:- lb_endpoints:- endpoint:address:socket_address:address: "<your-environment-id>.live.dynatrace.com"port_value: 443transport_socket:name: envoy.transport_sockets.tlstyped_config:"@type": type.googleapis.com/envoy.extensions.transport_sockets.tls.v3.UpstreamTlsContext
Adaptive Traffic Management
By default, Envoy traces exported via OTLP are not subject to Adaptive Traffic Management (ATM). They count against your included Full-Stack trace volume, and any excess is charged as extended ingest. There is no automatic rate control.
To participate in Adaptive Traffic Management, add the Dynatrace sampler extension (envoy.tracers.opentelemetry.samplers.dynatrace) to your Envoy tracer configuration. The sampler fetches the current adaptive trace sampling rate from the Dynatrace API and applies it to sampling decisions locally in Envoy, keeping trace volume within your licensed Full-Stack trace volume in the same way OneAgent does.
Configuration parameters for the sampler:
tenant: Your Dynatrace tenant identifier (available from the Envoy Hub entry setup page).cluster_id: Your Dynatrace cluster ID (available from the Envoy Hub entry setup page).http_service: The Dynatrace API endpoint from which the sampler fetches sampling configuration.root_spans_per_minute: Fallback sampling rate used when the Dynatrace API is unreachable (default:1000).
For the full proto reference, see the Dynatrace sampler specification in the Envoy documentation.
Envoy traces participating in ATM via the Dynatrace sampler are subject to the environment-wide adaptive trace sampling rate. Per-request HTTP or gRPC sampling rules do not apply to Envoy traces.
1. Configure the OpenTelemetry tracer
Add the following entry to the http_connection_manager filters section of your Envoy configuration file.
tracing:random_sampling:value: 100provider:name: envoy.tracers.opentelemetrytyped_config:"@type": type.googleapis.com/envoy.config.trace.v3.OpenTelemetryConfigservice_name: <your-service-name>http_service:http_uri:uri: "<your-environment-id>.live.dynatrace.com/api/v2/otlp/v1/traces"cluster: dynatrace-oteltimeout: 10srequest_headers_to_add:- header:key: "Authorization"value: "Bearer ${env:DT_PLATFORM_TOKEN}"resource_detectors:- name: envoy.tracers.opentelemetry.resource_detectors.dynatracetyped_config:"@type": type.googleapis.com/envoy.extensions.tracers.opentelemetry.resource_detectors.v3.DynatraceResourceDetectorConfigsampler:name: envoy.tracers.opentelemetry.samplers.dynatracetyped_config:"@type": type.googleapis.com/envoy.extensions.tracers.opentelemetry.samplers.v3.DynatraceSamplerConfigcluster_id: <cluster-id>tenant: <your-tenant-id>http_service:http_uri:cluster: "dynatrace-otel"uri: "<your-environment-id>.live.dynatrace.com/api/v2/samplingConfiguration"timeout: 10srequest_headers_to_add:- header:key: "Authorization"value: "Bearer ${env:DT_PLATFORM_TOKEN}"
Replace the following placeholders with the appropriate values:
<your-service-name>: Your service's name.<your-environment-id>: Your Dynatrace environment ID. See environment ID to find yours.<DT_PLATFORM_TOKEN>: The platform token you created.<cluster-id>: The numeric ID of your Dynatrace cluster.<your-tenant-id>: The same value as<your-environment-id>.
If you're setting up the integration through the Dynatrace Hub (search for Envoy > select the Hub entry > Set up), the <cluster-id> value is pre-filled in the provided snippet. If you don't have access to this wizard, retrieve the value by sending a GET request to https://<your-environment-id>.live.dynatrace.com/api/v1/config/clusterid with a token that has the Data Export (DataExport) scope.
For more information, see Dynatrace API - Tokens and authentication.
2. Verify the setup
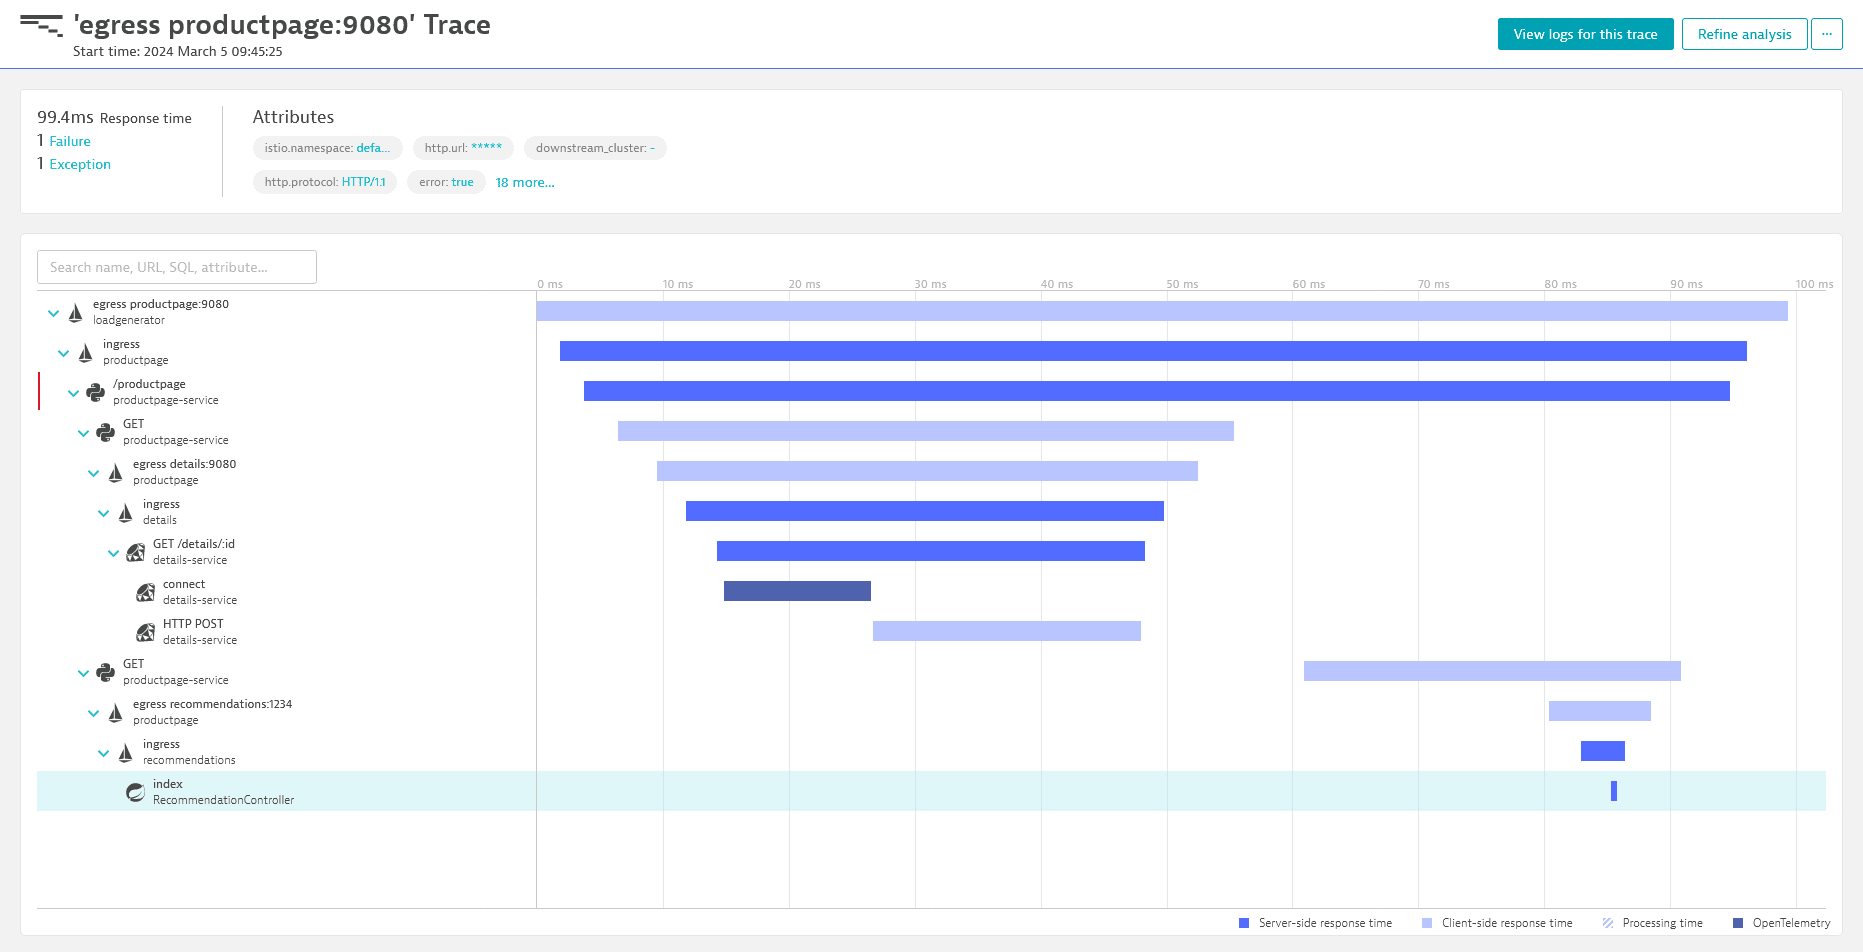
After the setup is complete and you have ingested your first data, you can verify if the traces show up in Dynatrace.
Next steps
To also trace Istio-managed traffic, see Configure OpenTelemetry tracing with Istio.