Monitor Azure Functions on Plans for Windows
- Latest Dynatrace
- How-to guide
- 6-min read
Prerequisites
-
Create a token to download and setup OneAgent:
- Platform tokens. Use Platform tokens to access the for following services:
- fleet-management:oneagents:download
- fleet-management:cluster-id:read
- fleet-management:oneagent.tokens:read
- API Tokens
- Platform tokens. Use Platform tokens to access the for following services:
-
Determine your environment ID.
-
Determine your server URL if required.
The server URL is required only if you use an ActiveGate for a Dynatrace SaaS endpoint. The URL is automatically generated from the environment ID.
- ActiveGate server URL:
https://<your-active-gate-IP-or-hostname>:9999/e/<your-environment-id>/api(the ActiveGate port is configurable)
- ActiveGate server URL:
Before you install the site extension, enable the Azure Functions OneAgent feature for the technology that you want to monitor:
- Go to
 Settings > Collect and capture > General monitoring settings > OneAgent features.
 - Filter for
azure function. - Enable the feature for your technology.
Install Dynatrace OneAgent site extension
There are two ways to install the Dynatrace OneAgent site extension: via Azure portal or using an ARM template. Follow the steps below for instructions.
Install Dynatrace OneAgent site extension via Azure portal
If you use a Consumption Plan, stop the function app before you install the site extension. Restart the function app after you complete the installation.
- In the Azure portal, open the function app that you want to monitor.
- In the left menu, search for Extensions and select it.
- Select + Add.
- Select Choose an extension, search for Dynatrace OneAgent, and select it.
- Accept the legal terms and select Add.
- Wait for the extension to install and refresh the extensions list.
- In the Browse column for Dynatrace OneAgent, select the icon to open the extension configuration page in a new tab.
- Enter your environment ID and PaaS token, as described in Prerequisites.
- Select the Technology that you want to monitor.
- Select Refresh versions and choose a OneAgent version. If you don't choose one, the extension defaults to the latest version.
- Select Install OneAgent and wait for the installation to finish. The page displays the required OneAgent environment variables, with an Azure CLI command at the bottom to set them. The Azure CLI command is shown for Consumption and Premium plans, but not for Dedicated plans.
- Run the provided Azure CLI command to add the required application settings.
- Return to the extension configuration page and verify that all configuration values are set.
- In the Azure portal, refresh and restart the function app.
After restart, OneAgent starts monitoring your application automatically.
To reduce download time and package size, select only the technologies you need. By default, all technologies are included.
Install Dynatrace OneAgent site extension using an ARM template
Alternatively to the main installation method via Azure portal, you can make the Dynatrace site extension part of your ARM templates.
Example configuration:
{"apiVersion": "2016-08-01","name": "[parameters('resourceName')]","type": "Microsoft.Web/sites","properties": {"name": "[parameters('resourceName')]","siteConfig": {"alwaysOn": true,"appSettings": [{ "Name": "DT_TENANT", "Value": "<Environment-ID>" },{ "Name": "DT_API_TOKEN", "Value": "<PaaS-Token>" },{ "Name": "DT_API_URL", "Value": "<Server-Url>" },{ "Name": "DT_SSL_MODE", "Value": "default" }]},"serverFarmId": "[resourceId('Microsoft.Web/serverfarms', parameters('resourceName'))]"},"dependsOn": ["[concat('Microsoft.Web/serverfarms/', parameters('resourceName'))]"],"location": "[parameters('location')]","resources": [{"apiVersion": "2016-08-01","name": "Dynatrace","type": "siteextensions","dependsOn": ["[resourceId('Microsoft.Web/sites', parameters('resourceName'))]"],"properties": { }}]}
| Parameter | Requirement | Description |
|---|---|---|
| Required | The environment ID as described in Prerequisites. |
| Required | The PaaS token as described in Prerequisites. |
| Optional | The server URL, if you want to configure an alternative communication endpoint as described in Prerequisites. |
| Optional | To automatically accept all self-signed TLS certificates, set the value to |
| Optional | The OneAgent technology to install. By default, all technologies are installed. |
| Optional | The OneAgent version to install. By default, the latest version is installed. |
If AlwaysOn isn't set to true, the installation of OneAgent is triggered on the start-up/first request to Kudu.
To check the deployment status, go to  Fleet Management for Latest Dynatrace or Deployment Status for Dynatrace Classic.
After installation is complete, go to Azure portal and restart the App Function application to recycle the application's worker process. Immediately after restart, OneAgent will begin monitoring your application.
Override OneAgent configuration
To override the default configuration, you can use the following parameters.
| Parameter | Description |
|---|---|
| Semicolon-separated list of communication endpoints |
How to add the DT_CONNECTION_POINT parameter in the Azure portal
-
In the Azure portal, select the web function you want to monitor.
-
Select Settings > Configuration > Application Settings.
-
Select New application setting.
-
Enter the following key/value pair:
- Name:
DT_CONNECTION_POINT - Value:
https://<YOUR_ACTIVEGATE_ADDRESS>:9999/communication, making sure to replace<YOUR_ACTIVEGATE_ADDRESS>with your own value.
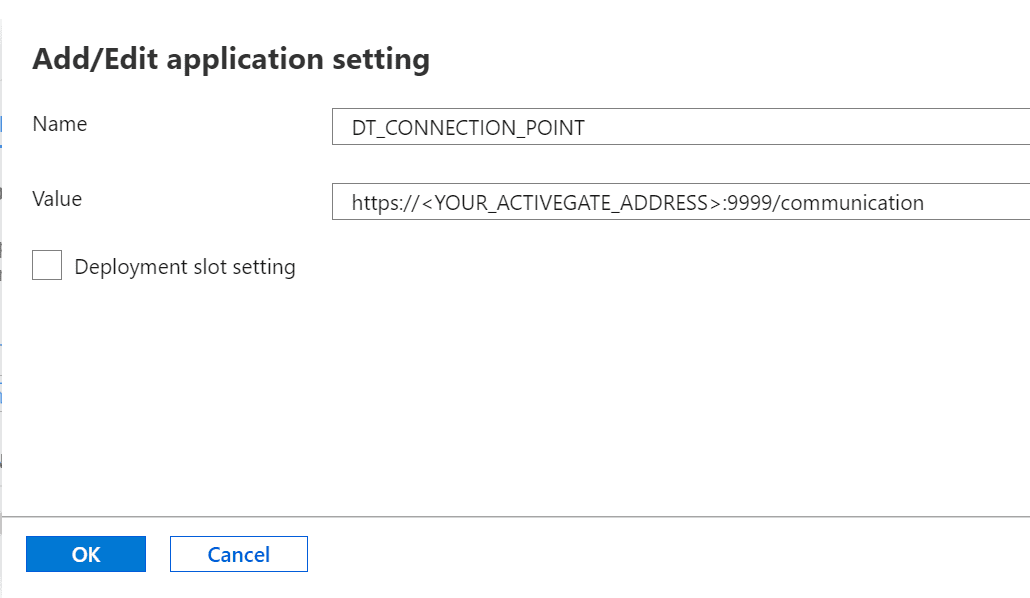 DT connection
 - Name:
-
Select OK to save the configuration.
Update OneAgent
Dynatrace doesn't provide OneAgent updates on Azure Functions automatically. To update OneAgent on Azure Functions:
- In the Azure portal, go to Extensions and select Browse for Dynatrace OneAgent. If an update is available, select Update. You can monitor the progress until the update is finished.
- Restart Azure Functions to recycle the application worker process.
If you're on a Consumption Plan, stop Azure Functions before the update and restart them after the update.
Update the site extension
To update the site extension on Azure Functions, go to Extensions, select Browse for Dynatrace OneAgent, and, if an update is available, select Update.
An update to the site extension doesn't force an update to OneAgent.
Uninstall OneAgent
Removing the extension also removes OneAgent.
If the application is running at the time of removal, the extension recognizes the running application, taking care to not remove any Dynatrace artifacts to prevent issues with the application. Instead, only the extension including the configuration is removed, so that, on the next restart of the application, OneAgent is no longer active.