Manage Extensions
- Latest Dynatrace
- How-to guide
- 7-min read
Manage Dynatrace extensions for hundreds of technologies.
Prerequisites
Permissions
Things to consider
If you can't access  Extensions, make sure you have the required permissions, specifically those starting with
 extensions:configuration and extensions:definitions. For additional information, refer to Working with policies and IAM Policy - Read and write permissions on extensions configurations in the Dynatrace Community.
Overview
Extensions allows you to extend Dynatrace capabilities for data acquisition and domain expertise to hundreds of technologies. Extensions app is your central resource for managing and configuring Extensions 2.0.

Dynatrace Hub
Upload a custom extension from Dynatrace Hub
- Go to Extensions > Upload custom extension.
- Select your extension archive and upload it to Dynatrace.
Dynatrace Hub verifies the extension archive and structure, then automatically enables it after a successful upload.
Most fields are pre-filled based on the extension YAML file. You can provide release notes information explaining why the extension version changed.
Deploy an extension from Dynatrace Hub
- Go to Extensions > Discover.
- Find the extension from the list or use the search bar. All extensions already in your environment are marked with Installed.
- Select the tile of the extension you want to add, then select Add to environment.
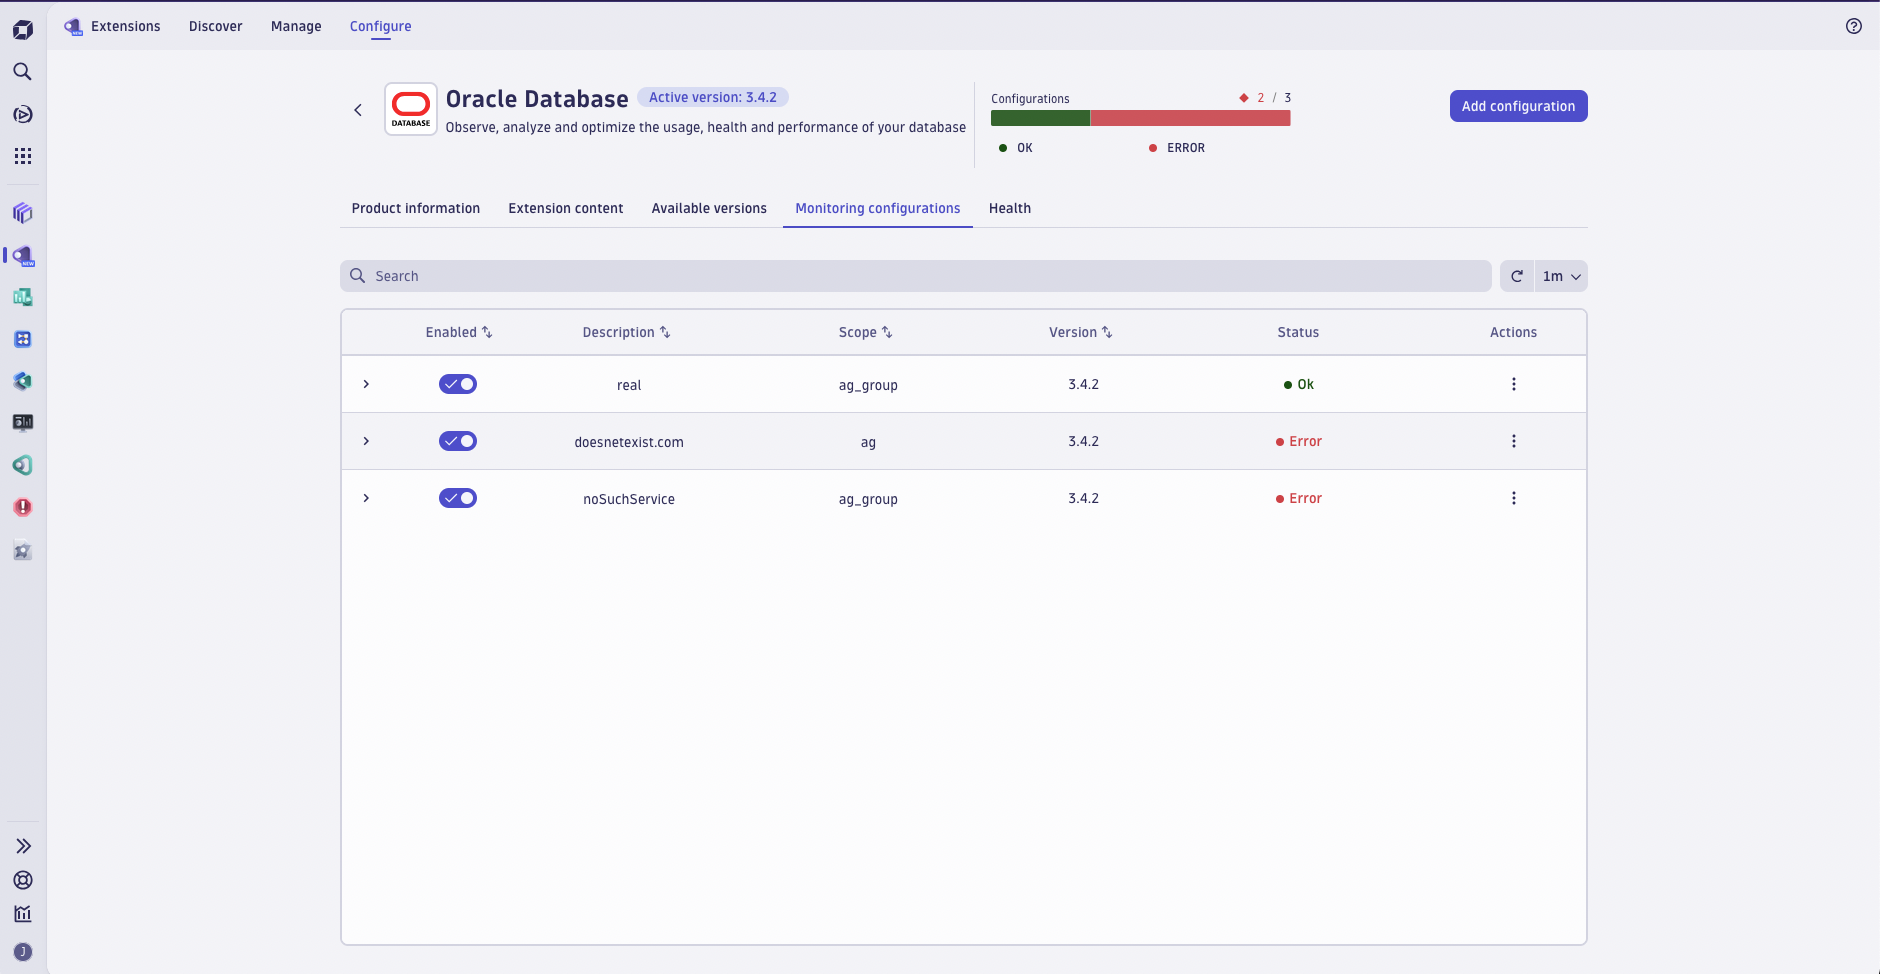
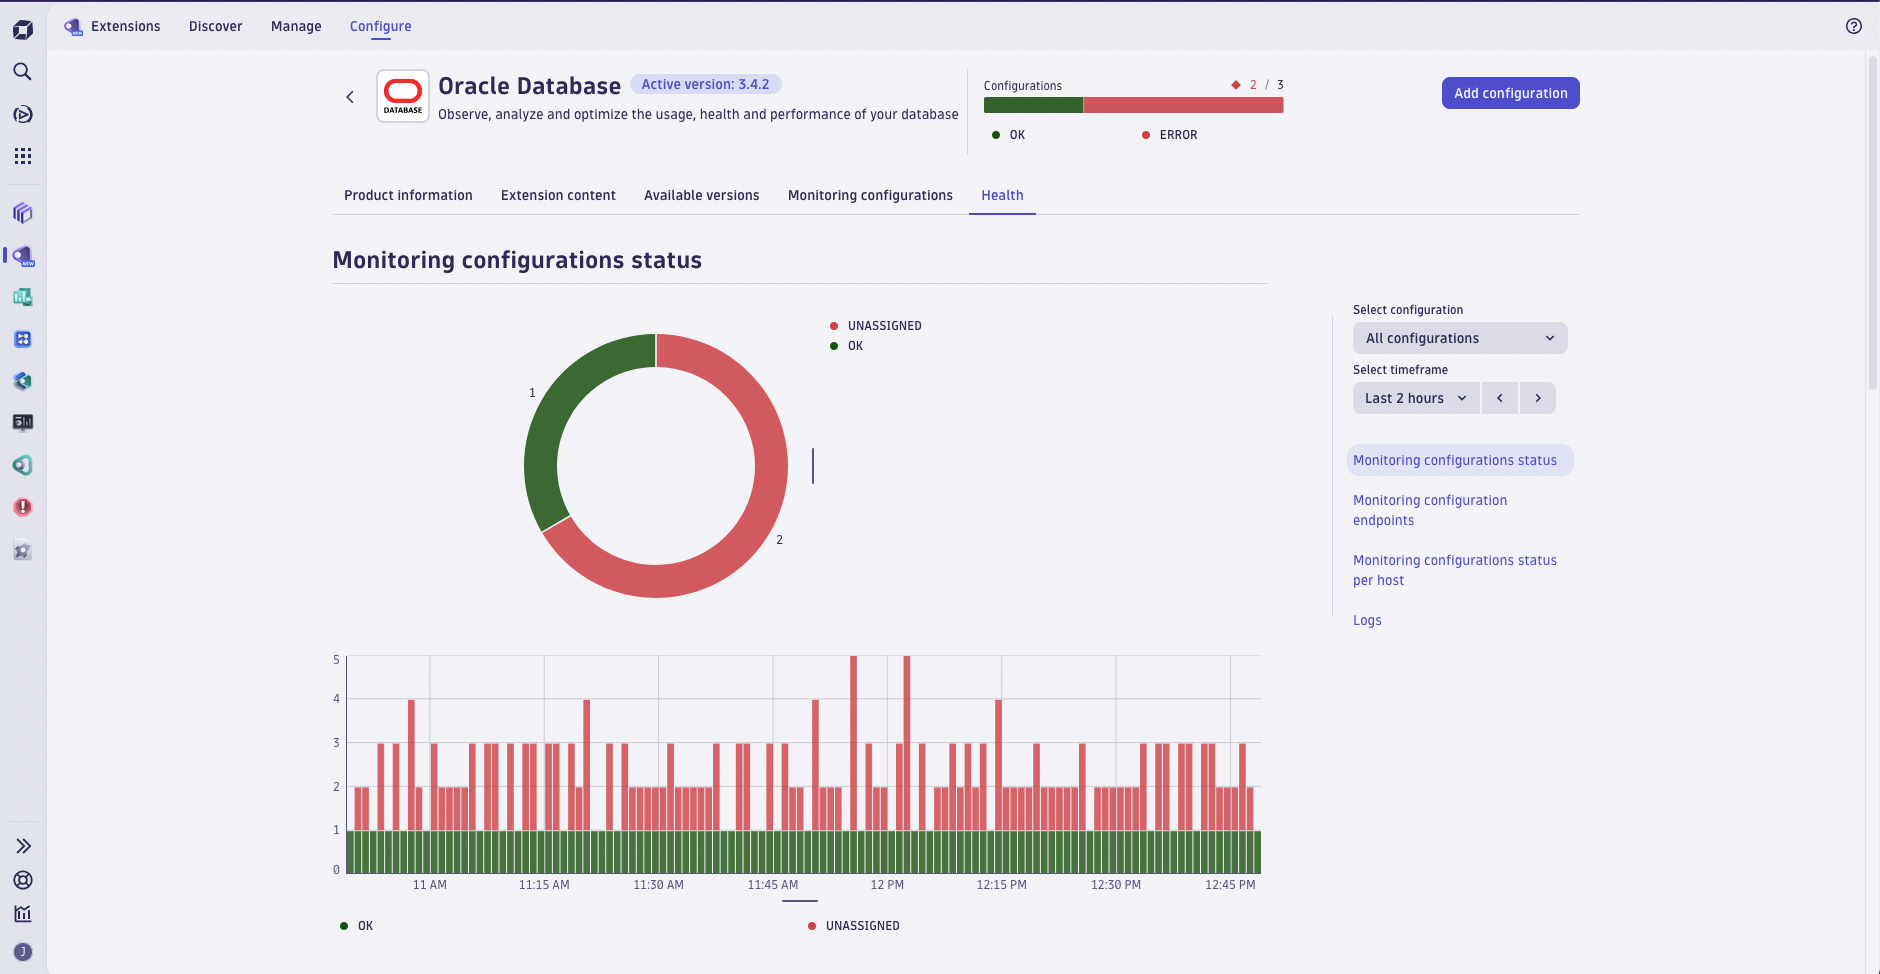
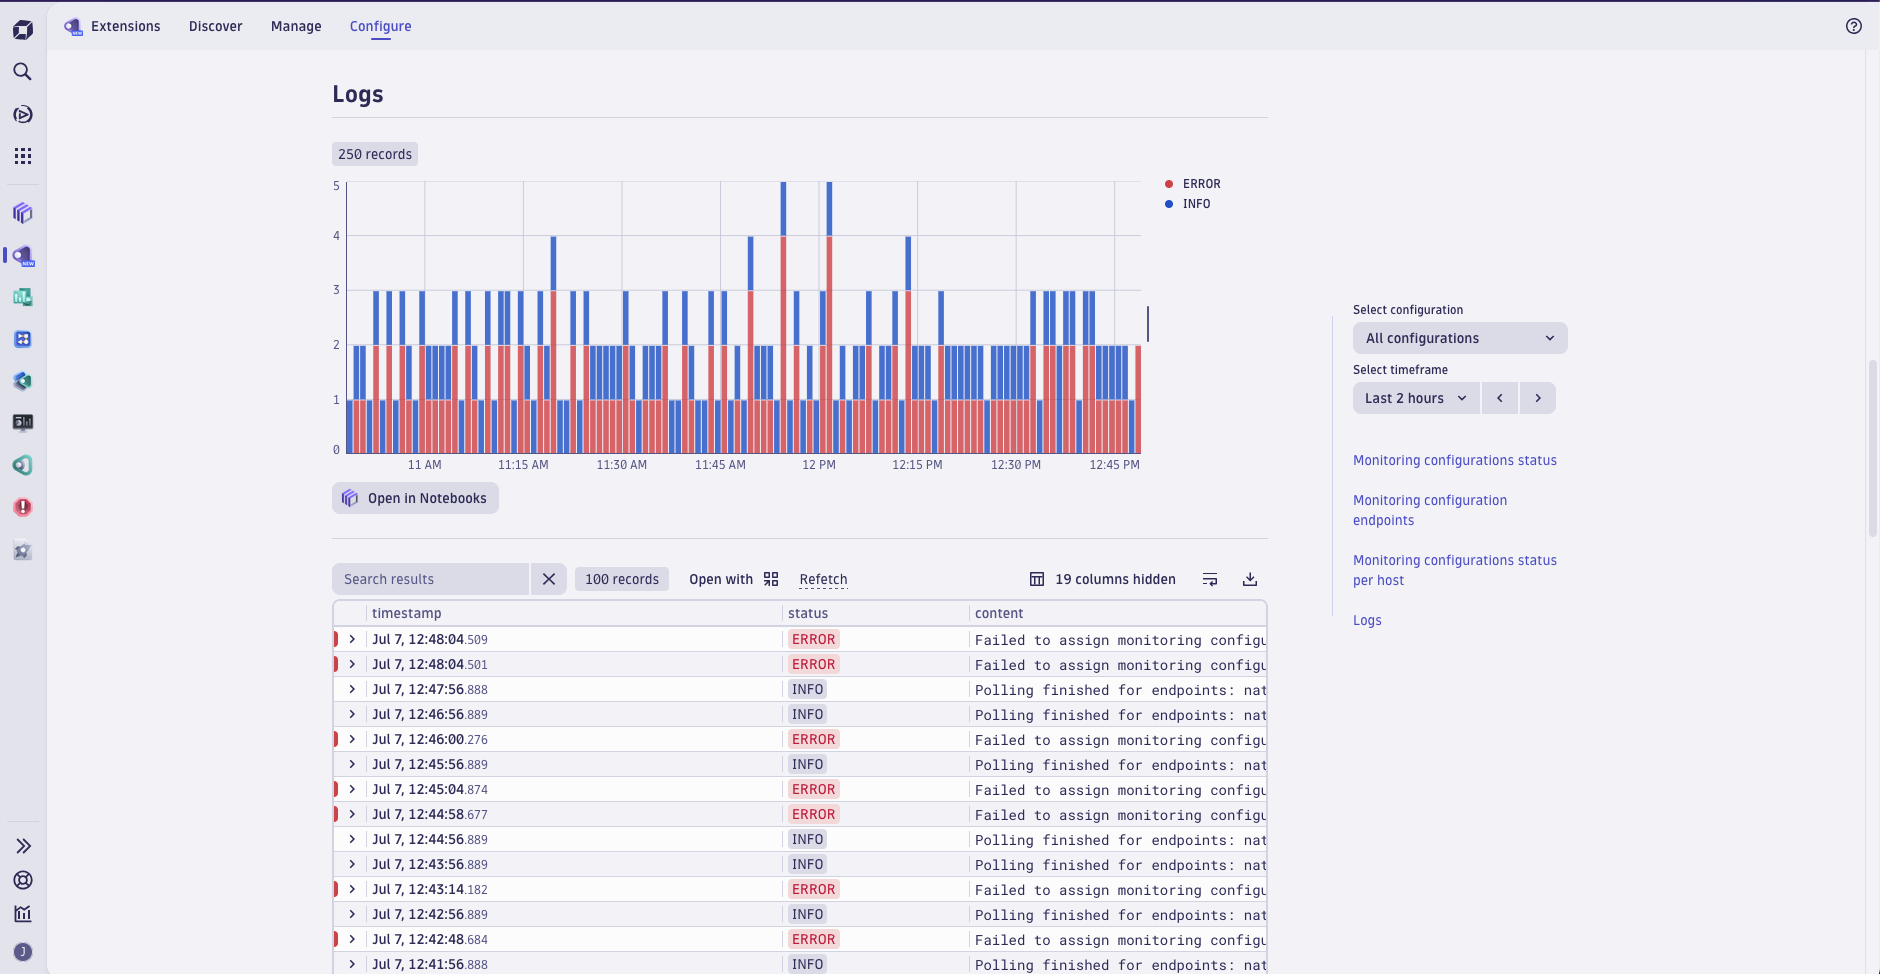
You can now check the Product information, Extension content, Available versions, Monitoring configurations, and Health of your extension by selecting each of the tabs.
Define devices
Select Add device to define the devices from which you want to collect data and provide the device connection details:
- IP address or device name
- Port
- SNMP version and related authentication details
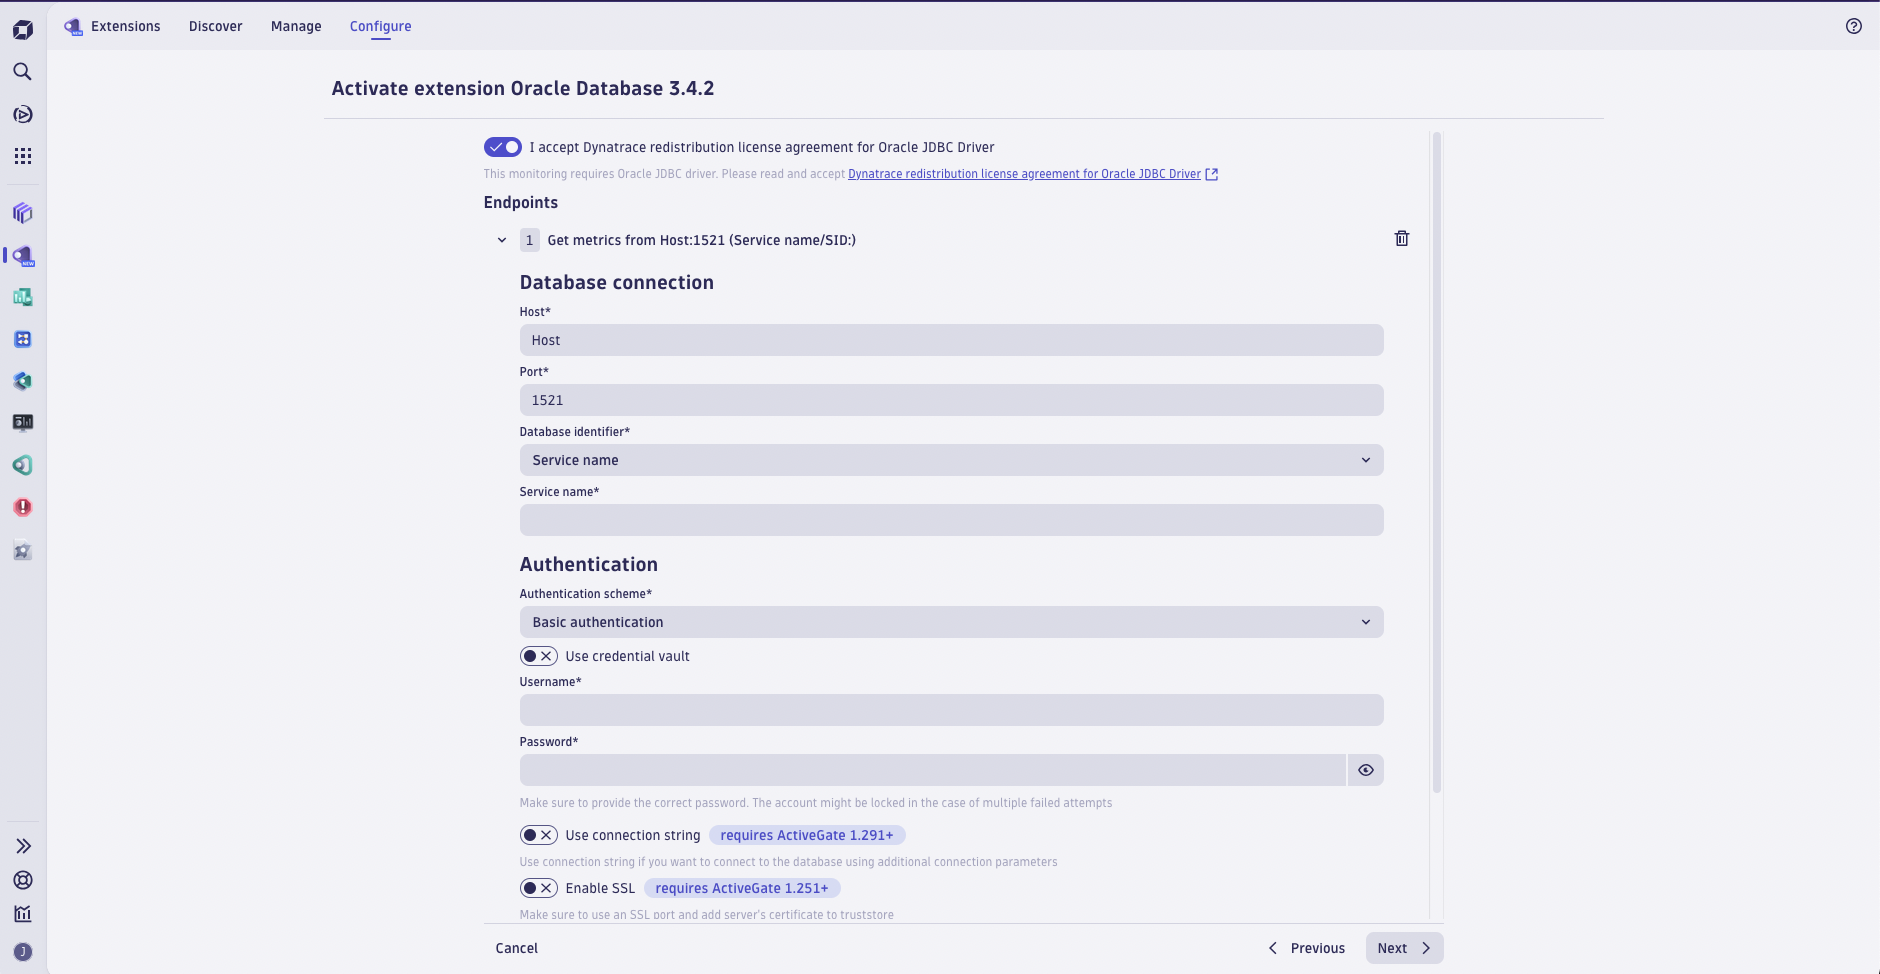
Start monitoring
Your extension appears in Dynatrace Hub. The next step is to provide the monitoring configuration for your extension. The detailed steps depend on your extension data source. For more information, see:
Update an extension from Dynatrace Hub
To update an extension, upload a new version. Dynatrace Hub automatically activates the new extension version.
Each update of the extension overwrites the metric event configuration that may come with the extension. This means that any customizations made to the metric events settings are reset to their default values upon updating the extension. Take note of any custom configurations and reapply them after the update if needed.
Delete an extension from Dynatrace Hub
You can uninstall an extension or remove a version of that extension.
To uninstall an extension
- Go to Extensions > Manage.
- Find the extension you want to remove and select > Uninstall.
To delete extension versions
- Go to Extensions > Manage.
- Select the extension tile to open the details.
- Select Available versions > Uninstall.
When you delete a version, Dynatrace Hub activates the latest available version.
Dynatrace API
API permissions
You need a platform token with the following scopes to manage the extension lifecycle:
extensions:definitions:read—read extensions definitionsextensions:definitions:write—upload and delete extensions and manage environment configurationsextensions:configurations:read—read extension monitoring configurationsextensions:configurations:write—create and update extension monitoring configurations
Upload an extension with Dynatrace API
Run the following command to upload the extension package to your environment. For this example, we use the Dynatrace SaaS URL:
curl -X POST "https://{env-id}.live.dynatrace.com/platform/extensions/v2/extensions" \-H "accept: application/json" \-H "Authorization: Bearer {platform-token}" \-H "Content-Type: application/octet-stream" \--data-binary "@MyCustomExtension.zip"
Replace:
{env-id}with your environment ID.{platform-token}with a platform token that has the required permissions.MyCustomExtension.zipwith the actual name of your extension package.
After a successful upload, the Dynatrace API returns basic extension details with HTTP 201, including the extension name, version, and minimum Dynatrace version required to run the extension:
{"extensionName": "custom:my.company.extension","version": "1.0.0","author": {"name": "My Company"},"dataSources": [],"variables": [],"featureSets": [],"minDynatraceVersion": "1.213.0"}
Activate an extension with Dynatrace API
After you upload the extension to your environment, you need to activate the environment configuration. This step is necessary because you can upload up to 10 extension versions but only one version can be active at a time. When you activate the extension, you specify which version to use.
Run the following command to activate the extension in your environment. For this example, we use the Dynatrace SaaS URL.
curl -X POST "https://{env-id}.live.dynatrace.com/platform/extensions/v2/extensions/{extension-name}/environment-configuration" \-H "accept: application/json" \-H "Authorization: Bearer {platform-token}" \-H "Content-Type: application/json" \-d "{\"version\":\"{version}\"}"
Replace:
{env-id}with your environment ID.{platform-token}with a platform token that has the required permissions.{extension-name}with the actual extension name.{version}with the extension version you want to activate.
To determine the extension name, extract the extension package, extract the extensions.zip file from the package, and open the extension.yaml file.
After a successful activation, the Dynatrace API returns the version of the activated extension:
{"version": "1.0.0"}
Start monitoring with Dynatrace API
To start monitoring, you need to create at least one monitoring configuration. The format of the JSON payload depends on the monitored data source.
curl -X POST "https://{env-id}.live.dynatrace.com/platform/extensions/v2/extensions/{extension-name}/monitoring-configurations" \-H "accept: application/json" \-H "Authorization: Bearer {platform-token}" \-H "Content-Type: application/json" \--data "@{monitoring-configuration}"
Replace:
{env-id}with your environment ID.{platform-token}with a platform token that has the required permissions.{extension-name}with the actual extension name.{monitoring-configuration}with the filename containing the JSON payload with the monitoring configuration. For details on the format, see SNMP.
After a successful call, the Dynatrace API returns the monitoring configuration ID with HTTP 201:
{"objectId": "vu9U3hXa3q0AAAABACVleHQ6Y29tLmR5bmF0cmFjZS5zY2hlbWEtc25tcC1nZW5lcmljAAhhZ19ncm91cAAHRTJFVEVTVAAkMWMxZTlhMDctNzVkYi0zZjI0LWI4OGUtZmIxYWRiNGNjYTY4vu9U3hXa3q0","code": 201}
After a few minutes, go to metric browser and search for the metrics you defined for your extension.
Update extension with Dynatrace API
To update an extension, upload the new extension package and then update the active environment configuration version.
Upload updated extension package with API
To upload the package, use the same command you used to upload the initial version of the extension. You need to use the new extension package filename if it changed.
Update active configuration version with API
To update the active environment configuration version, use one of these methods to determine the new version:
- After a successful upload, the Dynatrace API returns basic extension details, including the version.
- Find the version in the
extension.yamlfile inside the extension package. - Call
GET /platform/extensions/v2/extensions/{extension-name}to list all available versions.
Run the following command to switch to the new version. For this example, we use the Dynatrace SaaS URL.
curl -X PUT "https://{env-id}.live.dynatrace.com/platform/extensions/v2/extensions/{extension-name}/environment-configuration" \-H "accept: application/json" \-H "Authorization: Bearer {platform-token}" \-H "Content-Type: application/json" \-d "{\"version\":\"{version}\"}"
Replace:
{env-id}with your environment ID.{platform-token}with a platform token that has the required permissions.{extension-name}with the actual extension name.{version}with the extension version you want to activate.
After a successful update, the Dynatrace API returns the version of the now-active extension:
{"version": "1.1.0"}
If you need to revert to an earlier version, run the command above with a different version parameter.
Delete extension with Dynatrace API
If you uploaded multiple extension versions, you need to delete all versions to completely remove the extension from your environment. Call GET /platform/extensions/v2/extensions/{extension-name} to list all available versions.
Deactivate environment configuration with API
To deactivate the currently active environment configuration, run the following command. For this example, we use the Dynatrace SaaS URL.
curl -X DELETE "https://{env-id}.live.dynatrace.com/platform/extensions/v2/extensions/{extension-name}/environment-configuration" \-H "accept: application/json" \-H "Authorization: Bearer {platform-token}"
Replace:
{env-id}with your environment ID.{platform-token}with a platform token that has the required permissions.{extension-name}with the actual extension name.
After a successful deactivation, the Dynatrace API returns HTTP 204 with no response body.
Delete extension version with API
To delete an extension version, run the following command. In this example, we use the Dynatrace SaaS URL.
curl -X DELETE "https://{env-id}.live.dynatrace.com/platform/extensions/v2/extensions/{extension-name}/{extension-version}" \-H "accept: application/json" \-H "Authorization: Bearer {platform-token}"
Replace:
{env-id}with your environment ID.{platform-token}with a platform token that has the required permissions.{extension-name}with the actual extension name.{extension-version}with the extension version you want to delete.
After a successful version deletion, the Dynatrace API returns HTTP 202 with the deleted extension details:
{"extensionName": "custom:my.company.extension","version": "1.0.0","author": {"name": "My Company"},"dataSources": [],"variables": [],"featureSets": [],"minDynatraceVersion": "1.213.0"}
 Extensions