- Latest Dynatrace
- 3-min read
You can automate sending out-of-the-box emails using Email  based on the events and schedules defined by your workflows.
Grant permissions to Workflows
Workflows require certain permissions to run actions on your behalf. Other permissions are required by actions that come bundled with Email.
To fine-tune permissions granted to Workflows
- Go to Workflows
 and go to Settings > Authorization settings.
 - Select the following permissions besides the general Workflows permission.
- Permissions needed for Send email actions
email:emails:send
- Permissions needed for Send email actions
For more on general Workflows user permissions, see Expression reference.
Trial environments are prohibited to send emails with Email.
Send an email with workflows
- Go to Workflows
 and select
 Workflow to create a new workflow.
- Select the Trigger to choose the right trigger for your needs.
- In the side panel, select one of the triggers.
- On the trigger node, select Add task
to browse available actions.
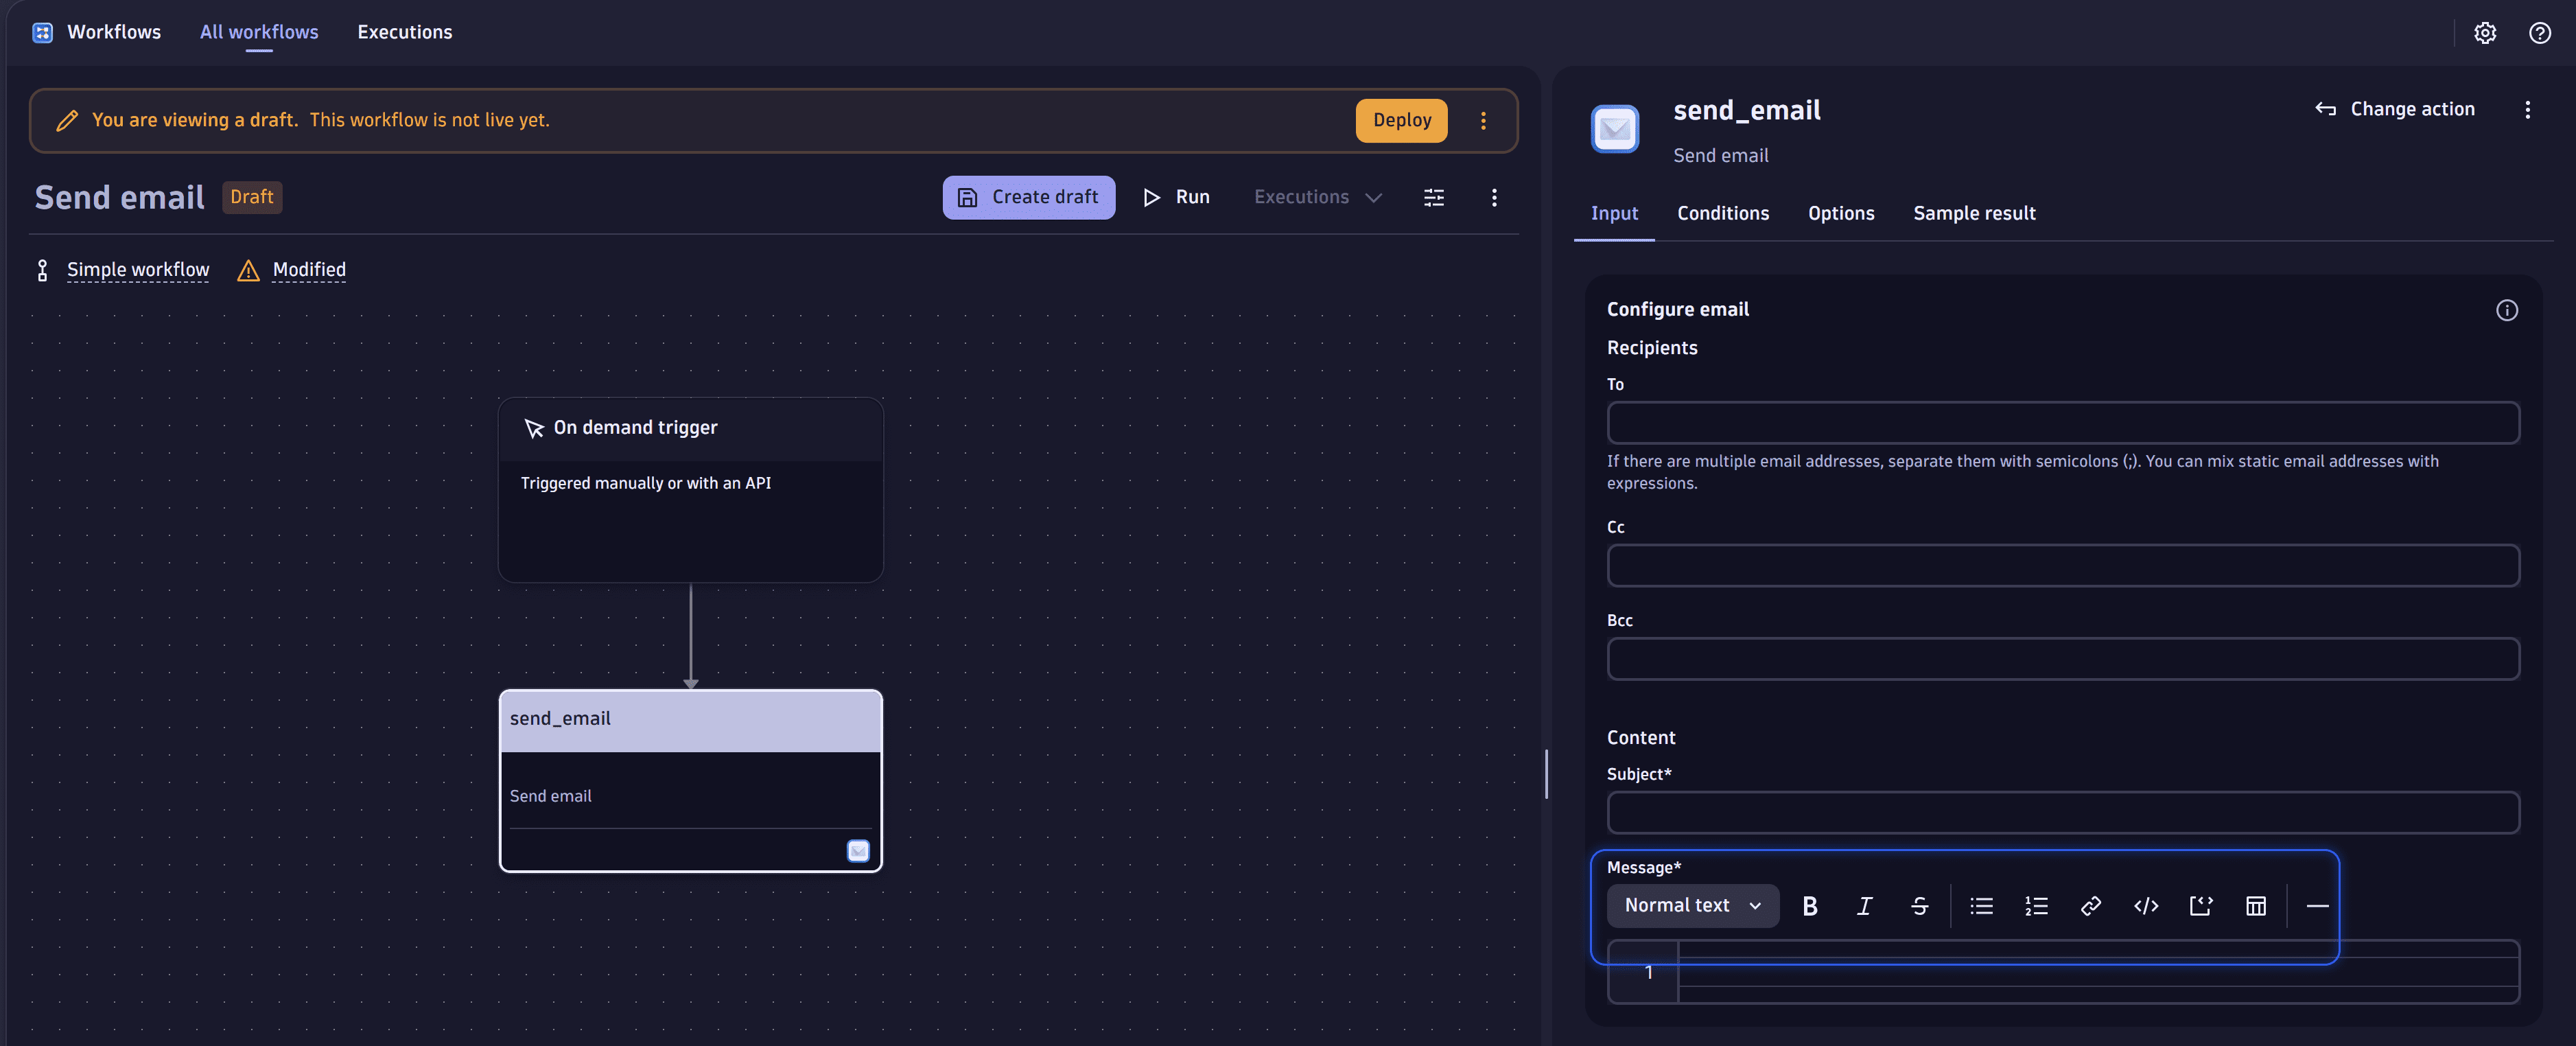
- In the side panel, search the actions for Email and select Send email.
- In To field, enter the email addresses of the recipients. The Cc, Bcc fields, are also available. For To, Cc, and Bcc fields the number of email addresses is restricted to 10 per field.
- In Subject and Message fields, enter a meaningful text.
- Select Run.
Email sends emails from no-reply@apps.dynatrace.com email address. We recommend whitelisting the domain to avoid emails being redirected to the junk folder.
Format email
To format the body of an email
-
Select Message.
-
Enter your text.
When you select, for example, the bold style, your text is rendered as bold in the sent email. You won't be able to preview it without the formatting symbols. However, when you send an email, the recipient will see the properly formatted text, and the formatting symbols won't be visible.
You can use the toolbar to insert common elements like a heading, bold text, or a link.
Attaching an image or inserting JavaScript code into the email body is impossible. It's just shown as plain text.

Format syntax
Italics
Wrap text in single asterisks (*like this*) to get italics like this.
Bold
Wrap text in double asterisks (**like this**) to get bold text like this.
Strikethrough
Wrap text in double tildes (~~like this~~) to get strikethrough (crossed out) text like this.
Code
-
Wrap text in backticks (`like this`) to get bold text
like this. -
Wrap text in triple backticks (```like this```) to show a code block (multiple lines of
code text).
Headings
To add a heading, start the line with the # character like this: # This is your heading text.
Horizontal line
To visually separate sections of your annotation, add a horizontal line with three dashes (---):
Lists
Each line of an unordered (bulleted) list starts with an asterisk (*):
* Line 1* Line 2
Alternatively, you can use a dash (-):
- Line 1- Line 2
An ordered (numbered) list starts with a number and a period (1.) followed by a space and then your text:
1. The first line of my procedure.2. The second line of my procedure.3. The third line of my procedure.
Tables
To add a table, define the headers, the column formatting row, and then the rows of data you want to display
| Header 1 | Header2--- | ---content2 | content2
| Header 1 | Header2 |
|---|---|
| content2 | content2 |
Links
To link to a website, use this format:
[Example text label](https://www.example.com)
Here's a link to the [Dynatrace website](www.dynatrace.com).
When using markdown links in email messages, only certain protocols are supported and are transformed to HTML links:
httphttpsftpftpsmailtotelsms
Links using unsupported protocols (such as file://) aren't transformed from markdown to HTML links and remain plain text. Depending on your email client, these links might still be highlighted or rendered as clickable links by the client itself.
Line break
To add a single line break and a new line, select Enter in the Message field of the Connector.
This Connector only allows formatting of the message body using the listed formatting options. It doesn't offer support for HTML.
Email formatting is disabled for messages with a size greater than or equal to 256 KiB.
Inputs
| Field | Description | Required |
|---|---|---|
| To | The recipients of the email. | Required |
| Cc | The cc recipients of the email. | Required |
| Bcc | The bcc recipients of the email. | Required |
| Subject | The subject of the email. | Required |
| Content | The content of the email. | Required |
You must enter at least one and a maximum of ten recipients in one of the fields (to, cc, bcc).
If you are using expressions for the recipients, the expressions must be evaluated as a list of email addresses, for example, ["user1@domain.com", "user2@domain.com"].
Action result
The Send email action provides the following result.
Property
Description
requestId
A unique identifier to trace successfully accepted email send requests.
clientRequestId
A unique identifier to trace successfully accepted email send requests. For sending emails, this is identical to requestId.
Expected behavior 'Failed to send email. Status code 403.'
Failed to send email. Status code 403.
This message is related to missing permissions or a trial environment as described above in Grant permissions to Workflows.
Sending JSON payloads as message content
When sending an object or non-string data as message content, ensure it is properly formatted as a string.
The recommended approach is to wrap your input in an expression and convert it to a JSON string using the to_json filter:
{{ result("run_javascript_1") | to_json }}
This approach ensures your data is properly formatted for transmission. For more information, see Expression reference.
The message size is limited to 256 KiB. Larger payloads will result in an action failure.