Deploy an extension with UA page documents
- Latest Dynatrace
- Reference
- 5-min read
- Published Jul 13, 2026
This page walks through a minimal, end-to-end example of shipping unified analysis (UA) page documents with an extension. It uses a single generic node type, CUSTOM_NODE, exposed by an extension named custom:my-extension.
You ship four documents:
| File | Document type | Purpose |
|---|---|---|
|
| Top-level Inventory Explorer category that groups related extensions. |
|
| Subtype under the category, representing this extension. |
|
| Subtype that lists all |
|
| Detail screen shown when a user opens a single |
The three InvExTypeDefinition documents nest into a hierarchy; the EntityDetailsDefinition then renders the individual entity page:
Example category (category-inventory.screen.json)└── Example extension (extension-inventory.screen.json)└── Example nodes (custom_node-inventory.screen.json)
Each document declares a target that binds it to an app (and, for nested types, to its parent invExType). See Targeting for the full field reference.
Where the files live
Place all four documents in your extension's screens directory:
src/extension/├── extension.yaml└── screens/├── category-inventory.screen.json├── extension-inventory.screen.json├── custom_node-inventory.screen.json└── custom_node-entitydetails.screen.json
and declare them in the extension.yaml file:
name: custom:my-extensionversion: 1.0.0minDynatraceVersion: "1.343"author:name: Joe Doedocuments:screens:- path: screens/category-inventory.screen.json- path: screens/extension-inventory.screen.json- path: screens/custom_node-inventory.screen.json- path: screens/custom_node-entitydetails.screen.json
When the extension is built and activated in Dynatrace, the documents will be automatically imported to your environment.
1. Category document
The category is the top-level entry in the Inventory Explorer. It has no invExType in its target, which marks it as a new top-level type. Multiple extensions can register subtypes under the same category, so keep the id and displayName generic.
category-inventory.screen.json
{"version": "1.3.0","type": "InvExTypeDefinition","target": {"app": "dynatrace.infraops"},"content": {"id": "example-category","displayName": "Example category","content": {"type": "vertical-layout","items": []}}}
2. Extension document
The extension document nests under the category by setting target.invExType to the category id (example-category). Its own id is the string that child node types point to.
extension-inventory.screen.json
{"version": "1.3.0","type": "InvExTypeDefinition","target": {"app": "dynatrace.infraops","invExType": "example-category"},"content": {"id": "custom:my-extension","displayName": "Example extension","content": {"type": "vertical-layout","items": []}}}
3. Node inventory document
This document lists every CUSTOM_NODE entity in a table. It nests under the extension via target.invExType, and metadata.nodeType binds it to the Smartscape node type, which the ALERTS_LOOKUP uses to auto-filter events to the correct entity type. The dql-table fetches nodes with smartscapeNodes and renders one row per entity; interactiveRows: "id" makes each row link to the entity details page. alertGroups, ALERTS_LOOKUP, and the health columns wire up health indicators so current alert state appears per row.
custom_node-inventory.screen.json
{"version": "1.3.0","type": "InvExTypeDefinition","target": {"app": "dynatrace.infraops","invExType": "custom:my-extension"},"metadata": {"nodeType": "CUSTOM_NODE"},"content": {"id": "CUSTOM_NODE-inventory","displayName": "Example nodes","filtering": {"type": "filtering","id": "text-filtering","filters": [{"id": "name-filter","title": "Name","fieldIds": ["name"]}]},"content": {"type": "vertical-layout","items": [{"type": "dql-table","id": "CUSTOM_NODE-default-table","title": "Example nodes","interactiveRows": "id","alertGroups": [{"groupName": "Availability","alerts": [{"displayName": "Availability","matchConditions": { "event.type": ["AVAILABILITY_EVENT"] }}]}],"dqlQuery": {"idField": "id","query": "smartscapeNodes CUSTOM_NODE\n| fieldsAdd status, version","lookups": [{"builtInLookup": "ALERTS_LOOKUP","lookupField": "id"}]},"columns": [{"id": "name","field": "name","displayName": "Name","defaultColumn": true,"sortable": true},{"id": "status","field": "status","displayName": "Status","sortable": true},{"id": "version","field": "version","displayName": "Version","sortable": true},{ "builtInColumn": "HEALTH_ALERTS_COLUMN" },{ "builtInColumn": "CUSTOM_ALERTS_COLUMN" }]}]}}}
4. Entity details document
The details document renders the page for a single entity. Its target.nodeType binds it to CUSTOM_NODE, and every query filters on the selected entity with toSmartscapeId($(entityId)). alertGroups configures health chip grouping; health is derived from the active table row, so no alertQueryParams is needed. This example defines two tabs: a metadata properties tab and an Overview tab with one chart.
custom_node-entitydetails.screen.json
{"version": "1.3.0","type": "EntityDetailsDefinition","target": {"app": "dynatrace.infraops","nodeType": "CUSTOM_NODE"},"content": {"type": "details","id": "example-node-details","alertGroups": [{"groupName": "Availability","alerts": [{"displayName": "Availability","matchConditions": { "event.type": ["AVAILABILITY_EVENT"] },"charts": ["example-node-charts"]}]}],"content": {"type": "tabs","items": [{"type": "tab","id": "example-node-properties","title": "Properties","content": [{"type": "vertical-layout","items": [{"type": "metadata","id": "example-node-metadata","dqlQuery": "smartscapeNodes CUSTOM_NODE\n| fields id, name, status, version\n| filter id == toSmartscapeId($(entityId))"}]}]},{"type": "tab","id": "example-node-overview","title": "Overview","content": [{"type": "vertical-layout","items": [{"type": "chart-group","id": "example-node-charts","charts": [{"id": "example-node-uptime-chart","displayName": "Uptime","dqlQuery": "timeseries uptime = avg(`my_extension.uptime`),\n by: {`dt.smartscape.custom_node`},\n filter: {`dt.smartscape.custom_node` == toSmartscapeId($(entityId))}","visualization": {"type": "TIMESERIES_CHART","variant": "line"}}]}]}]}]}}}
Verify the result
After you build and activate the extension:
- Open the Infrastructure & Operations app.
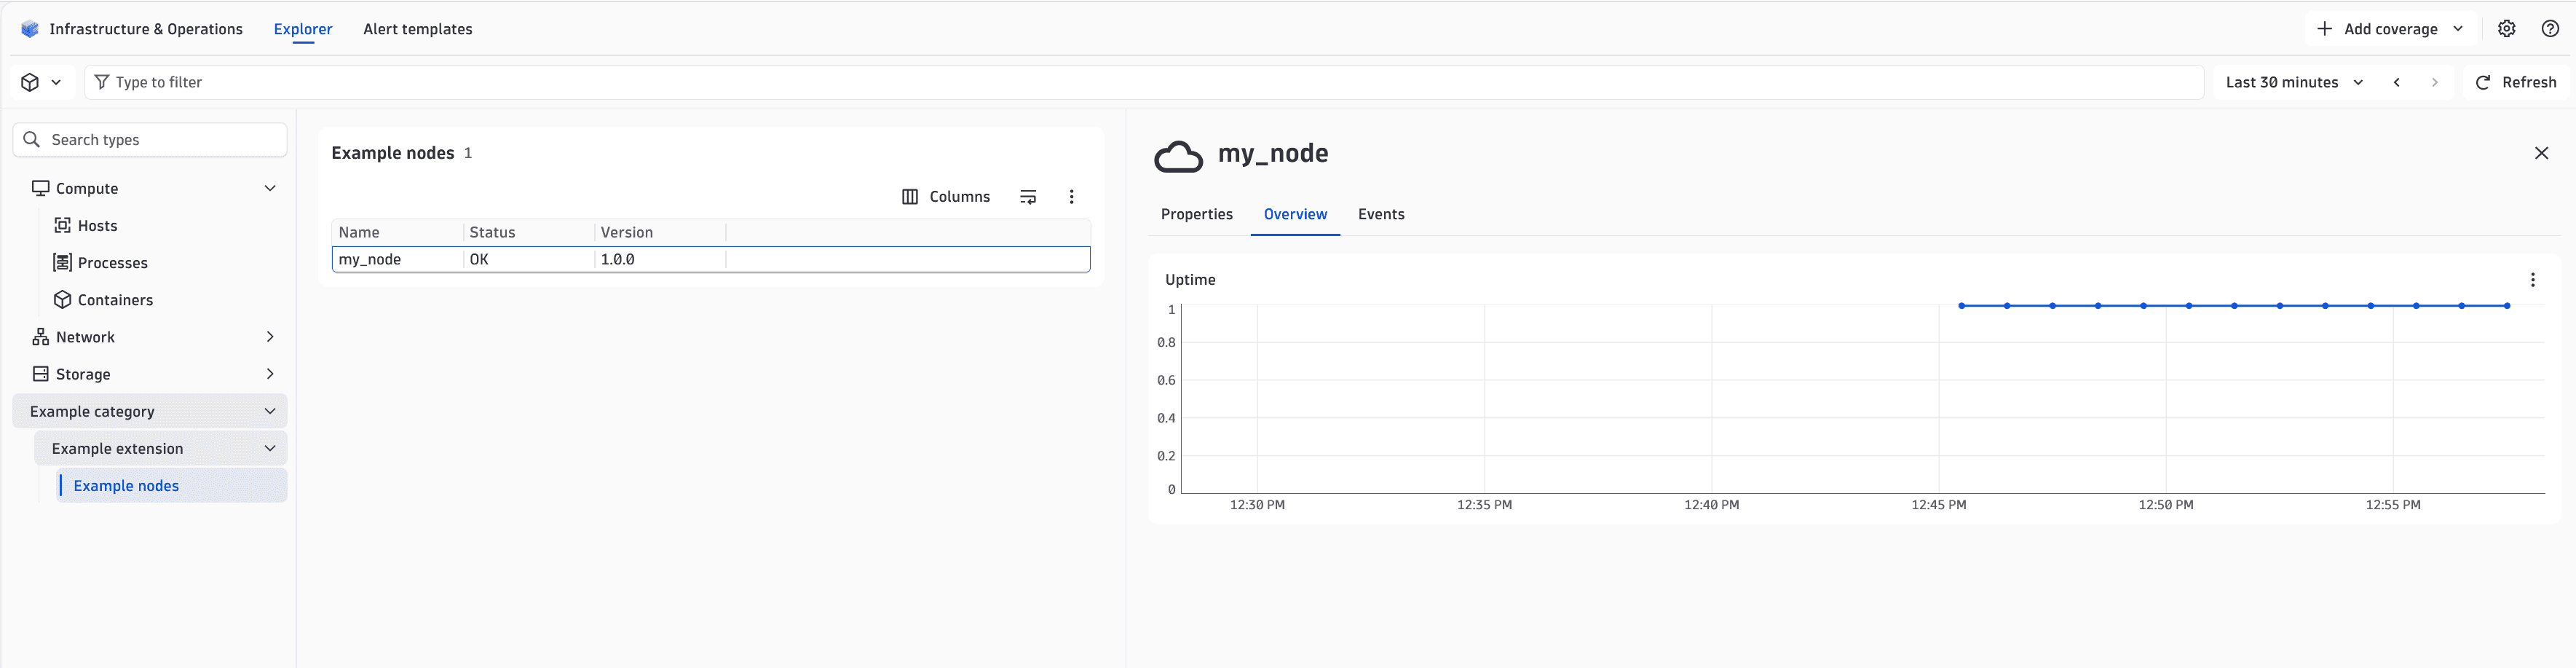
- In the Inventory Explorer, expand Example category → Example extension → Example nodes. The table from document 3 lists your
CUSTOM_NODEentities. - Select a row. The entity details page from document 4 opens with the Properties and Overview tabs.
See also
 ExtensionsInfrastructure Observability