Reverse proxy or load balancer for ActiveGate
- Latest Dynatrace
- 1-min read
- Published Aug 26, 2019
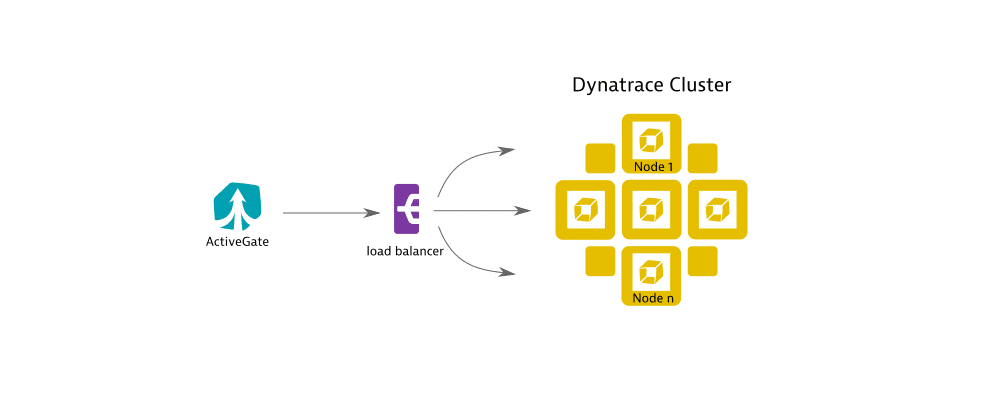
A reverse proxy or a load balancer can be placed on the path from an ActiveGate to the Dynatrace Cluster. This allows your ActiveGate to connect to any available node of the Cluster, spreading the load between the nodes.
To do this, you need to:
- Provide the address of the reverse proxy/load balancer.
- Ensure that ActiveGate will ignore any further target address information sent from the Dynatrace Cluster, and will thus connect only to the address you have specified.

Option to configure during installation
This configuration—to use a reverse proxy or a load balancer—can also be applied during ActiveGate installation, by specifying installation parameters to the ActiveGate installer for Linux or Windows or it can be configured later, after ActiveGate installation, as shown in the following procedure.
A load balancer should not be placed between ActiveGate and OneAgent, as it can disrupt memory dump transmission and processing.
Configure ActiveGate to use reverse proxy or load balancer
Follow the steps below to specify the reverse proxy address and to ignore connectivity information received from the Dynatrace Cluster:
-
Stop the ActiveGate and edit the
custom.propertiesfile in the ActiveGate configuration directory. -
To tell the ActiveGate to ignore connectivity information received from the Dynatrace cluster, add or modify the
ignoreClusterRuntimeInfoparameter in the[connectivity]section of thecustom.propertiesfile:[connectivity]ignoreClusterRuntimeInfo = true -
Specify the address of the reverse proxy: Add the
seedServerUrlparameter in the[collector]section of thecustom.propertiesfile in the following format:
seedServerUrl = https://<REVERSE_PROXY>:<REVERSE_PROXY_PORT>/communication
For example:[collector]seedServerUrl = https://my.reverse-proxy.com:443/communicationSpecify multiple addresses:
The parameter can be a single value or it can be a comma-separated list of target addresses to which the ActiveGate connects.
For example:[collector]seedServerUrl = https://my.reverse-proxy-1.com:443/communication,https://my.reverse-proxy-2.com:443/communication -
Save the
custom.propertiesfile and restart the ActiveGate main service.