Red Hat Event-Driven Ansible
- Latest Dynatrace
- How-to guide
- 5-min read
- Preview
Preview
When you integrate your Dynatrace environment with Red Hat Event-Driven Ansible controller using Red Hat Ansible Connector  ,
you can automatically send events to the Event-Driven Ansible Controller by using the dt_webhook event source plugin.
,
you can automatically send events to the Event-Driven Ansible Controller by using the dt_webhook event source plugin.
Configure the integration
To use Red Hat Ansible workflow actions, you first need to install Red Hat Ansible Connector from Dynatrace Hub.
- In Dynatrace Hub
 , select Red Hat Ansible.
 - Select Install and then follow the process below to set up your Event-Driven Ansible environment, grant permissions, and configure the connection.

Set up Event-Driven Ansible controller for integration with Dynatrace

Grant permissions to Workflows

Configure Red Hat Event-Driven Ansible connection
Configuration of Event-Driven Ansible controller
For more information on the Event-Driven Ansible Controller, see Event-Driven Ansible controller user guide.
Project configuration
For more information on how to configure a project, see Event-Driven Ansible controller user guide.
Event-Driven Ansible with simplified event routing (event streams)
Prerequisites
- Red Hat Ansible Automation Platform 2.5+
Setting up a decision environment
When using event streams, you can use the standard decision environment provided by Red Hat, for example, the Ansible-rulebook default-de. You don't need to build a custom decision environment when using event streams.
Credential configuration
Before creating the event stream, you need to set up the credentials for token authentication.
-
In the Ansible Automation Platform Dashboard navigation panel, select Automation Decisions > Infrastructure > Credentials.
-
Select Create credential.
-
Enter the following credential details.
Field Description Name
Enter a name.
Description
Enter a short description.
Organization
From the list, select your organization or
Default.Credential type
From the list, select
Token Event Stream.Token
Enter a token. This token is used later for the connection of the workflow action.
HTTP Header Key
Enter
Authorization.
For more information on how to set up a credential, see Setting up a credential in the Red Hat documentation.
Event stream configuration
After the credential is configured, you can create an event stream.
-
In the Ansible Automation Platform navigation panel, select Automation Decisions > Event streams.
-
Select Create event stream.
-
Enter the following event stream details.
Field Description Name
Enter a name.
Organization
From the list, select your organization or
Default.Event stream type
Select the event stream type
Token Event Stream.Credential
From the list, select the credential you created earlier.
For more information on how to set up an event stream, see Simplified event routing in the Red Hat documentation.
Rulebook activation
The final step is to attach the created event stream to a rulebook activation.
-
From the navigation panel on your Event-Driven Ansible Controller, select Rulebook Activations.
-
Select Create rulebook activation and enter the required fields.
-
Select the event stream:
- Select the gear icon and select
_SOURCE_1from the list. - Select the event stream you created in the step before and save it.
For more information on attaching an event stream to a rulebook activation, see Attaching event streams to activations in the Red Hat documentation.
- Select the gear icon and select
When the rulebook activation is enabled, events can be sent from the workflow action to the Event-Driven Ansible Controller.
For more information on configuring a rulebook activation on the Event-Driven Ansible controller, see Setting up a rulebook activation in the Red Hat documentation.
Event-Driven Ansible without simplified event routing (event streams)
Prerequisites
The collection dynatrace.event_driven_ansible that contains dt_webhook must be installed within a decision environment on the Event-Driven Ansible Controller.
Setting up a decision environment
For more information on how to set up a new decision environment, see Event-Driven Ansible controller user guide.
Event source plugin and rulebook configuration
A rulebook activation is used to enable an event source. Hence, it is necessary to set up a rulebook.
The rulebook should be located in the configured project repository in the directory /rulebooks. For more information, see Event-Driven Ansible rulebook example.
The first part of the rulebook is the configuration of the event source (source plugin). The second part of the rulebook configuration contains the actual rules. A rule includes conditions and actions.
Example rulebook for dt_webhook
To use the dt_webhook plugin, you need to configure it as a source in your rulebook. The following arguments must be set.
-
host- This can be, for example, a localhost or 0.0.0.0.
-
port- Configure the port which will be used from the source plugin to listen for events.
- Hints:
- The API URL in Red Hat Event-Driven Ansible Connection has the same
portas defined here. - Prerequisite for the port configuration.
- The API URL in Red Hat Event-Driven Ansible Connection has the same
-
token- Define a variable name for the token here, for example
dt_webhook_token. - Hints:
- This token variable will be set in the rulebook activation later on the Red Hat Event-Driven Ansible Controller.
dt_webhook_tokenis just an example name for the token variable. It could be also another name but the name must be the same in the rulebook activation and rulebook configuration.
---- name: Listen for events on dt_webhookhosts: allsources:- dynatrace.event_driven_ansible.dt_webhook:host: 0.0.0.0port: 5000token: '{{ dt_webhook_token }}'rules:- name: API Endpoint not availablecondition: event.payload.eventData["event.name"] is match ("Monitoring not available")action:run_job_template:name: "Trigger test playbook"organization: "Default" - Define a variable name for the token here, for example
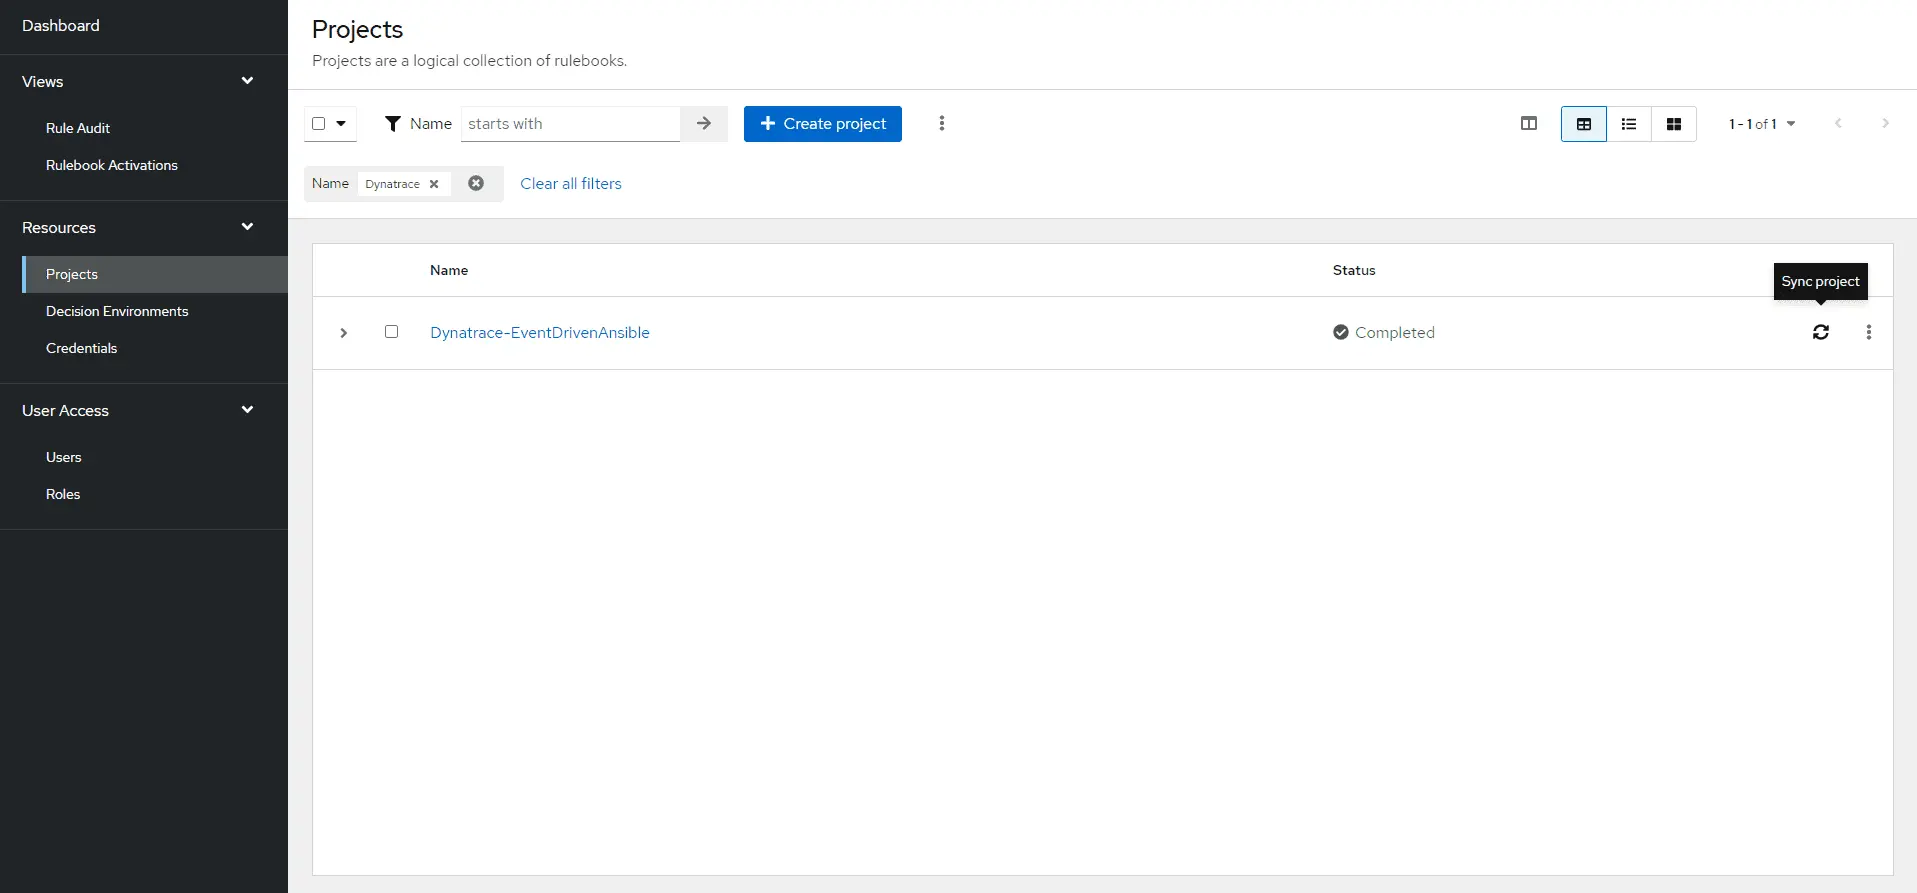
When the rulebook configuration is done, ensure your project repository is synchronized to the Event-Driven Ansible Controller by selecting Sync project in the project list.
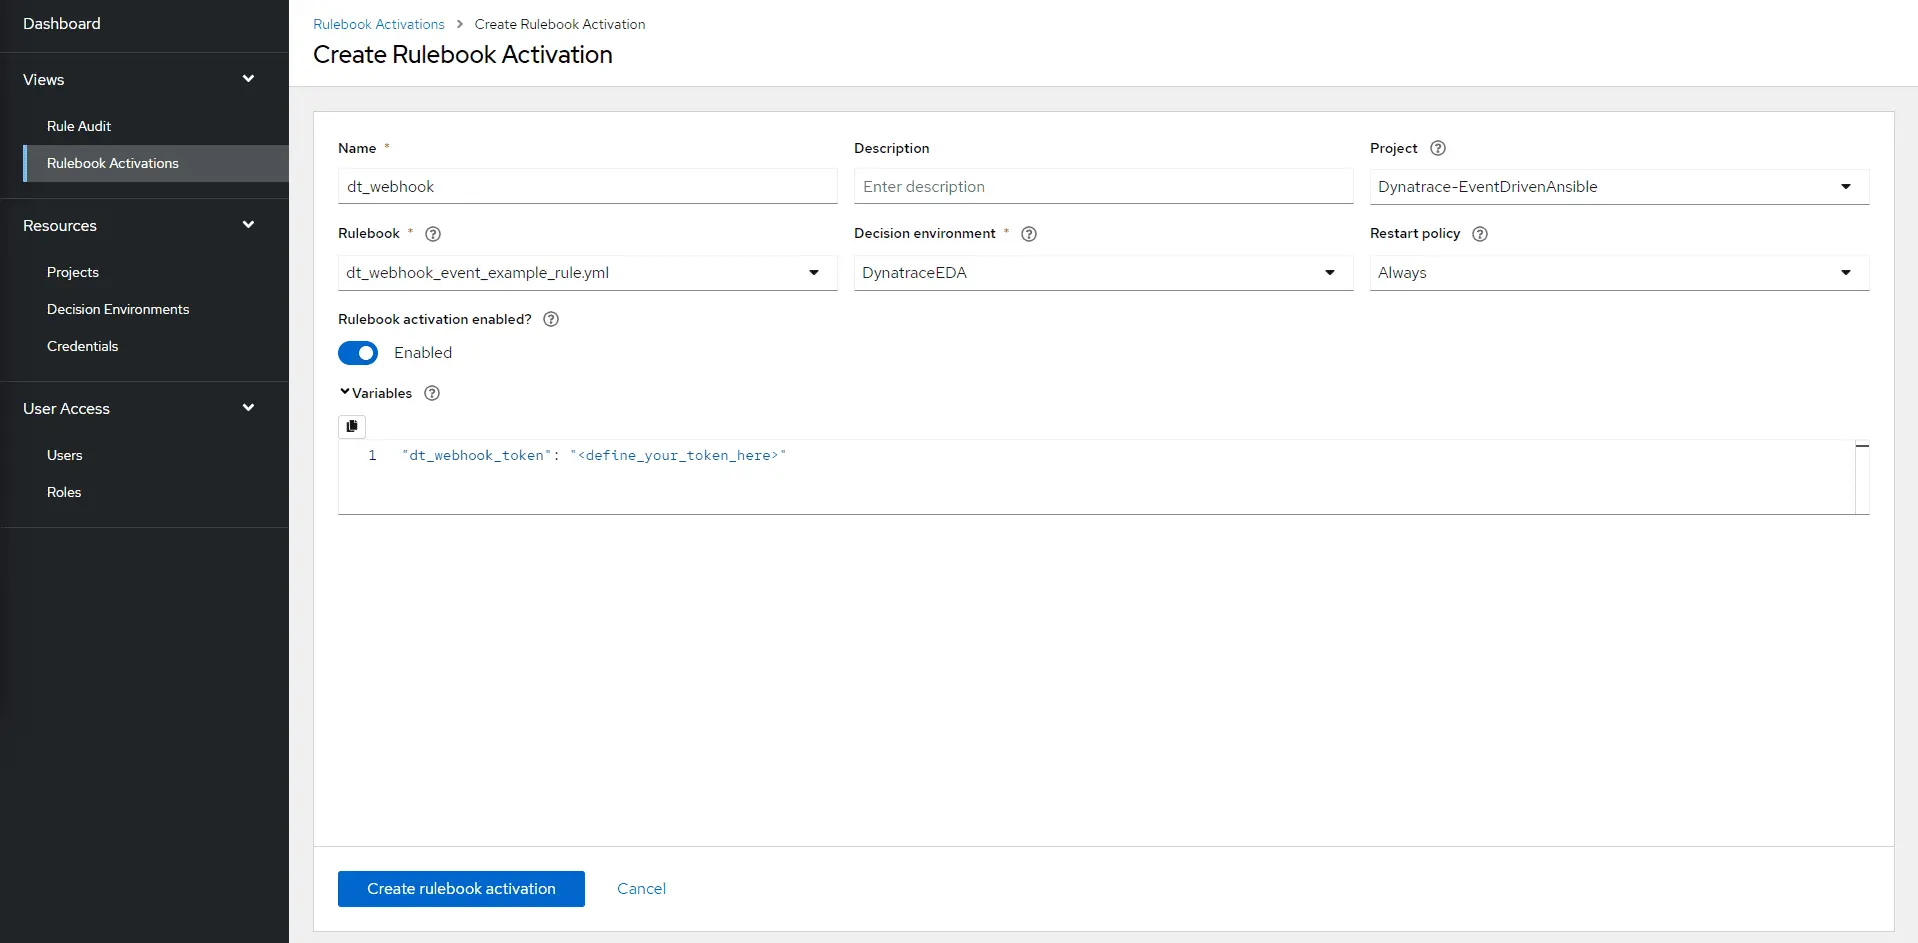
The next step then is to configure the rulebook activation. Select Rulebook Activations from the navigation panel on your Event-Driven Ansible Controller. Select Create rulebook activation and fill in the required fields.
In the field Variables you define the token by setting your token variable from the Rulebook configuration. The rulebook variables are in a JSON/YAML format.
Ensure the variable name is identical in the rulebook activation and rulebook configuration.
For more information on configuring a rulebook activation on the Event-Driven Ansible controller, see Setting up a rulebook activation.
When the rulebook activation is enabled, events can be sent from the workflow action to the Event-Driven Ansible Controller.
Grant permissions to Workflows
Some permissions are required by Workflows to run actions on your behalf.
To fine-tune permissions granted to Workflows
- Go to Workflows and select Settings > Authorization settings.
- Select the following permissions besides the general Workflows permission.
app-settings:objects:readstate:app-states:readstate:app-states:writestate:app-states:delete
For more on general Workflows user permissions, see Manage workflow permissions.
Configure Red Hat Ansible connection
You need a configured connection for your Red Hat Event-Driven Ansible environments.
This connection connects to the dt_webhook plugin within Red Hat Event-Driven Ansible. Open a specific port on your firewall to ensure the plugin is accessible for these connections. If this is impossible, you can use EdgeConnect to tunnel the traffic and make the environment accessible.
To configure a connection for the Red Hat Event-Driven Ansible Controller
- Go to Settings and select Connections > Connectors > Red Hat Ansible.
- Select the tab Event-Driven Ansible.
- Select
 Connection.
 - Provide a meaningful name for your connection.
- Select if you would like to use event stream
- Provide your Red Hat Event-Driven-Ansible Controller URL,
- when not using event stream,
http://your-eda-controller.redhat.com:your-port(must include theport, which is configured in the Ansible Rulebook). - when using event stream,
http://your-aap.redhat.com/eda-event-streams/api/eda/v1/external_event_stream/a-uuid/post.
- when not using event stream,
- Provide your token of the Red Hat Event-Driven Ansible source plugin.
- Select Create.
Available action
The following workflow action is available for the Red Hat Event-Driven Ansible controller.
| Action | Description | Red Hat Ansible API endpoint |
|---|---|---|
Send event to Event-Driven Ansible | Send an event to the Red Hat Event-Driven Ansible Controller via Event Source Plugin |
|
Send event to Event-Driven Ansible
To send an event to Event-Driven Ansible in your workflow, you need to provide the information listed below.
| Field | Description | Required |
|---|---|---|
Event data | The event data to be sent as valid JSON | Optional |
To create a workflow that sends an event to Event-Driven Ansible
-
Go to Workflows
 and select to create a new workflow.
 -
In the Choose trigger panel, select the trigger best suited to your needs.
-
On the trigger node, select
to browse available actions. -
On one of the information-extracting nodes, select
, search for Ansible, and select Send event to Event-Driven Ansible. -
On each of the remaining information-extracting nodes, select
and drag the line to the Send event to Event-Driven Ansible action. -
In the Send event to Event-Driven Ansible action, select the connection to your Red Hat Event-Driven Ansible Controller.
-
Configure the event data field as needed. To learn how to use the output of information-extracting notes, see Jinja expressions for Workflows.
The event data must be valid JSON.
-
To test your workflow, select Run.