Migrate a cluster
Cluster migration options depend on the details of your deployment environment (latency, proximity, and traffic volume), downtime tolerance, and data policies. We recommend that you migrate Dynatrace Managed clusters in the following ways:
Each method has advantages and disadvantages, as described below.
Backup method
This option involves backing up your source cluster, migrating the backup data, and restoring the data to a target cluster.
Before choosing this migration option, consider the following:
Advantages
- Since you're manually migrating the cluster data to the target cluster, the latency within your deployment has no effect on this process. We recommend this type of migration for deployments with high latency.
Disadvantages
- Monitoring will be unavailable from the time you begin the cluster backup until you complete the cluster restore on the target cluster.
- By default, Cassandra is backed up daily, so your cluster restore point will be the most recently performed backup, potentially setting your data back by up to 24 hours. You can schedule your migration close to the backup time to minimize data loss, however, considering the time it takes to manually transfer data and restore the new cluster, there will always be some data loss.
- Since transaction storage (distributed trace data with typical retention of 10 days) isn't included in the backup, transaction storage data is lost with this migration method.
Migrate cluster using backup and restore
To migrate Dynatrace Managed nodes using the backup and restore method:
-
Set up your target nodes and all the necessary networking in your target deployment.
- Make sure the target nodes meet the hardware requirements.
- For a typical scenario, it's assumed that the number of target nodes is equal to or higher than the number of source nodes.
-
Back up your current Dynatrace Managed cluster.
- See Backup a cluster
-
Stop your current Dynatrace Managed cluster. As a root user, log into the Linux machine where the Dynatrace Managed nodes are installed and execute the
dynatrace.shcommand with thestopparameter. By default, the script is located at/opt/dynatrace-managed/launcher.[root@localhost]# dynatrace.sh stop -
Restore from your backup to your target Dynatrace Managed cluster.
Replication method
The replication method guarantees monitoring continuity during the migration. You temporarily expand the cluster by adding new nodes, wait for the data to automatically replicate onto new nodes, and, once the replication is complete, remove the old nodes one at a time.
The replication method of migration is possible even if the target nodes are in a different data center. It can be performed to data centers in close proximity with an RTT time between nodes of no more than 10 ms and sufficient bandwidth between the data centers.
In data center scenarios where no direct link between data centers is available, use a VPN for the link between data centers.
Since the cluster requires constant cross-node connectivity, the network link between the data centers must be stable and secure. Keep in mind that the traffic within the clusters (i.e, between nodes) isn't encrypted. As a result, for cross-data center traffic, an encrypted connection is required, for example, by leveraging VPN.
Advantages
- No downtime and no data loss.
Disadvantages
- The replication method works well only for low-latency or low-traffic deployments.
- Approximate time for replication, including data resharding and waiting for non-replicated transaction storage data to expire, is typically 10 days.
Migrate cluster using replication
To migrate Dynatrace Managed nodes using the replication method:
-
Set up target nodes and all the necessary networking.
For the typical scenario, it's assumed that the number of target nodes is at least as high as the number of source nodes. Make sure the target nodes meet the hardware requirements and that there is unrestricted connectivity between your current nodes and the target nodes. All ports that are open within the current nodes must also be open within newly added target nodes.
-
Add new Dynatrace Managed nodes to the current cluster one at a time.
Make sure that all the existing cluster nodes are healthy and reachable before adding another node. If multiple nodes are being migrated, make sure that the new node is fully started before proceeding to the next one.
-
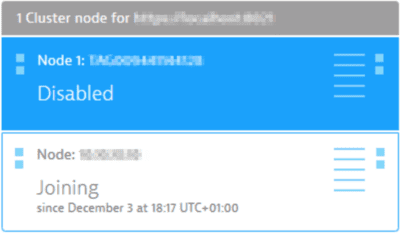
Disable OneAgent traffic on the source nodes but keep them running until data replication is finished and until non-replicated transaction storage data has expired.
To check the progress of data replication, on the new node only, execute
cassandra-nodetool.shwith thestatusparameter:sudo $DT_DIR/utils/cassandra-nodetool.sh statusThe result should look similar to this:
Datacenter: datacenter1===============Status=Up/Down/ State=Normal/Leaving/Joining/Moving– Address Load Tokens Owns (effective) Host ID RackUN 10.176.41.167 18.82 GB 256 100.0% 3af25127-4f99-4f43-afc3-216d7a2c10f8 rack1UN 10.176.41.154 19.44 GB 256 100.0% 5a618559-3a73-42ec-83f0-32d28e08beec rack1The Load value should not differ significantly between the nodes and Status should display
UNon all nodes. Transaction storage
Disabling a node effectively sets the transaction storage to read-only mode, but the node is still able to handle requests.
-
Remove the source nodes one at a time.
It's recommended that you postpone the removal of the source (old) node until the non-replicated transaction storage data has expired. The retention of this data is configurable but typically it is kept for 10 days.
Dynatrace won't allow you to remove multiple nodes simultaneously, so ensure that data is resharded before removing each subsequent node. Data resharding typically takes a couple of hours depending on the data volume and the bandwidth between the nodes. In extreme cases, it can take a couple of days.