Configure OpenTelemetry tracing with Istio
- How-to guide
- 3-min read
- Published May 28, 2024
Istio 1.22+
This integration is based on open source code governed by the respective communities and is not covered under the Dynatrace support policy. While we strive to assist, issues and feature requests should be reported directly to the respective project. Dynatrace cannot ensure fixes/features due to the independent nature of OSS projects.
Always use the most recent release version to ensure you have the latest patches and fixes deployed.
An important part in tracing is to have a stable, single point in your architecture where trace initialization, such as starting new or continuing existing traces using context propagation, is guaranteed. With network requests first arriving at the network edge, this is the ideal place to ensure that.
In a Kubernetes environment, this can be achieved with Istio and the automatic deployment of HTTP proxy services. The following configuration uses the Istio OpenTelemetry extension provider to automatically deploy and configure HTTP proxies to export OpenTelemetry traces to Dynatrace.
Why migrate?
Envoy deprecated and removed OpenTracing with Envoy 1.30 (Istio 1.22). As the Dynatrace Envoy code-module is based on OpenTracing, it is only available until Envoy 1.29 (Istio 1.21). Starting with Envoy 1.30 / Istio 1.22, we recommend to follow this configuration guide and use the Istio OpenTelemetry trace configuration including Dynatrace resource detection and sampling.
Licensing impact
The migration from an Dynatrace Envoy code-module to the new OpenTelemetry based approach might have an impact on your license consumption, depending on the sampling configuration and the Kubernetes deployment approach you use:
- Istio OTEL tracing including Dynatrace resource detector & sampler: When you follow the instructions on this page and configure Istio including the Dynatrace sampler while having classic full stack or cloud native full stack deployments, then there is no change in license consumption as this is covered by your Host Units (Dynatrace Classic License) or Host memory-gibibyte-hours (DPS). For application Observability only deployments, the new Istio tracing approach is subject to DDU for custom traces (Dynatrace Classic License) or Custom Traces Classic (DPS) consumption instead of the host unit hours originating from the Envoy code-module.
- Istio OTEL tracing without Dynatrace resource detector/sampler: This configuration always results in DDU for custom traces (Dynatrace Classic License) or Custom Traces Classic (DPS) consumption.
 Get configuration entries
- In Dynatrace Hub, search for
Istio. - Filter by the category Technology.
- Select the Hub entry Istio Service Mesh.
- Select Set up.
- Configure the API token.
- Use the provided and pre-configured snippets to deploy the following items in the next steps:
- the Mesh configuration
- the service entry
- the telemetry API
 Apply the Mesh configuration to your Istio installation
Save the Mesh configuration snippet you obtained in step 1 under meshconfig.yaml and configure Istio with the following command:
istioctl install -f meshconfig.yaml
If you already use your own, custom Mesh configuration, you need to merge its content with the provided snippet. Otherwise, you can use the snippet as-is.
 Deploy the service entry
Next, you need to deploy the Istio service entry manifest you obtained in step 1 using kubectl. Save it to service_entry.yaml and run the following command:
kubectl apply -n istio-system -f service_entry.yaml
 Enable tracing provider
As last configuration step, use the Istio telemetry API to enable the tracing provider.
Save the telemetry API manifest you obtained in step 1 to tracing.yaml and use kubectl to apply the configuration to the desired namespace.
kubectl apply -n istio-system -f tracing.yaml
Do not deploy more than one telemetry resource within a given namespace, as doing so may lead to configuration conflicts and incomplete tracing information.
If you require different telemetry resources, deploy them to different namespaces or using different selectors.
Make sure to restart all applicable Kubernetes pods, to let the changes to the mesh configuration take effect.
 Verify the setup
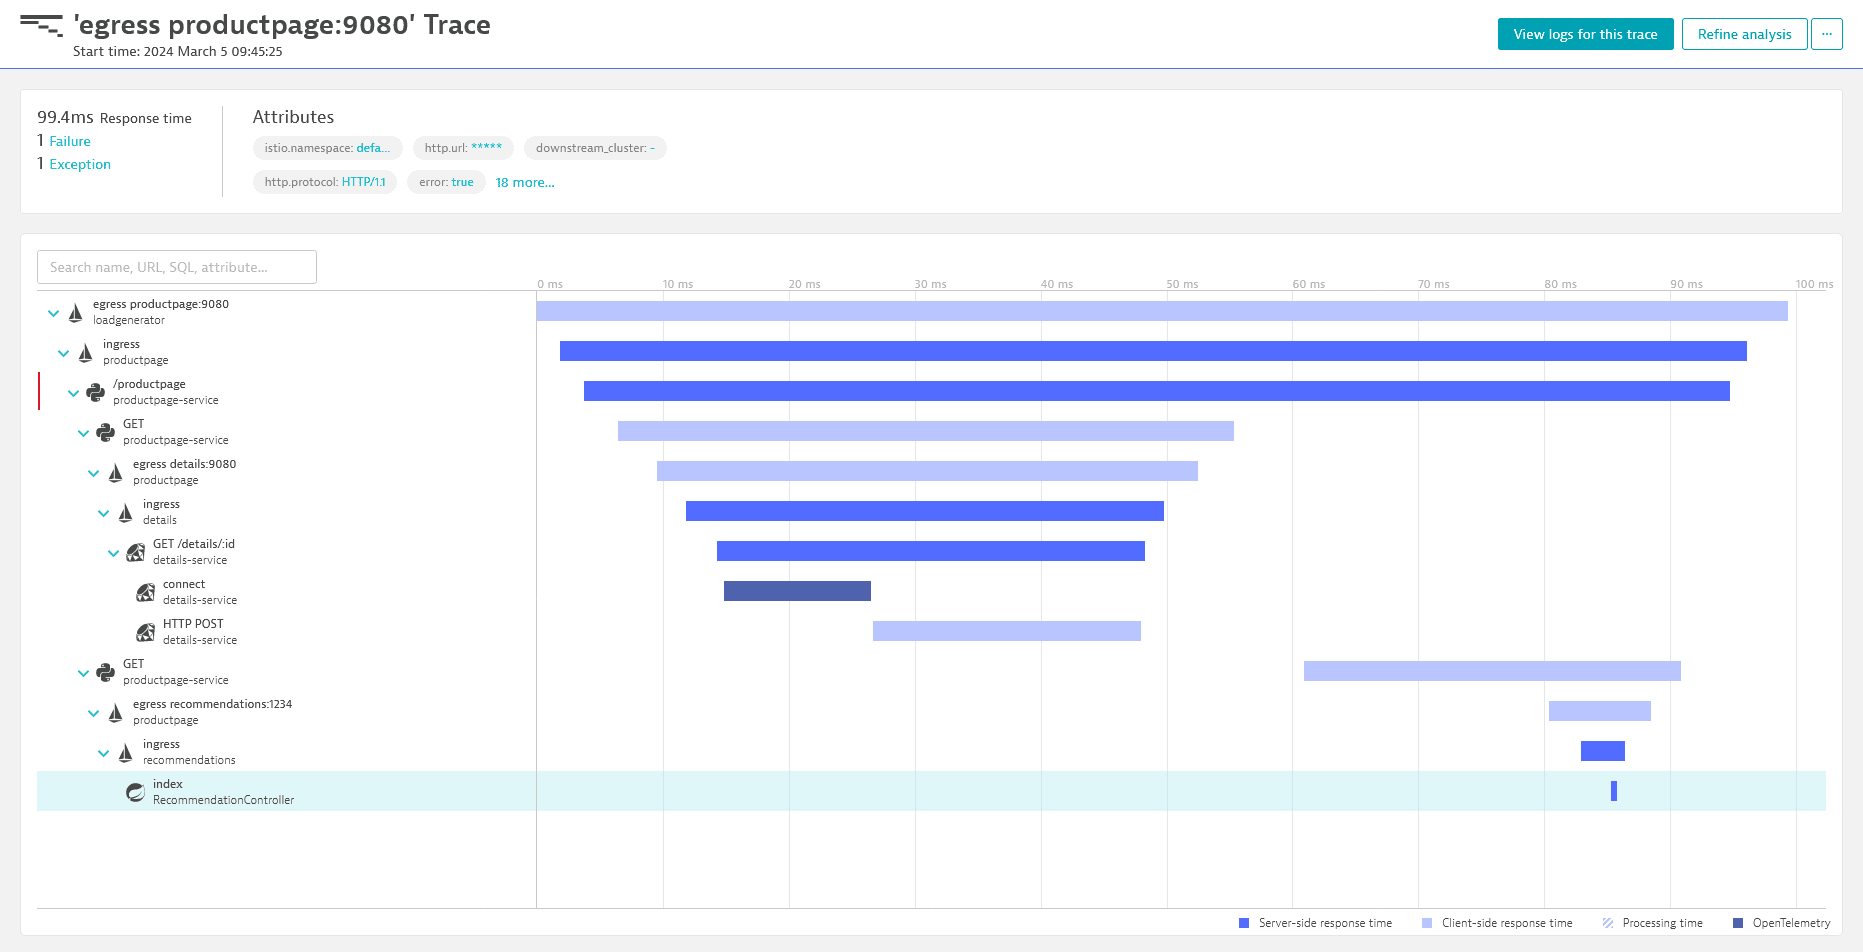
Once the setup is complete and you have ingested your first data, you can verify if the traces show up in Dynatrace.