Log onboarding flow in Dynatrace Platform
- Latest Dynatrace
- How-to guide
- 3-min read
- Published Mar 05, 2025
The Dynatrace log onboarding wizard simplifies the process of setting up log ingestion for various environments, including OneAgent, Kubernetes, and cloud-based log sources or forwarders. The wizard adapts to your specific setup, providing a clear and efficient path to log analytics and observability.
For deployments using OneAgent or instrumenting Kubernetes, logs are automatically detected. Built-in ingestion rules and sensitive data masking applied out of the box require no manual configuration. The configuration capabilities are offered centrally within the Dynatrace platform.
For Cloud log ingestion scenarios, Syslog, log shipper-based setups, or platform integrations, the wizard provides step-by-step guidance, including API key creation. It also offers contextual recommendations, detailed configuration instructions, and links to relevant documentation, all within a unified interface.
The onboarding process concludes with a verification step to ensure that log ingestion is fully operational and correctly configured.
Permissions
The following permissions are needed to access the Log onboarding component:
storage:logs:readhub:catalog:readenvironment-api:api-tokens:write
Access points to start the log onboarding process
There are several paths you can choose to start your log onboarding flow:
From the Logs App
The Logs app is the easiest way to start the log onboarding process, as it does not require finding a resource with no logs. If you are already ingesting logs and want to add additional sources, such as Syslog or platform logs, the Logs app provides an easy approach, without the need to search for specific resources.
- Go to the Logs app, and select Add logs in the top right corner.
From  Clouds
- Go to Clouds > All services.
- Select a service record to view the details, and select Logs. This section must have no log records.
- Select Add logs in the empty section.
From Settings
- Go to Settings > Log Monitoring > Set up log ingest.
From the Hub
- Go to Hub and search for any technology that you want to use to ingest your logs, such as Clouds, Amazon S3 log forwarder, Kubernetes, etc.
- Select the technology result, and select Set up to configure log ingestion for this technology.
From Discovery & Coverage
- Go to Discovery & Coverage > Discovery findings.
- View the status list, and select the Set up log ingestion action in a record.
The Set up log ingestion button is displayed when there are no logs for a given Account ID (AWS), an Azure Subscription ID (Azure), or a Google Cloud Project (GCP).
Use case - Set up a custom log ingest from Azure
-
Go to
Clouds > All services. -
Select Azure in the Cloud section in search field
-
Select a service record to view the details, and select Logs. This section must have no log records.
-
Select Add logs in the empty section to open the Set up log ingest modal.
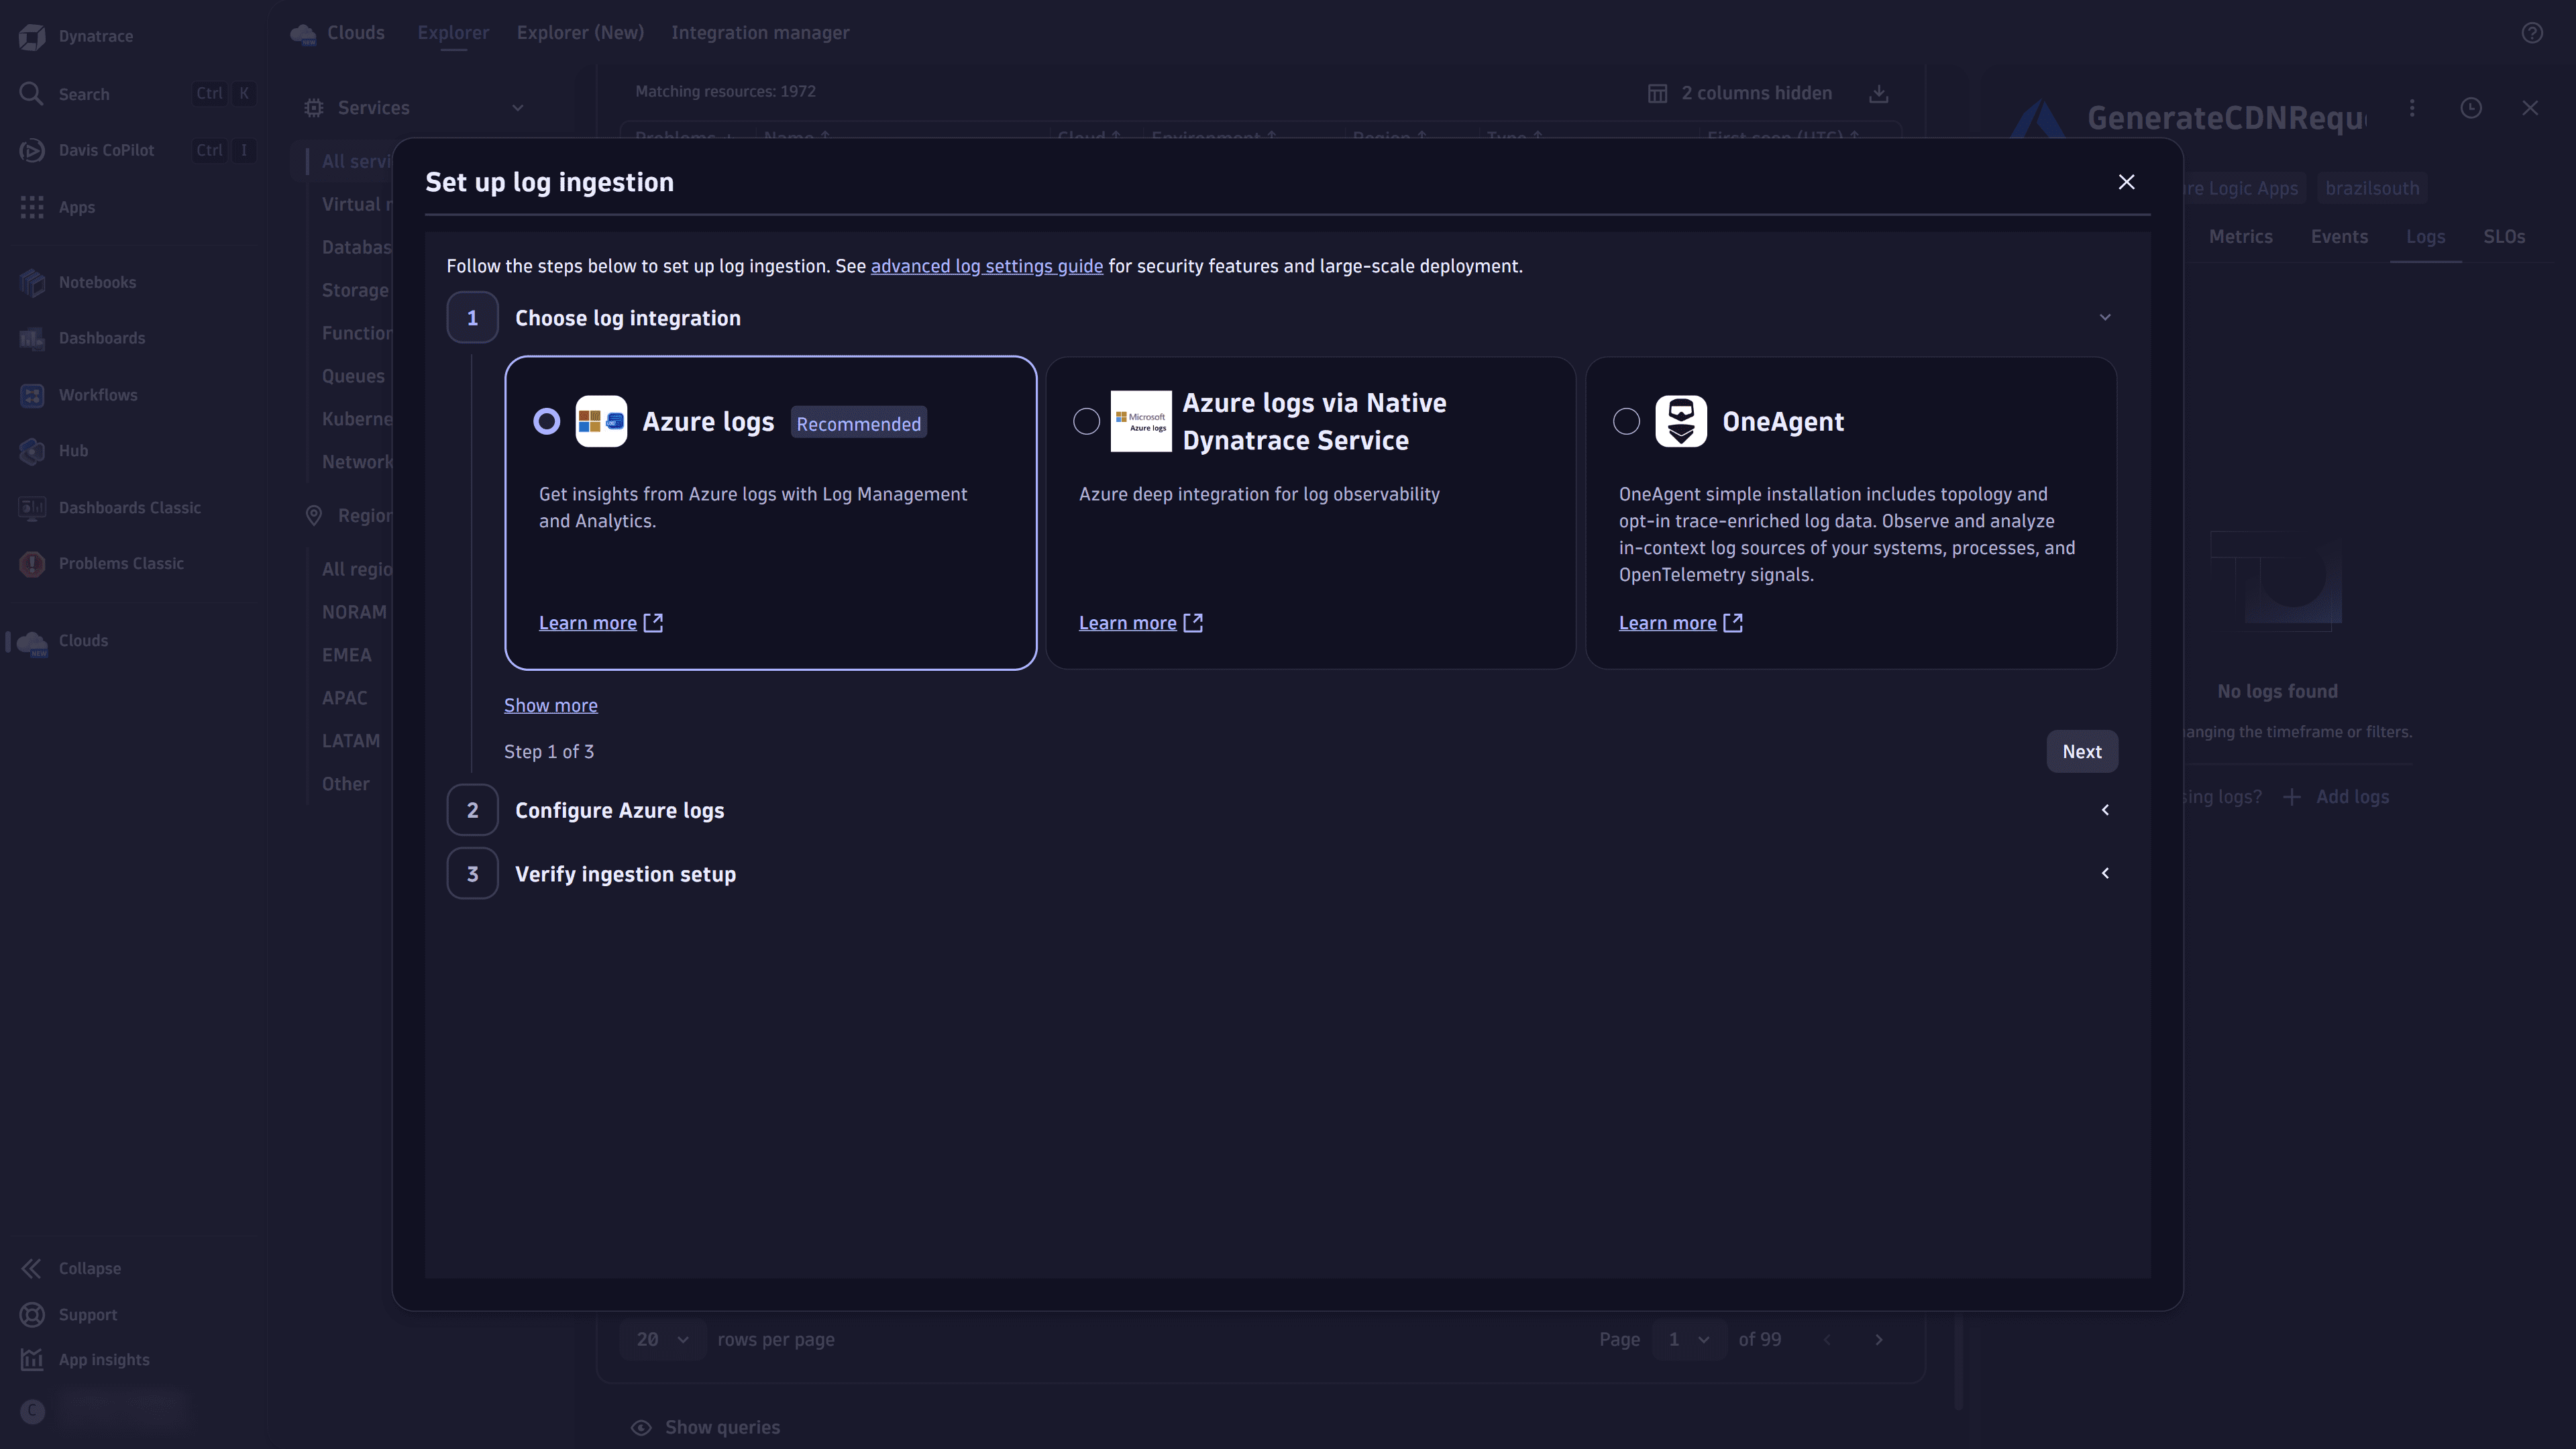 setup-log-ingestion
 -
Choose the Azure logs option in the Choose log integration section, and select Next.
-
In the Create token section, you have two options:
-
Generate a new token: Select Generate, copy the token key, and follow the steps in section B Add token to Logs via Azure.
 setup-log-ingestion-token
 -
Use an existing token: Select Use existing token, and follow the steps in section B Add token to Logs via Azure.
-
-
Select Next, and verify the correct ingestion of your logs, as per your configuration.
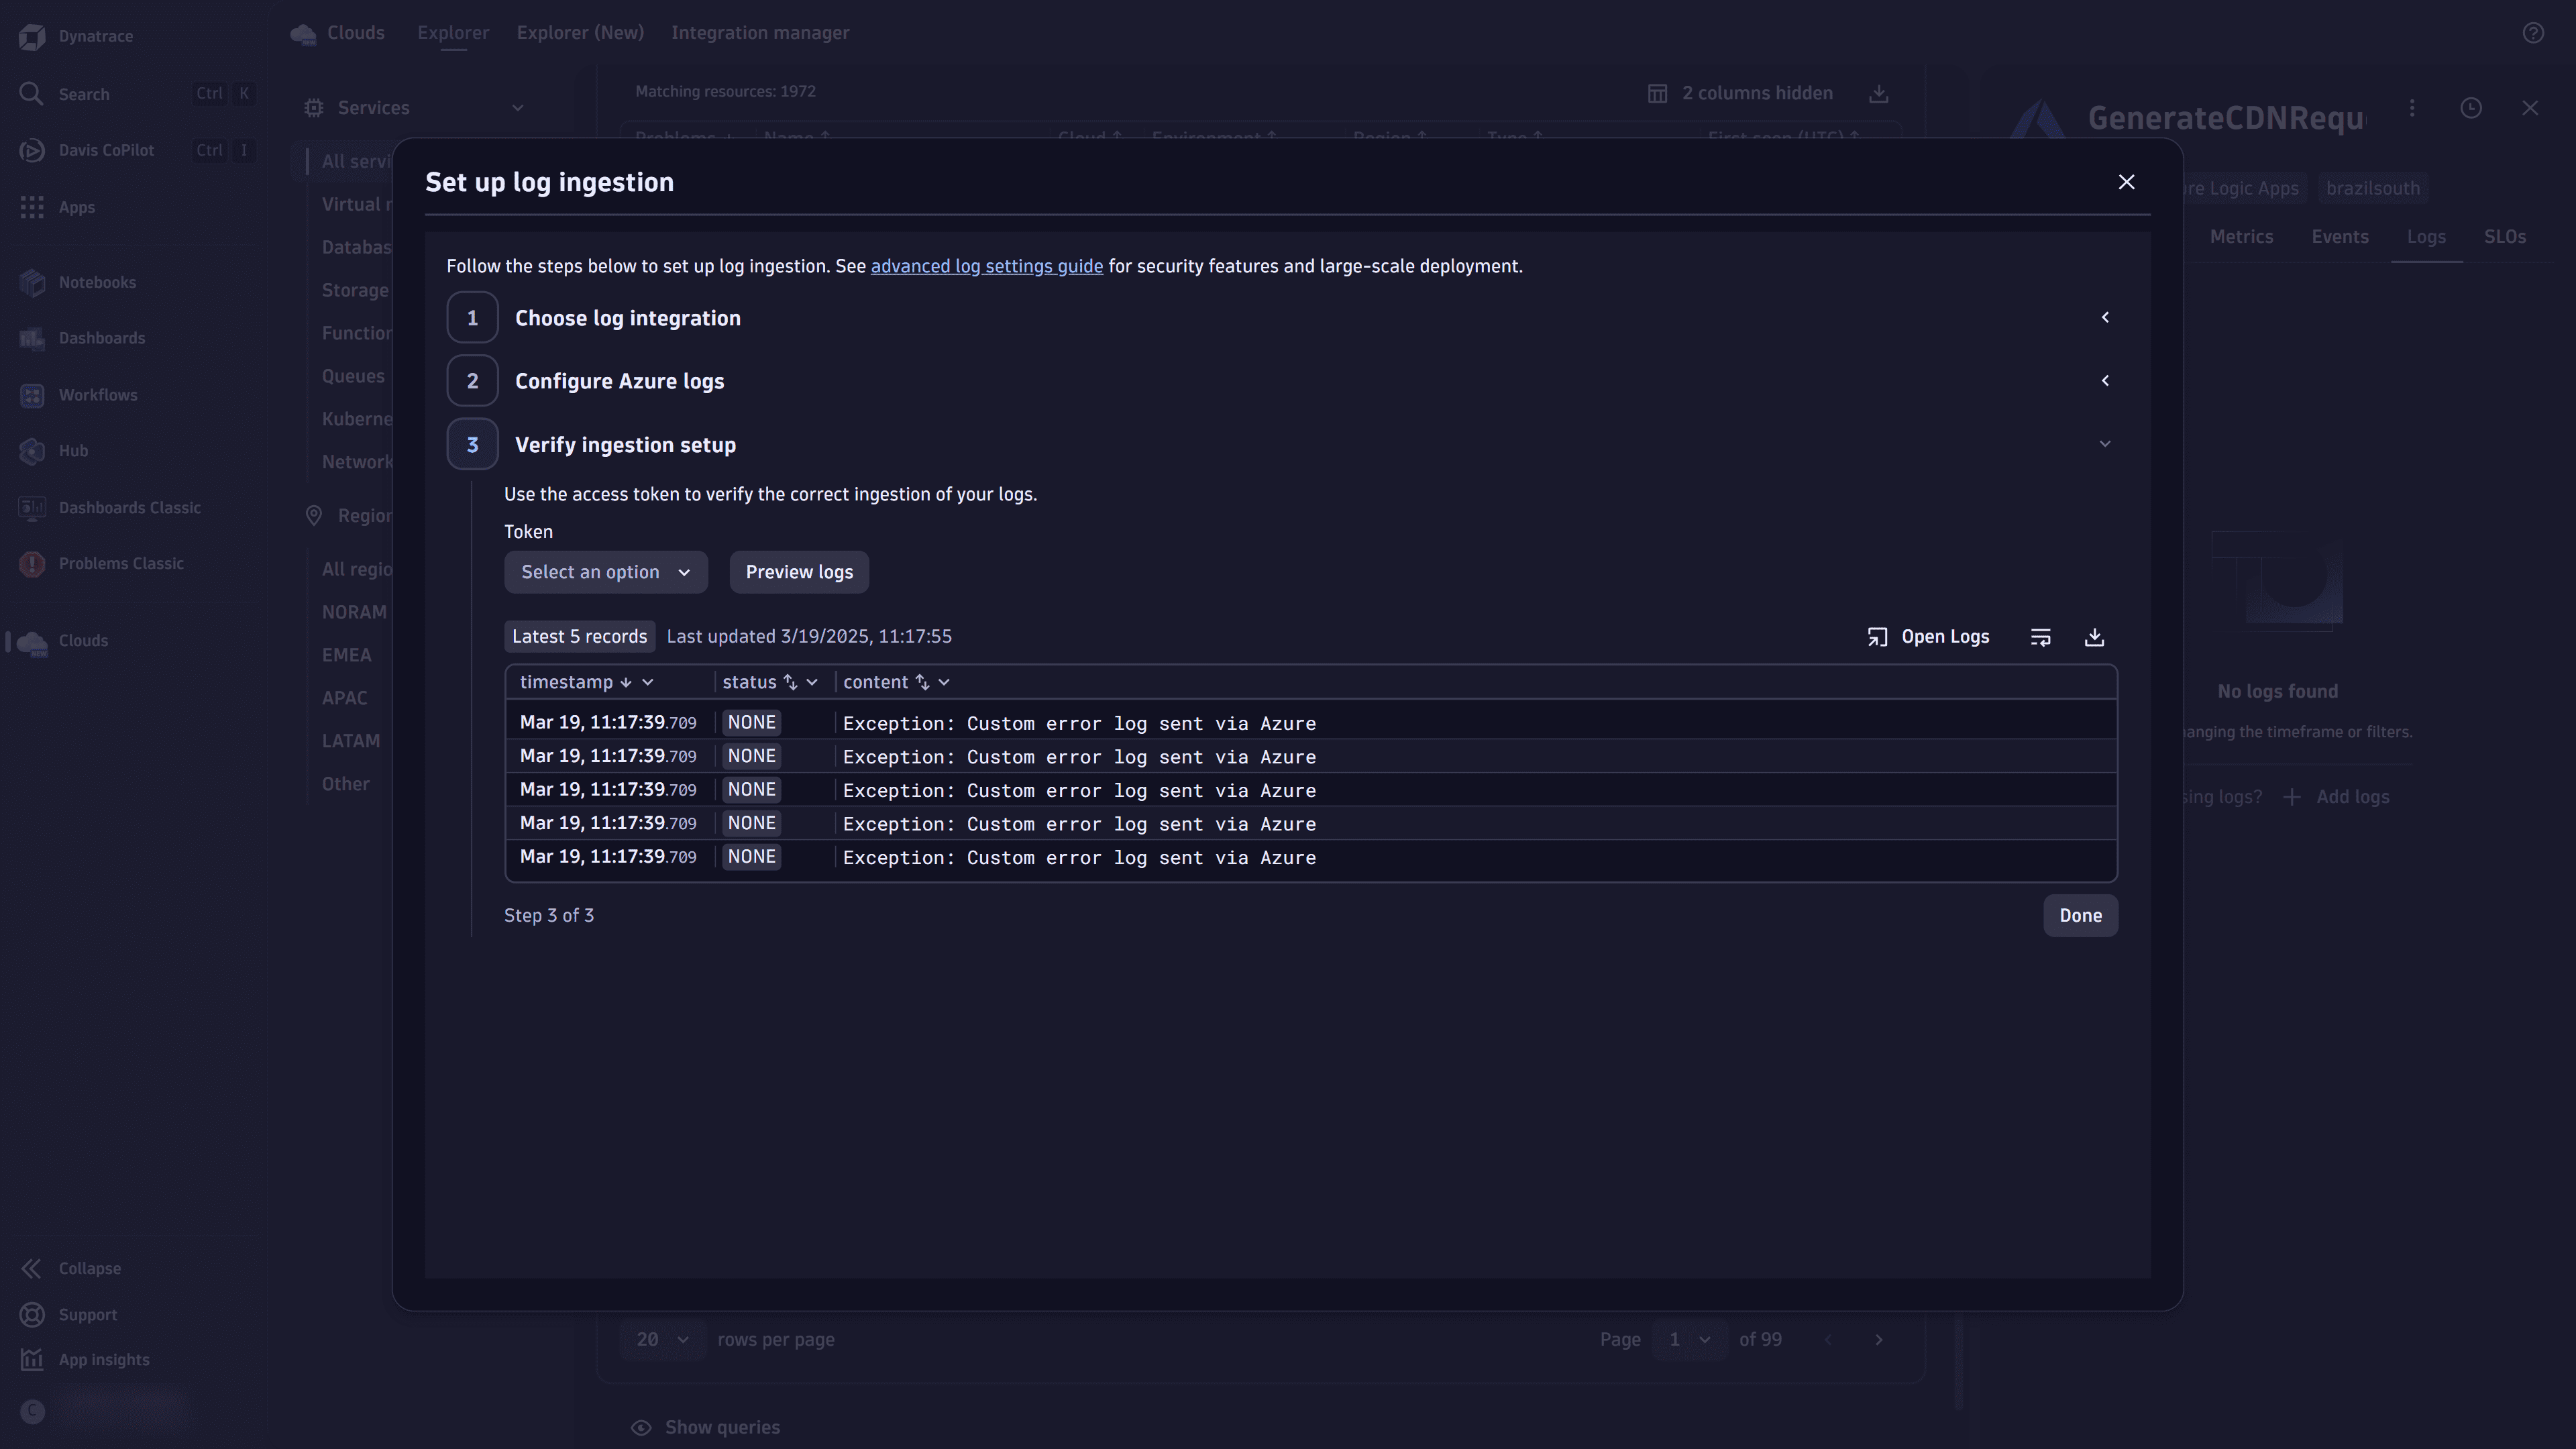 setup-log-ingestion-verify
 -
Close the modal, and check the Logs sections in the service record to view your logs.